¶ Purpose
This integration synchronizes Microsoft Teams' presence status with the Bicom client application (gloCOM Desktop, gloCOM Web, and gloCOM GO) extension’s presence status. For example, if users change their presence status to "Do Not Disturb" in Microsoft Teams, their presence status in gloCOM will automatically change to "Do Not Disturb" as well.
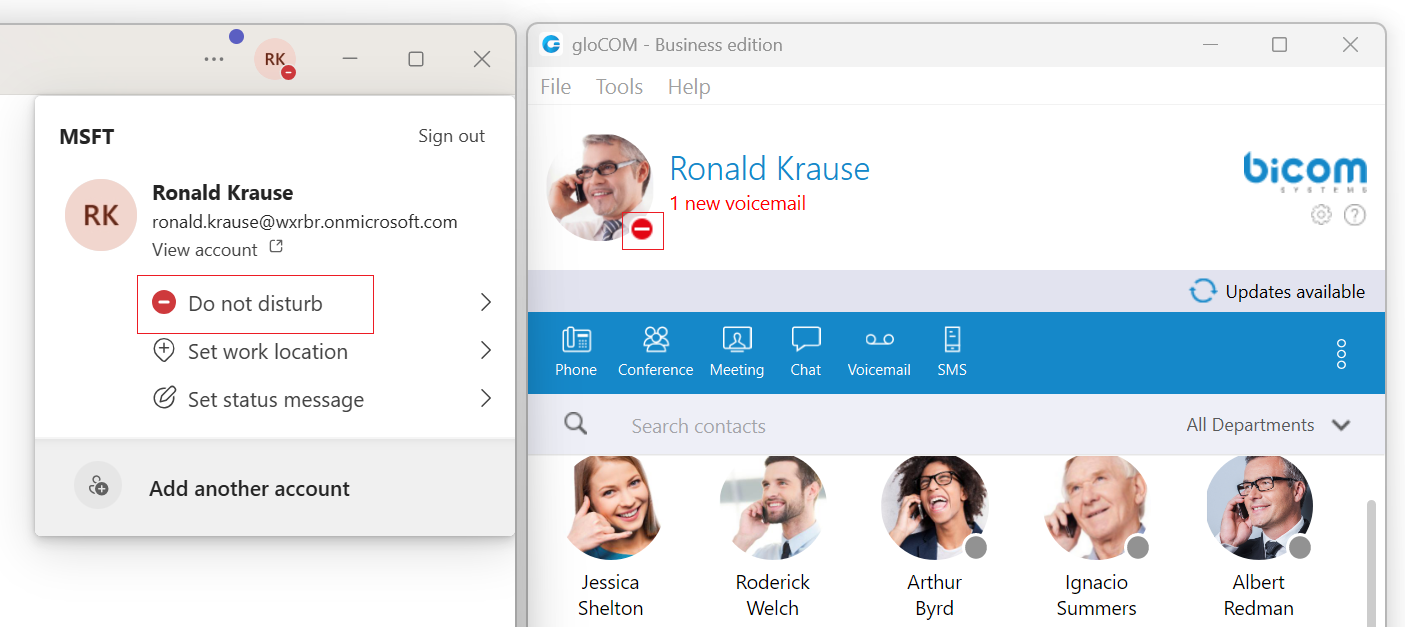
This synchronization only works from Microsoft Teams to gloCOM. It is not bidirectional. Changes made to gloCOM's presence status, such as setting it to "Busy", will not impact the presence status in Teams. However, there is an exception that applies only when the gloCOM Extension is on a call while Teams' presence status is set to "Available" or "Busy".
Consider the following two scenarios:
- Teams’ presence is not user-configured (it is set as “Available” or “Away” due to inactivity). A user makes a call via gloCOM. Their gloCOM status icon changes to "On Call". This will also reflect in the Teams app status and show the status as “Busy/In A Call”.
- Teams' presence is user-configured (e.g., a user explicitly puts their status as “Be right back”). A user makes a call via gloCOM. Their gloCOM status icon changes to "On Call". This doesn't reflect in the Teams app status since the user has manually configured their presence.
Microsoft's Active Directory includes both a "User Principal Name" (UPN) and an email address. By default, these two values are the same, but they can be configured differently. For this integration, the UPN matches the PBXware extension’s email.
If two users on PBXware share the same email address, only one of them will be able to sync their presence with the Teams user who has the matching UPN.
Additionally, presence syncing is limited to a maximum of 650 users. If more than 650 Teams users correspond to PBXware extensions, it will not be clear which user's presence will not be synced.
¶ Configure Overview
To enable this integration, you need access to an admin account in the "Microsoft Azure Portal" and admin access to PBXware.
¶ Configure the Azure App
- Log in to the Azure Portal. After logging in, navigate to “Microsoft Entra ID”:

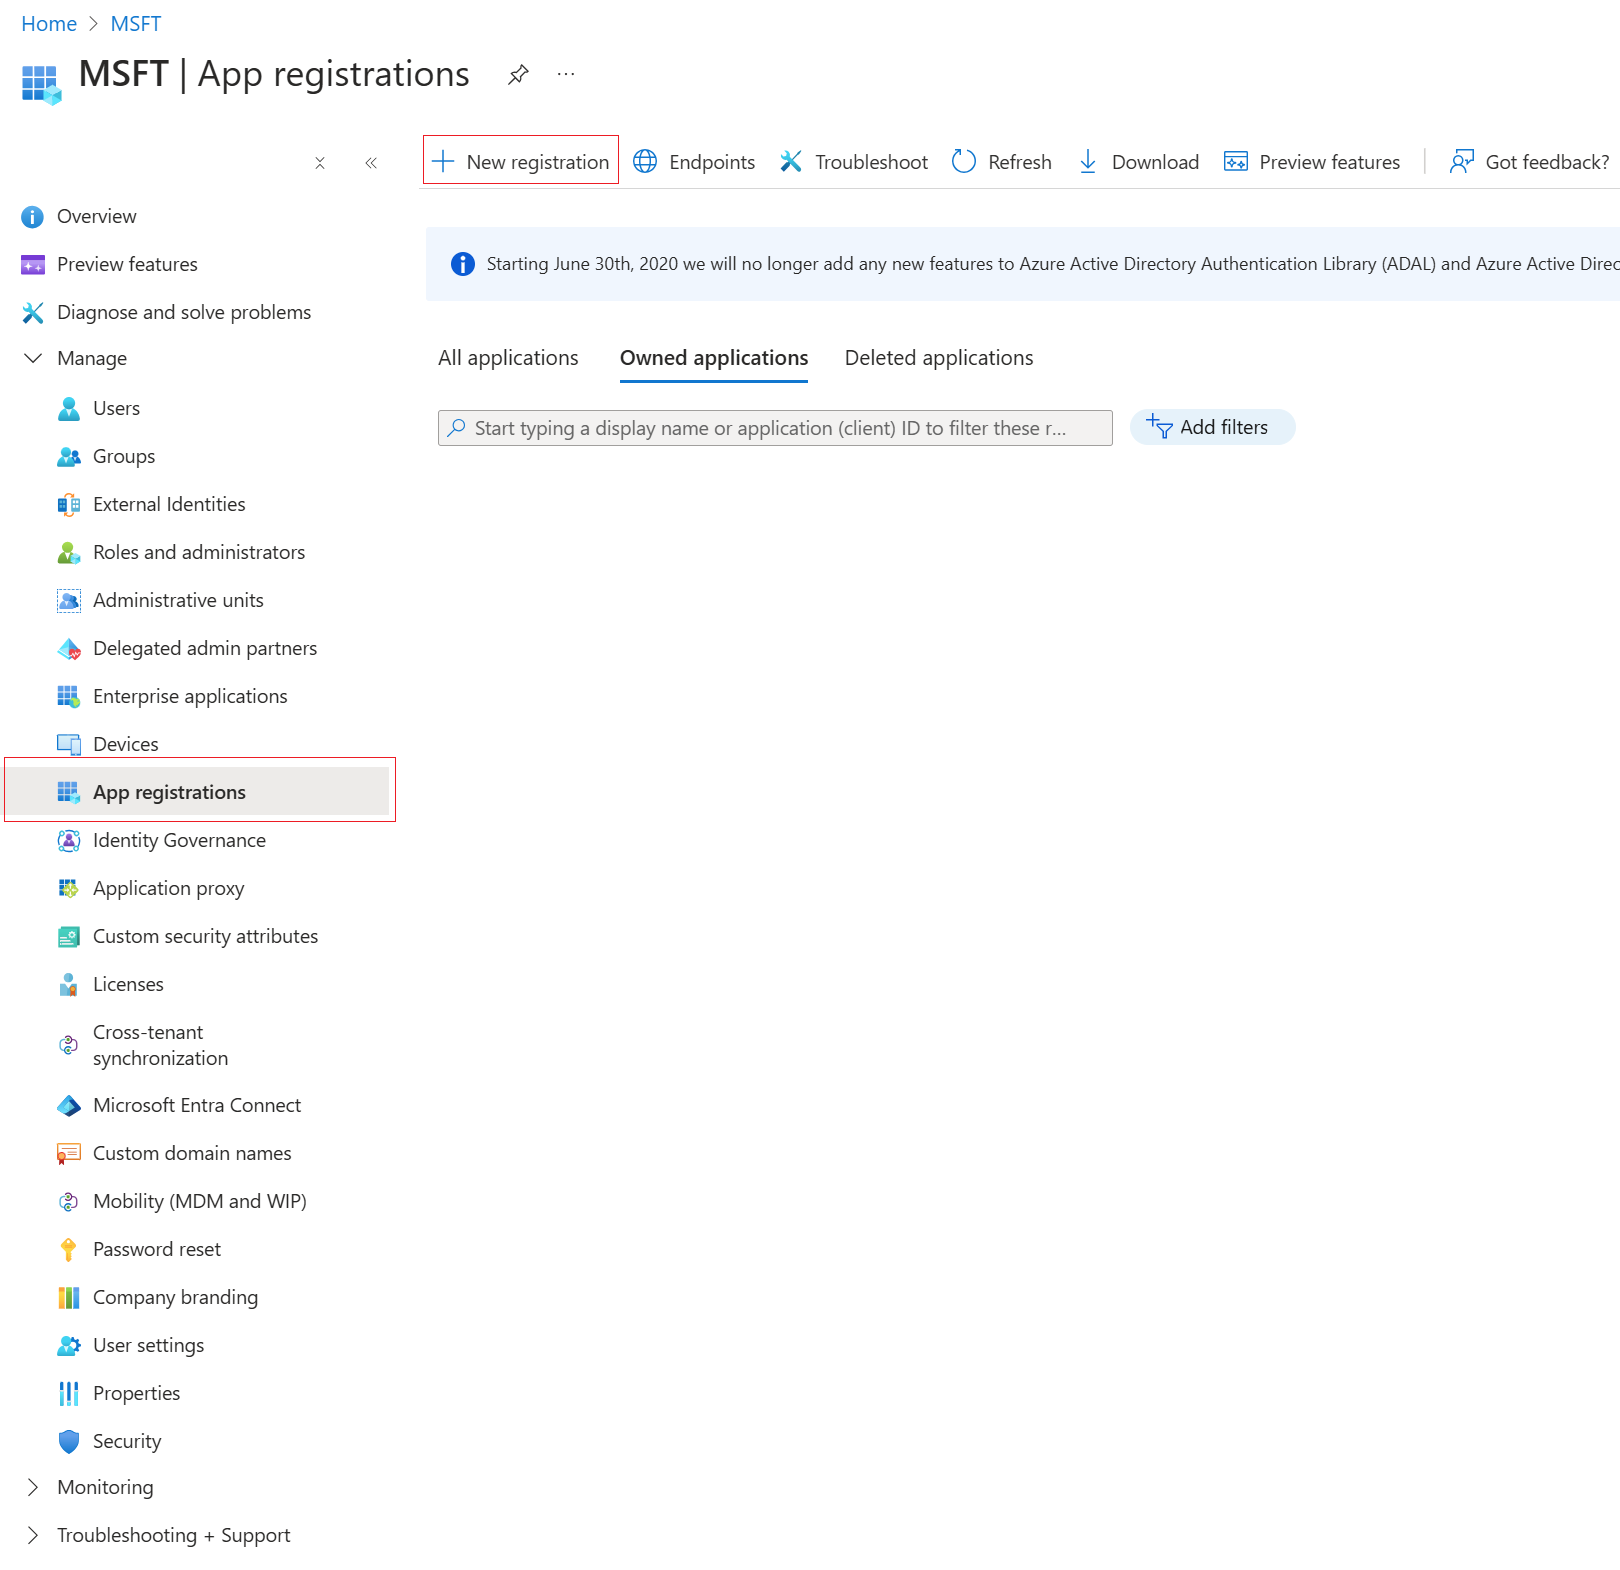
- Then switch to "App Registrations", and click on "New Registration":
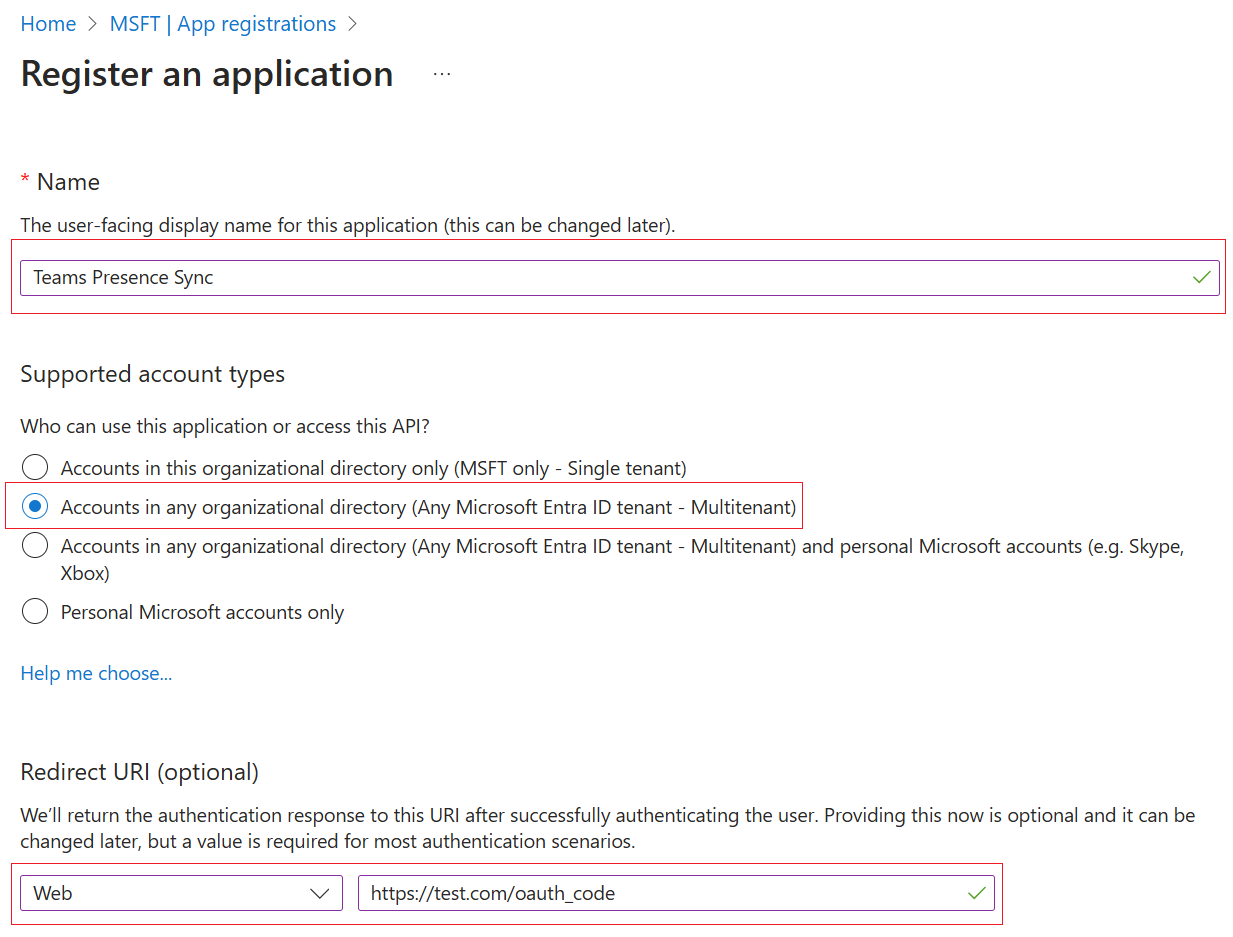
- Fill in the necessary data:
- Name: Provide some user-friendly name.
- Supported account types: Change to “Accounts in any organizational directory (Any Microsoft Entra ID tenant - Multitenant)”.
- Redirect URL: Change the type to web and put the address of your PBXware, adding the "/oauth_code" endpoint at the end: https://<PBXWARE_DOMAIN>/oauth_code.
- When ready, click the Register button at the bottom.
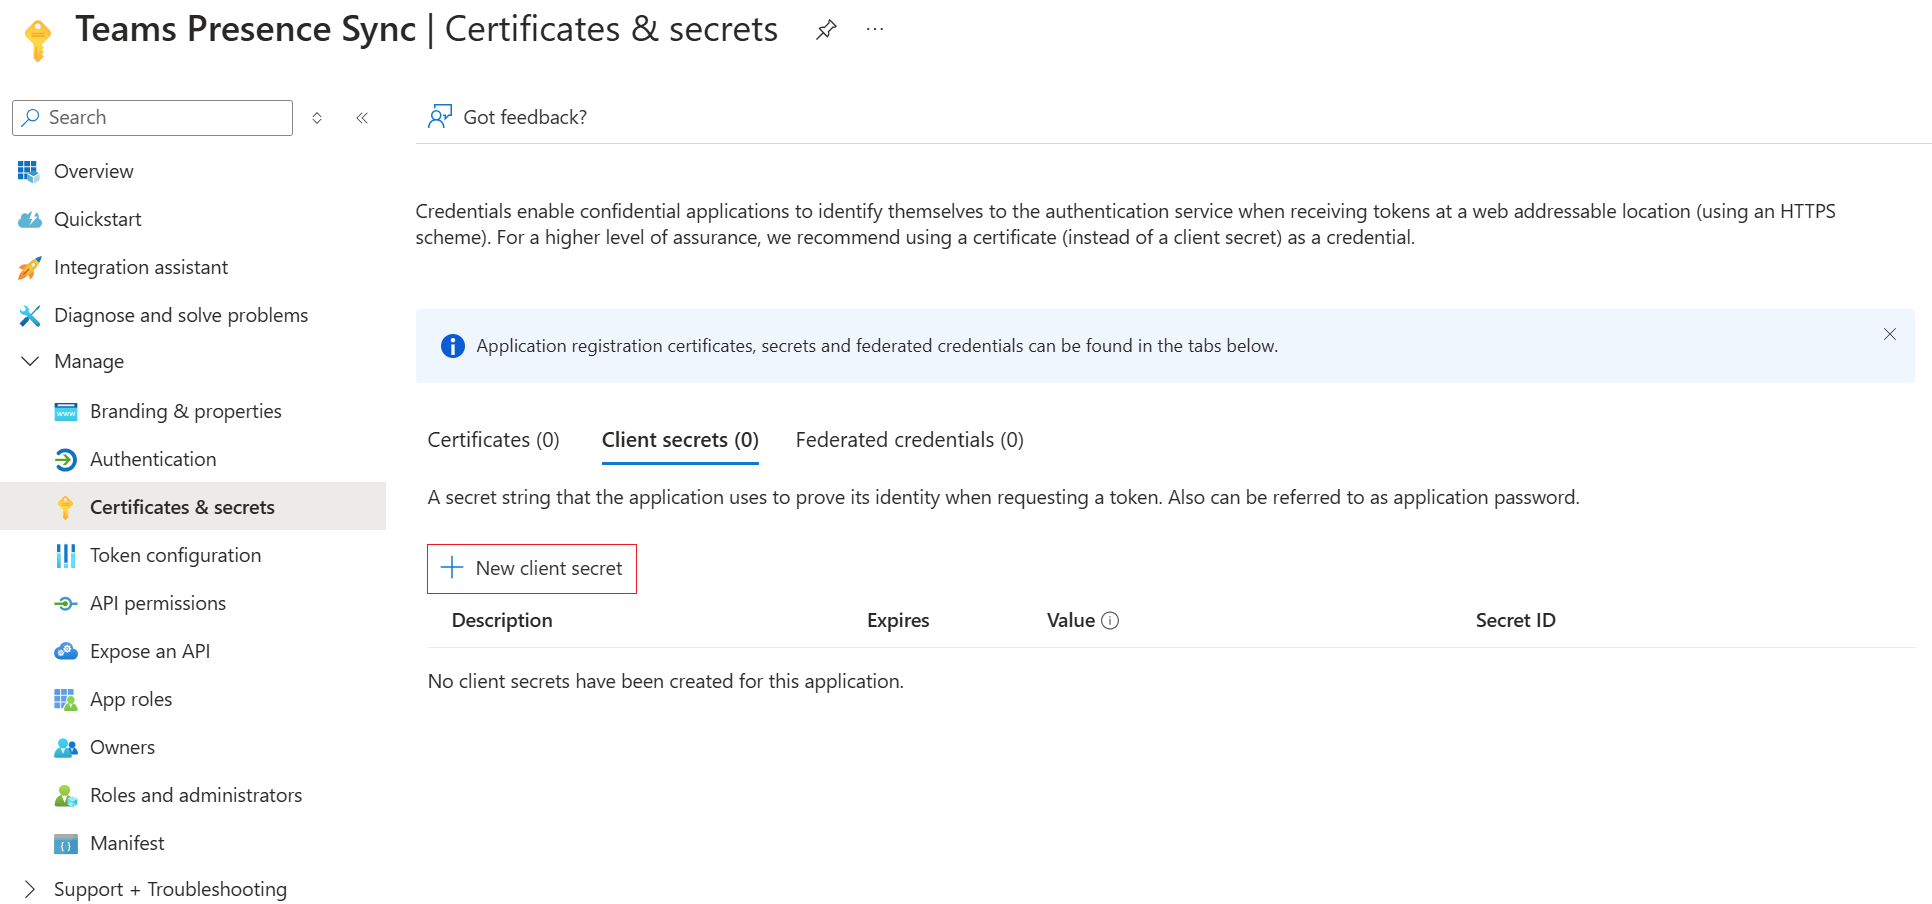
- The overview page should be displayed in your new app. Now, generate a client secret by clicking the "Add a certificate or secret":

- On the next screen, click on “New client secret”:
- Set the secret "Description", and feel free to leave the "Expires value" as default:
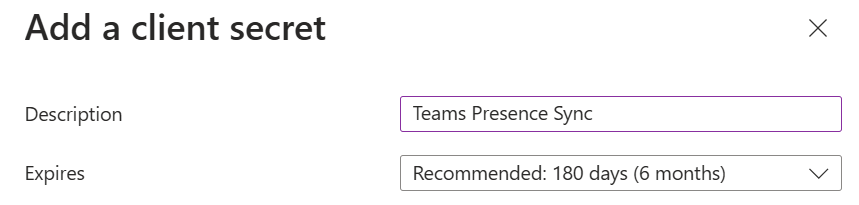
Once the secret expires, a new one must be generated and configured on PBXware.
-
After filling in the fields, click the Add button at the bottom.
-
Copy the newly created secret value right away and save it in a secure location:

It is essential to do this immediately, as the secret's value cannot be viewed or copied afterward. A copied secret value will be needed later when configuring Teams Presence on PBXware.
- Now, set up "API permissions" by clicking on the “API permissions” on the left and then on “Add a permission”:
- On the right side, select "Microsoft Graph":
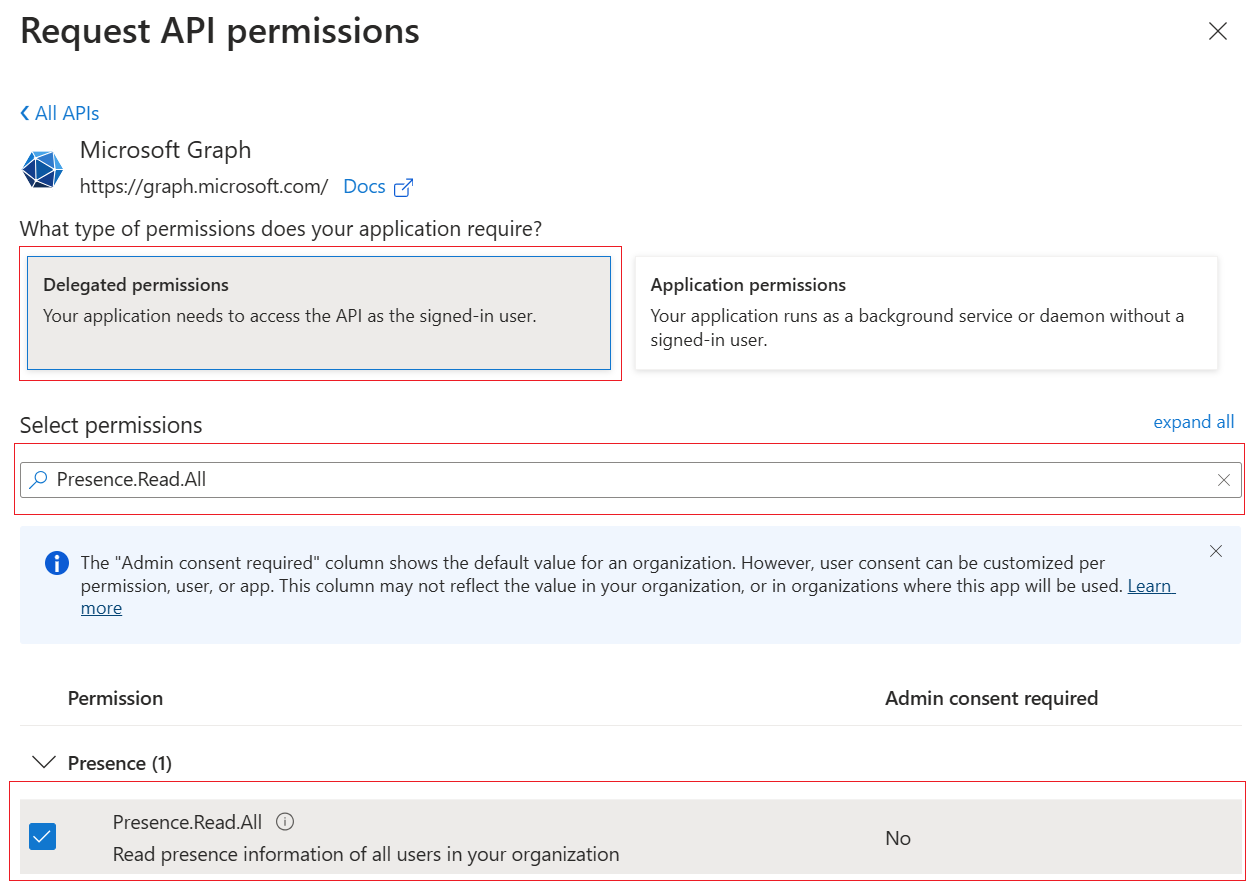
- Then, select “Delegated permissions”:
- Type in “Presence.Read.All” and expand the Presence section below.
- Check the checkbox for the "Presence.Read.All" permission.
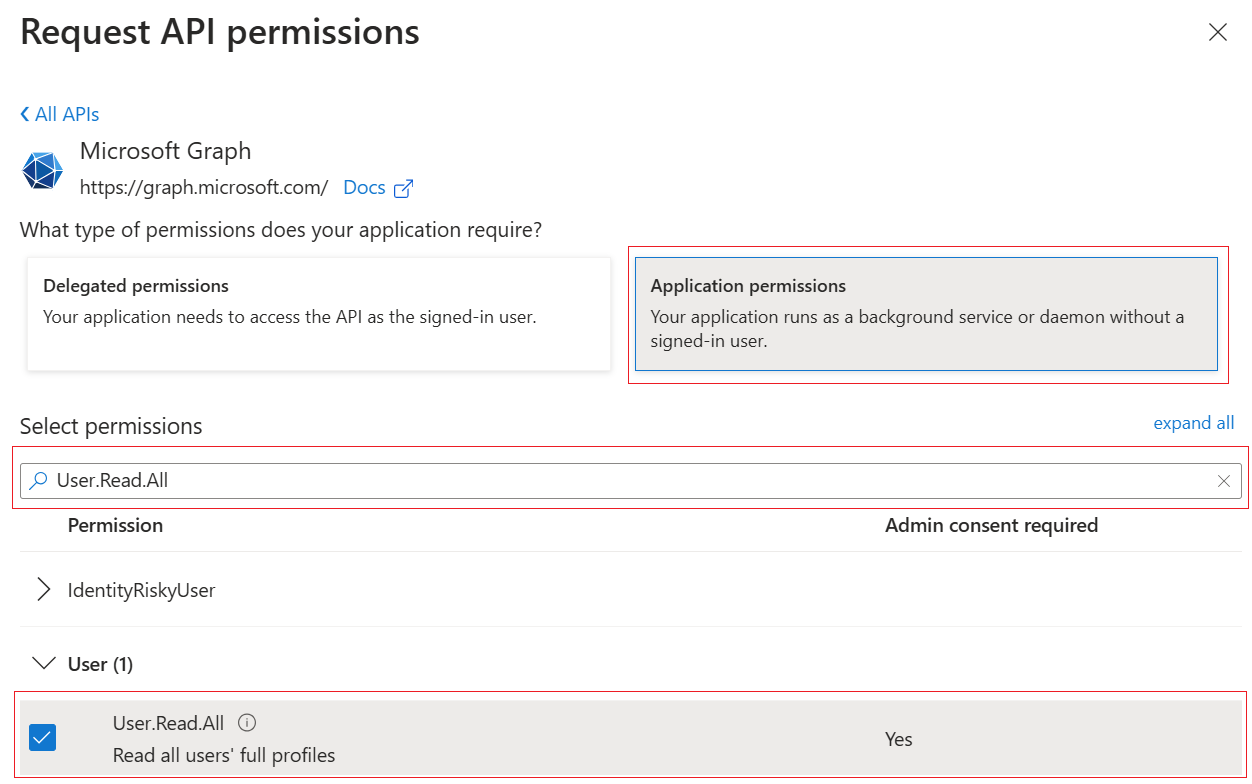
- Now, select “Application permissions”:
- Type in “User.Read.All”, expand the User section below.
- Check the checkbox for the "User.Read.All" permission.
- Clear the search field.
- Type in "Presence.ReadWrite.All" and expand the presence section.
- Check the checkbox for the "Presence.ReadWrite.All" permission.
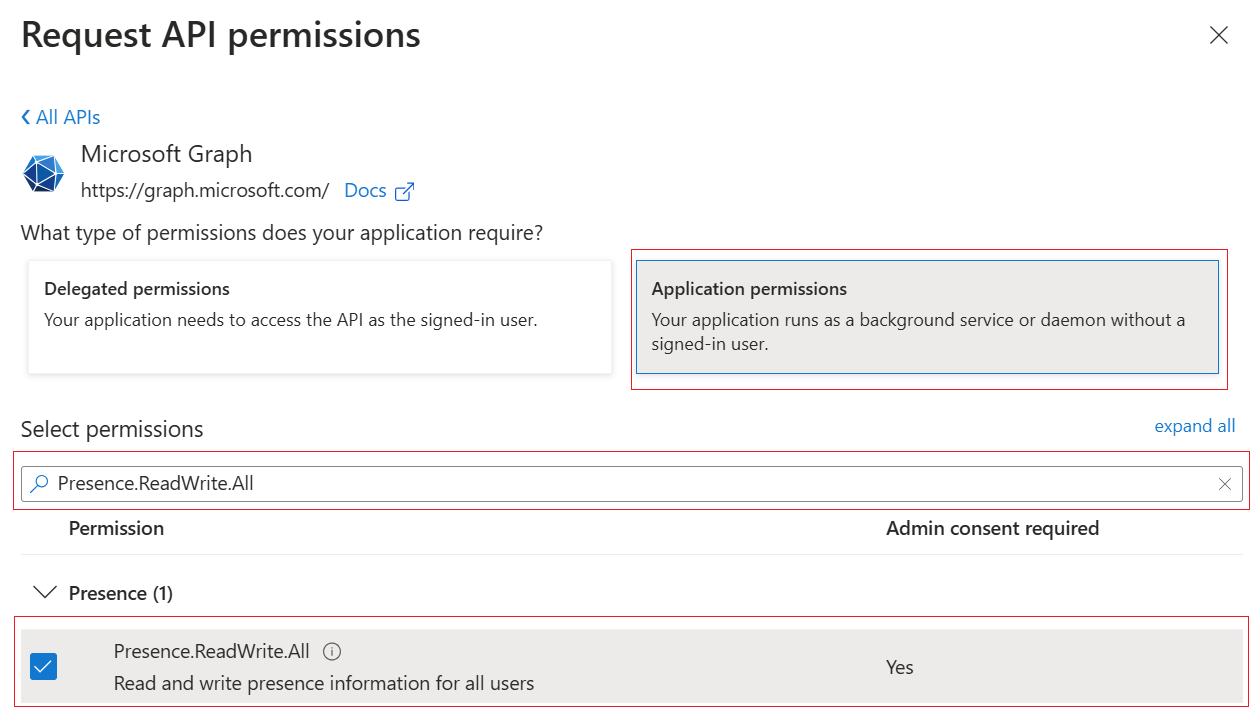
- Finally, click the Add permissions button at the bottom of the screen.
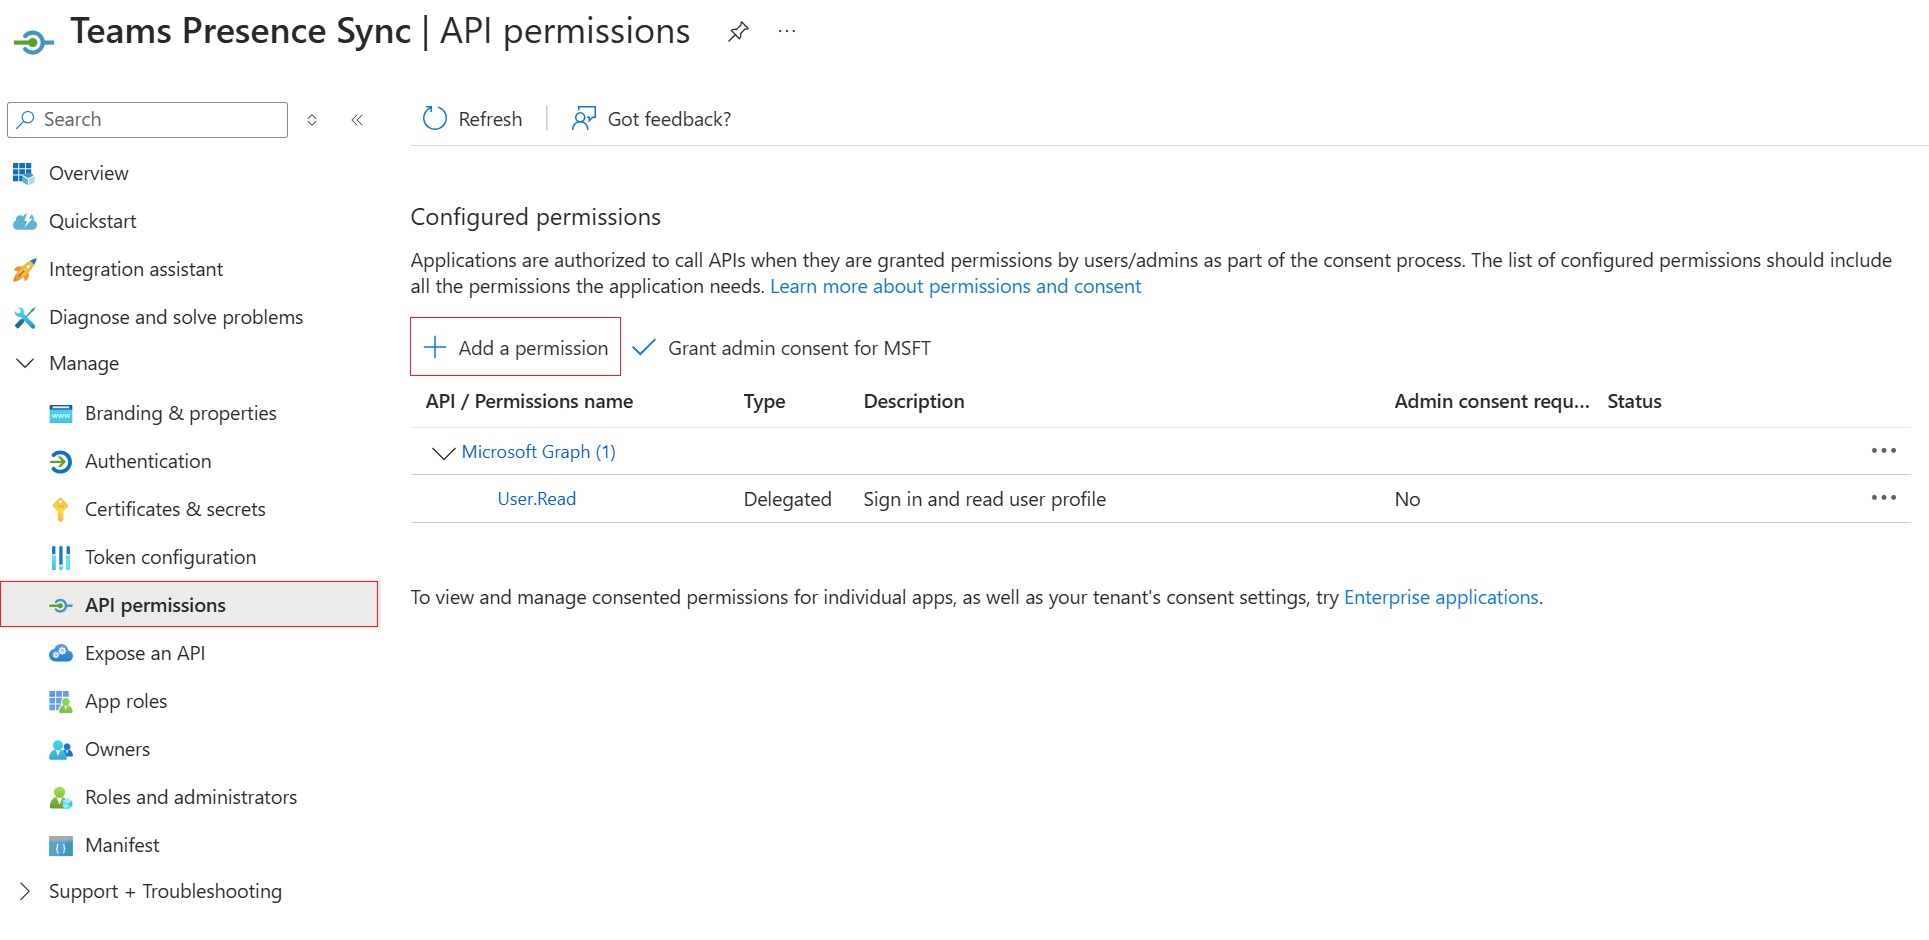
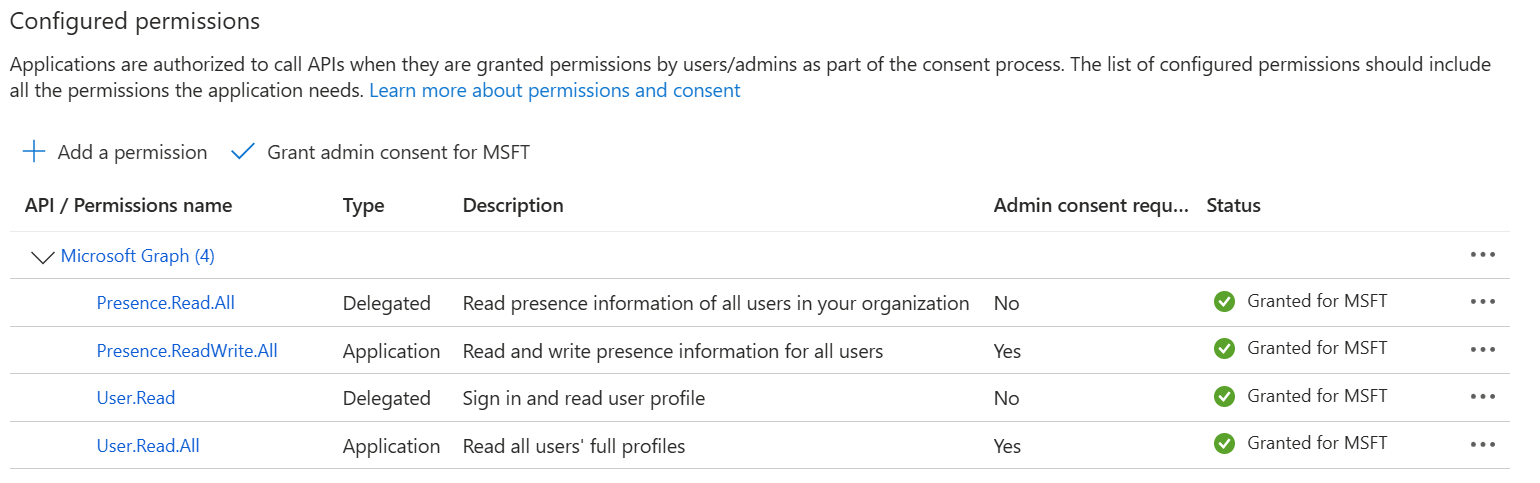
- After this is done, the configured permissions screen should look like this:
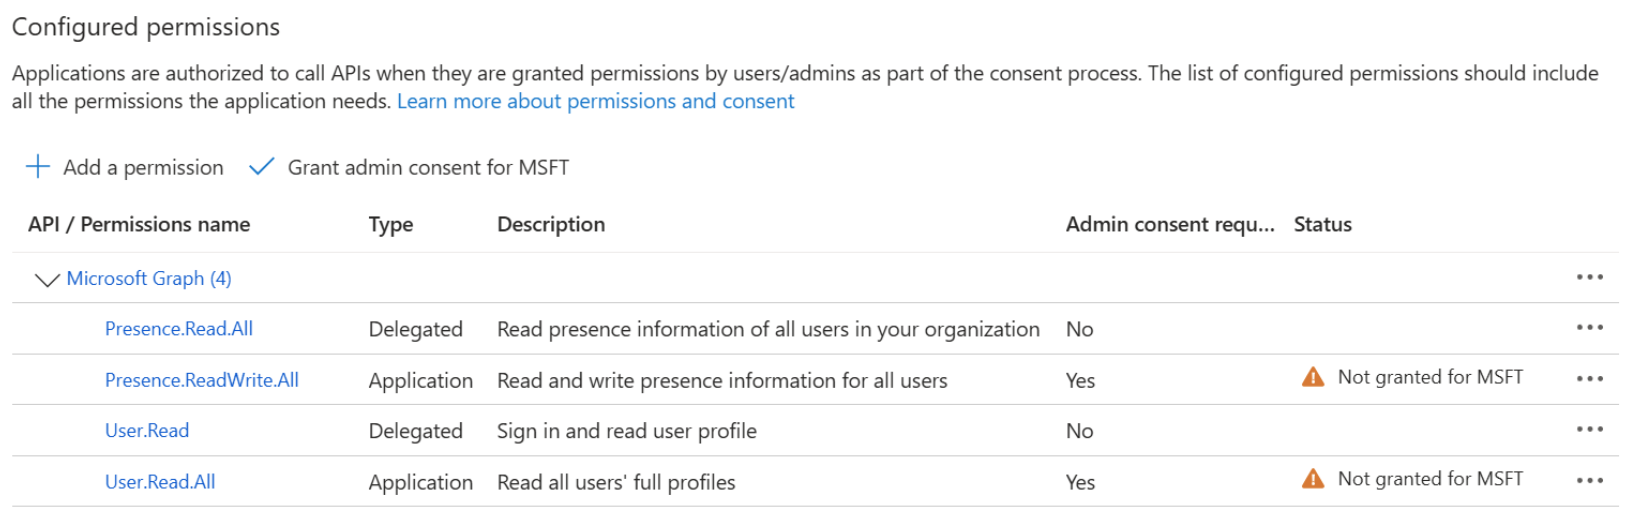
Please ensure that the permission types are correct and match the screenshot above.
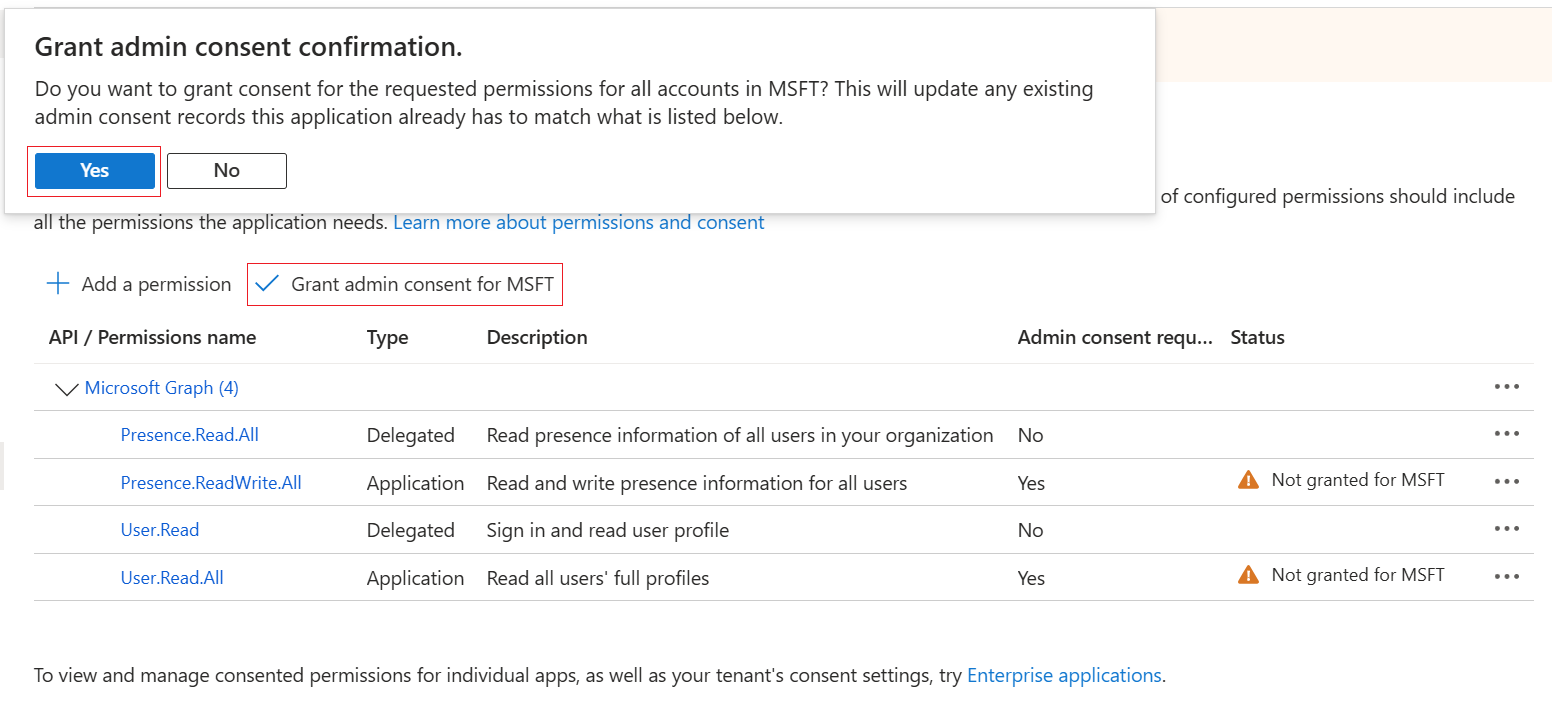
- Now, grant admin consent by clicking on the Grant admin consent for {{name}} button (e.g., Grant admin consent for MSFT button) and selecting the Yes button in the opened pop-up:
- The status of the permissions should show “Granted for {{name}} (e.g., Granted for MSFT)”:
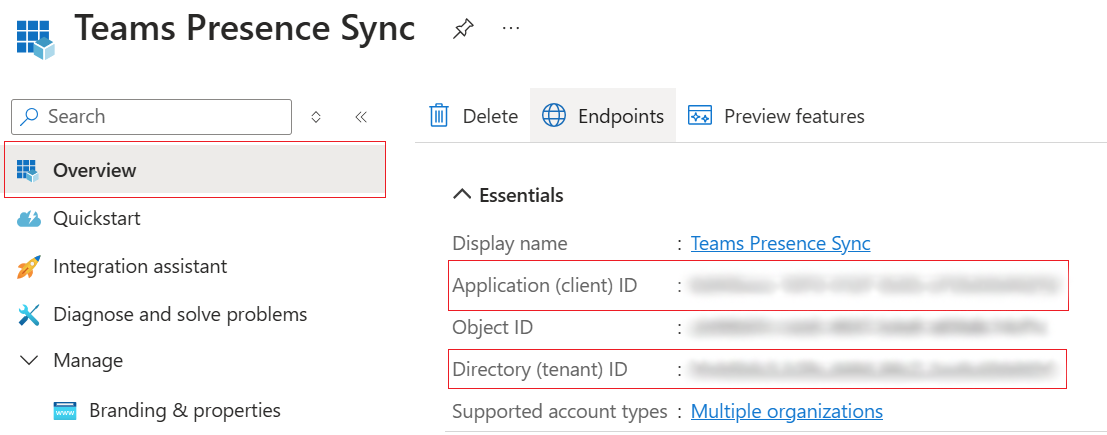
- Next, switch back to the "Overview" tab on the left side, copy both the "Application (client) ID" and "Directory (tenant) ID" and store them in a safe location.
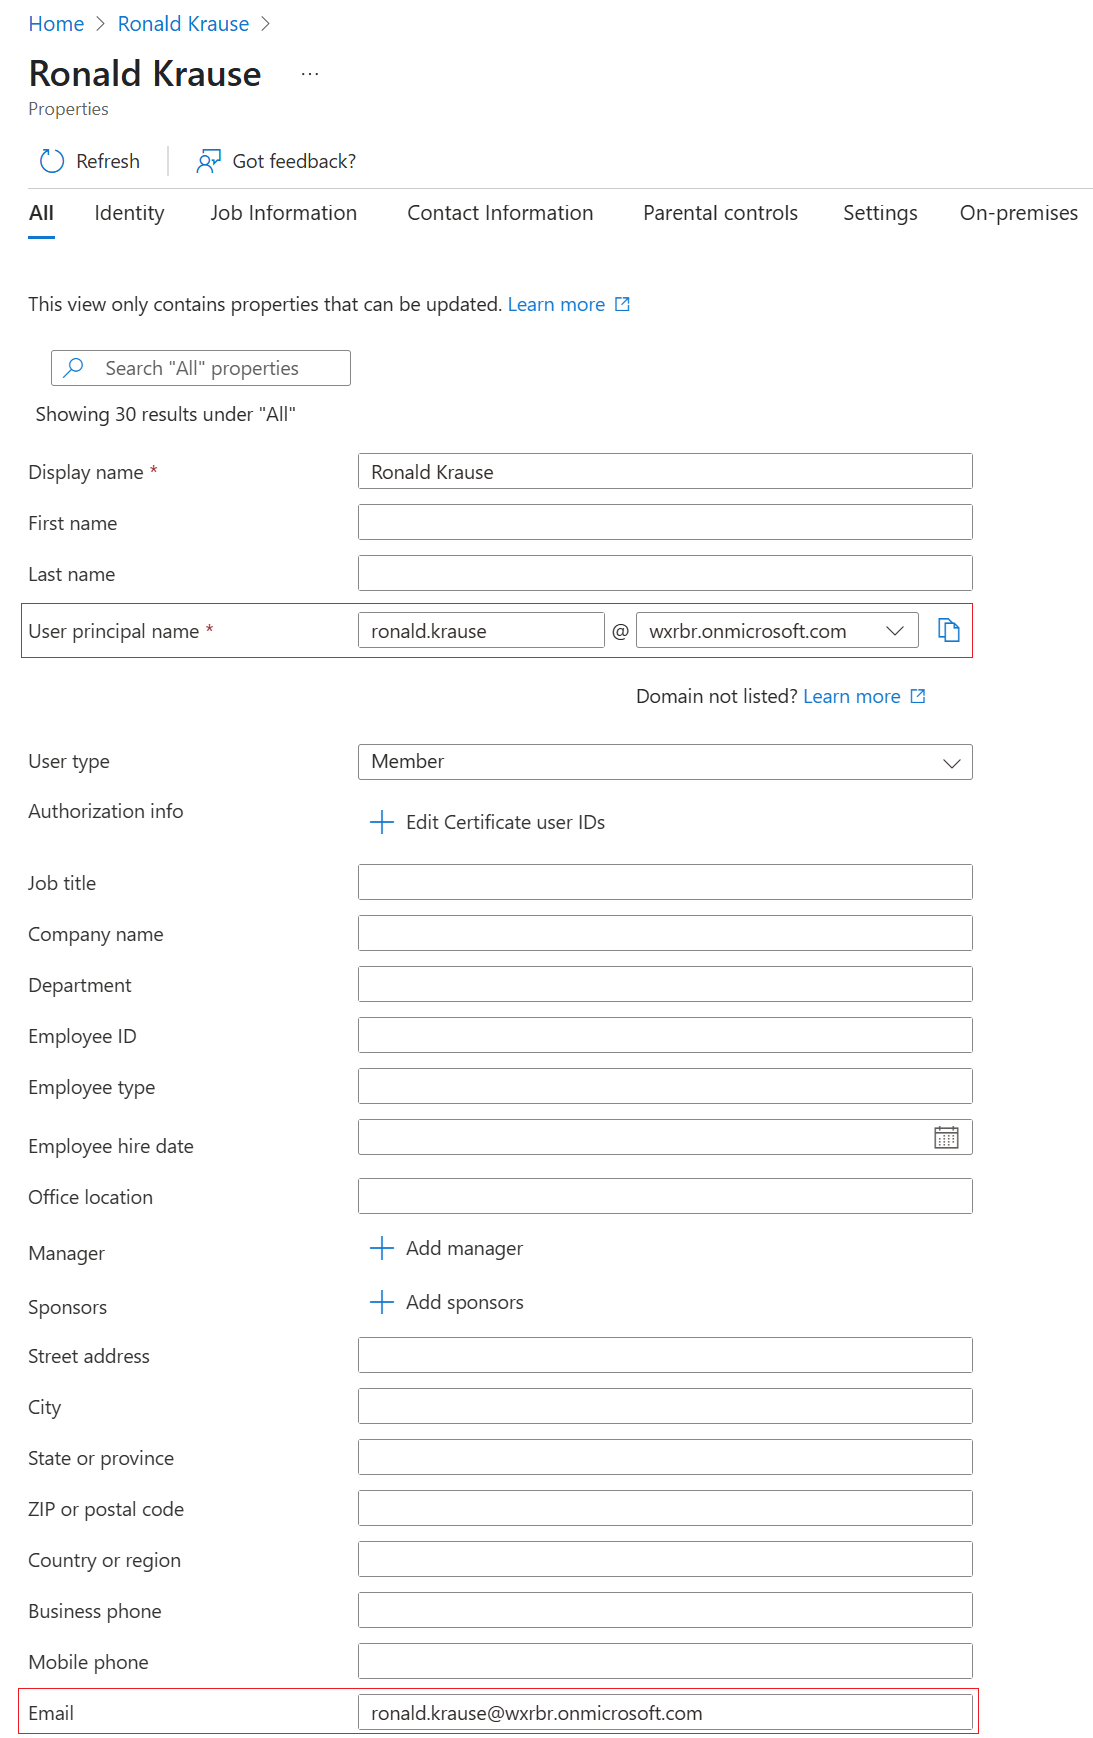
- For the last step, navigate to the “Users” section, click on the desired user, and click on “Edit properties”. Then, navigate to the “All” tab and confirm that the same email is used for the “User principal name” and the “Email”.
If the Email field is empty, please populate it with the same email found under the “User principal name”.
Finally, everything is ready to proceed to the PBXware configuration.
¶ Configure PBXware
To set up “Teams Presence Sync”, having, at least, PBXware v7.5-beta installed is the minimum requirement.
Also, before proceeding, these should have been obtained during the “Configuring Azure App” section:
- Azure Application ID
- Azure Directory ID
- Azure Client secret
This guide will show how to configure "Teams Presence Sync" in the PBXware Multi-Tenant edition. It should work the same way in the Call Center.
Integration works independently for each tenant.
Let’s begin with the configuration:
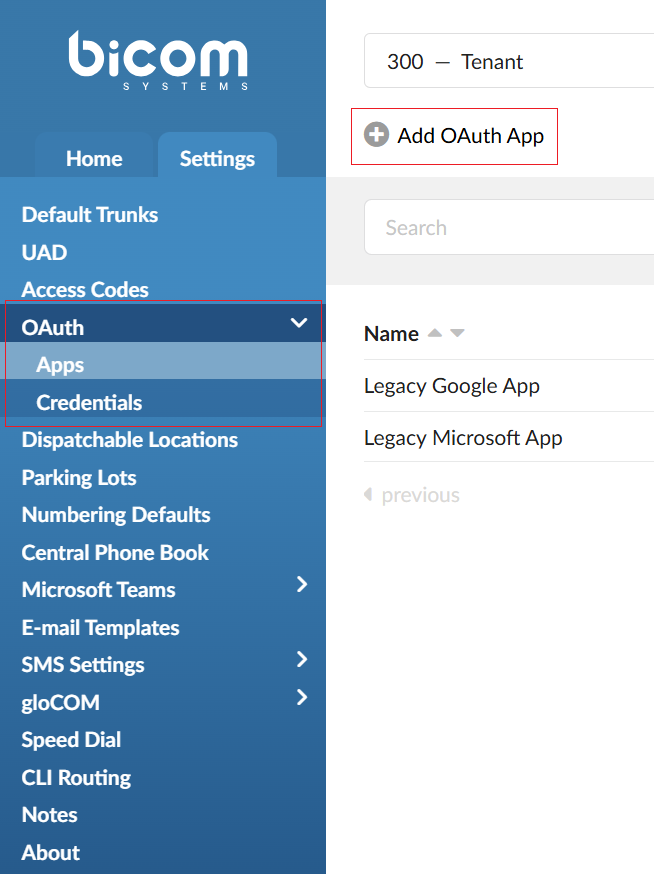
- Log in to PBXware as an administrator, switch to the desired tenant, and navigate to Settings -> OAuth. Click on the Add OAuth App button.
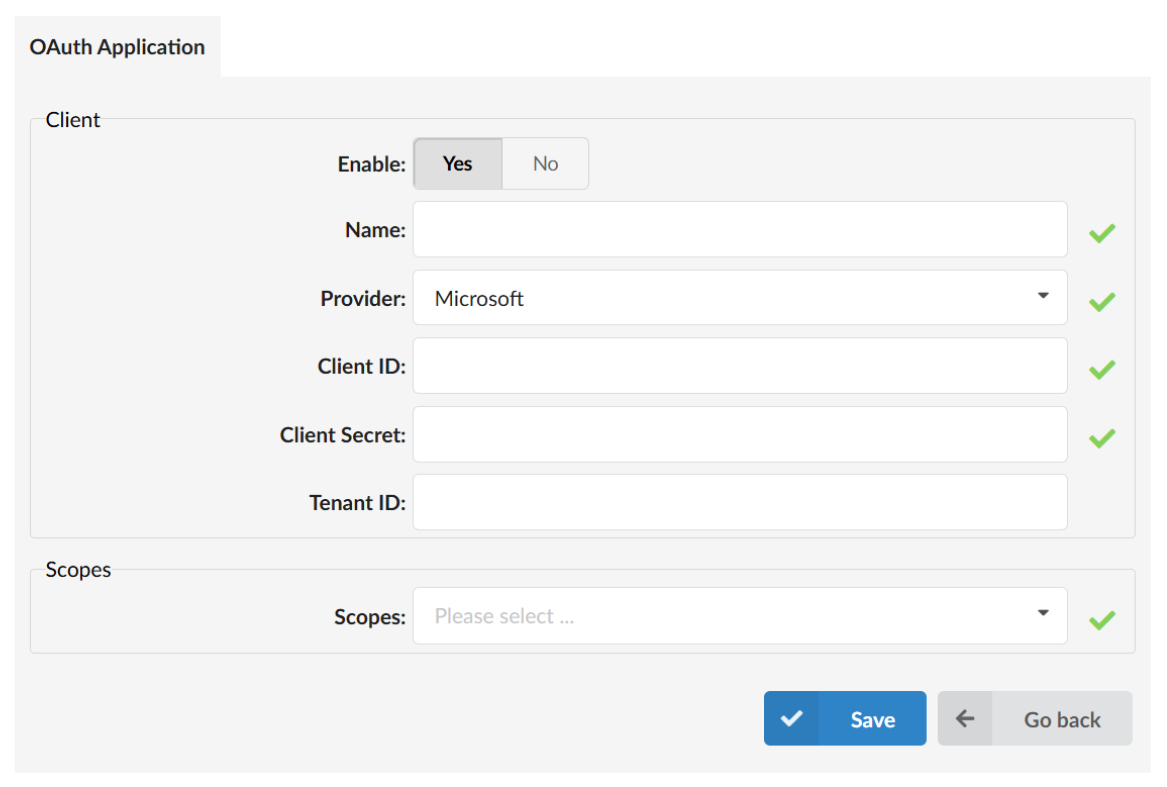
- Fill in the necessary information:
- Name: Set a user-friendly name that indicates that this is used for the "Teams' Presence Update".
- Provider: Select "Microsoft".
- Client ID: Paste "Application (client) ID" value obtained while configuring the "Azure App".
- Client Secret: Paste "Secret" value obtained while configuring the "Azure App".
- Tenant ID: Paste "Directory (tenant) ID" value obtained while configuring the "Azure App".
- Scopes: Select "Presence-Update".
- Click the Save button when ready.
Another OAuth Application needs to be added since the "Application" and "Delegated" scopes cannot be mixed into the same PBXware OAuth application.
-
Switch back to the OAuth apps list and click the Add OAuth App button again.
-
Fill the necessary information:
- Name: Set a user-friendly name that indicates that this is used for the "Teams' Presence Read".
- Provider: Select "Microsoft".
- Client ID: Paste "Application (client) ID" value obtained while configuring the "Azure App".
- Client Secret: Paste "Secret" value obtained while configuring the "Azure App".
- Tenant ID: Paste "Directory (tenant) ID" value obtained while configuring the "Azure App".
- Scopes: Select "Presence-Read".
- Click the Save button when ready.
Two Microsoft OAuth apps should be configured and displayed as shown below:

Of course, they still point to the Azure App configured before.
- After configuring both apps, switch to the "Credentials" tab and click on the Create Credential button:
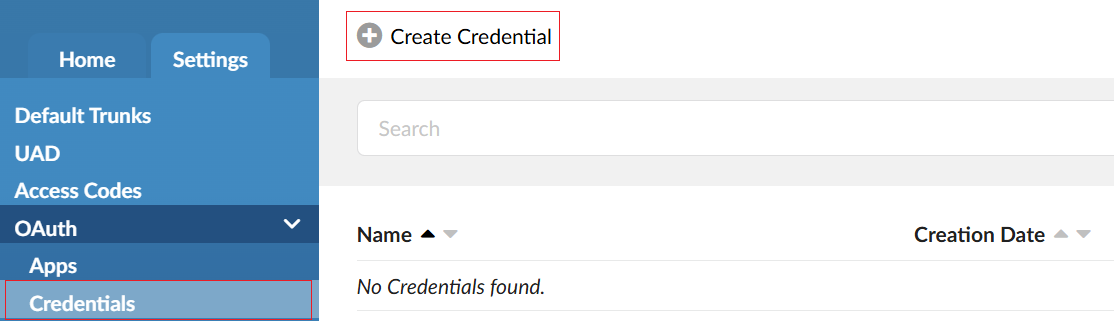
Since two OAuth applications had to be created, two OAuth Credentials also must be created.
- First, create the Update credential:
- Name: Set a user-friendly name that indicates that this is used for the "Teams Presence Update".
- Application: Select the application created for the "Teams Presence Update".
- Scopes: Select "Presence-Update".
- Click on the Generate Token button. A confirmation popup should be displayed.
- Finally, click the Save button.
Switch back to the Credentials list, and click the Create Credential button again. This time, a read credential should be created.
- Now create the Read credential:
- Name: Set a user-friendly name that indicates that this is used for the "Teams Presence Read".
- Application: Select the application created for the "Teams Presence Read"
- Scopes: Select "Presence-Read".
- Click on the Microsoft Login button. Sign into your Azure admin account using the pop-up that opens. Make sure to check the box next to “Consent on behalf of your organization”.
- After clicking the Accept button, a confirmation popup should appear, confirming that the token was generated.
- Finally, click the Save button.
Switch back to the credentials list. Two credentials related to your two OAuth applications should be displayed.

- Switch to Microsoft Teams -> Settings as the last step and select the credentials:
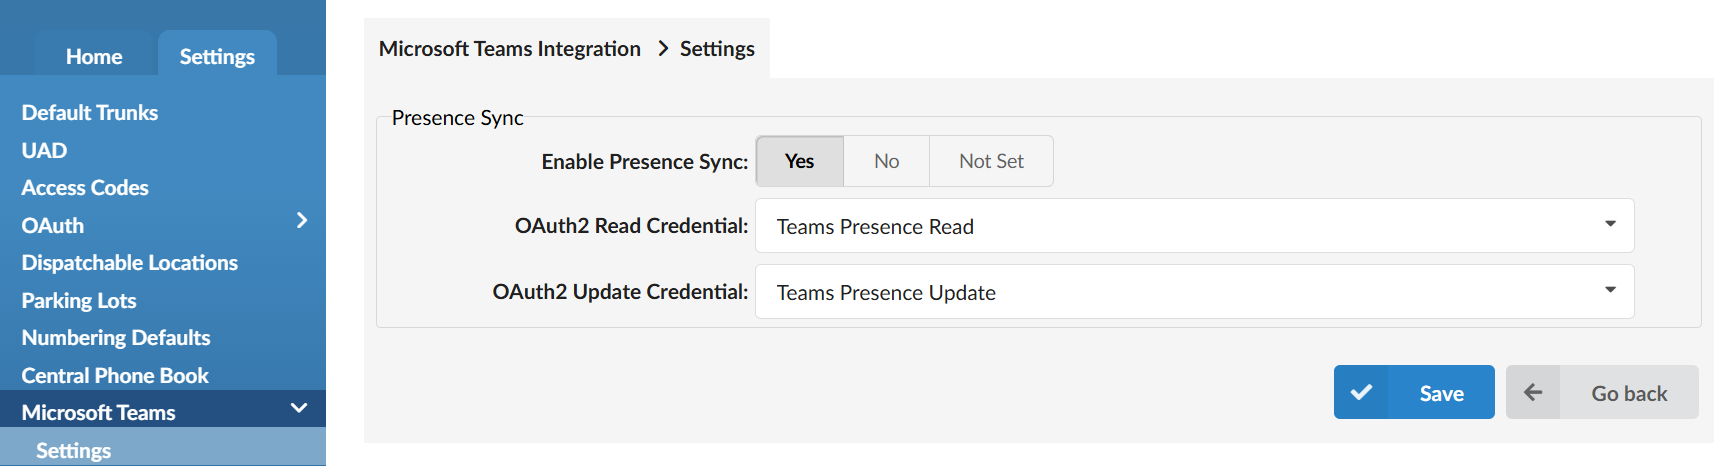
The "Enable Presence Sync" option determines whether the presence is synced across the entire tenant or PBXware if it is not multi-tenant.
The "Teams Presence Sync" option can also be customized at the extension level. To adjust it, open an extension's settings, click "Show Advanced Options", and scroll to the gloCOM section, where the "Teams Presence Sync" can be turned on or off.
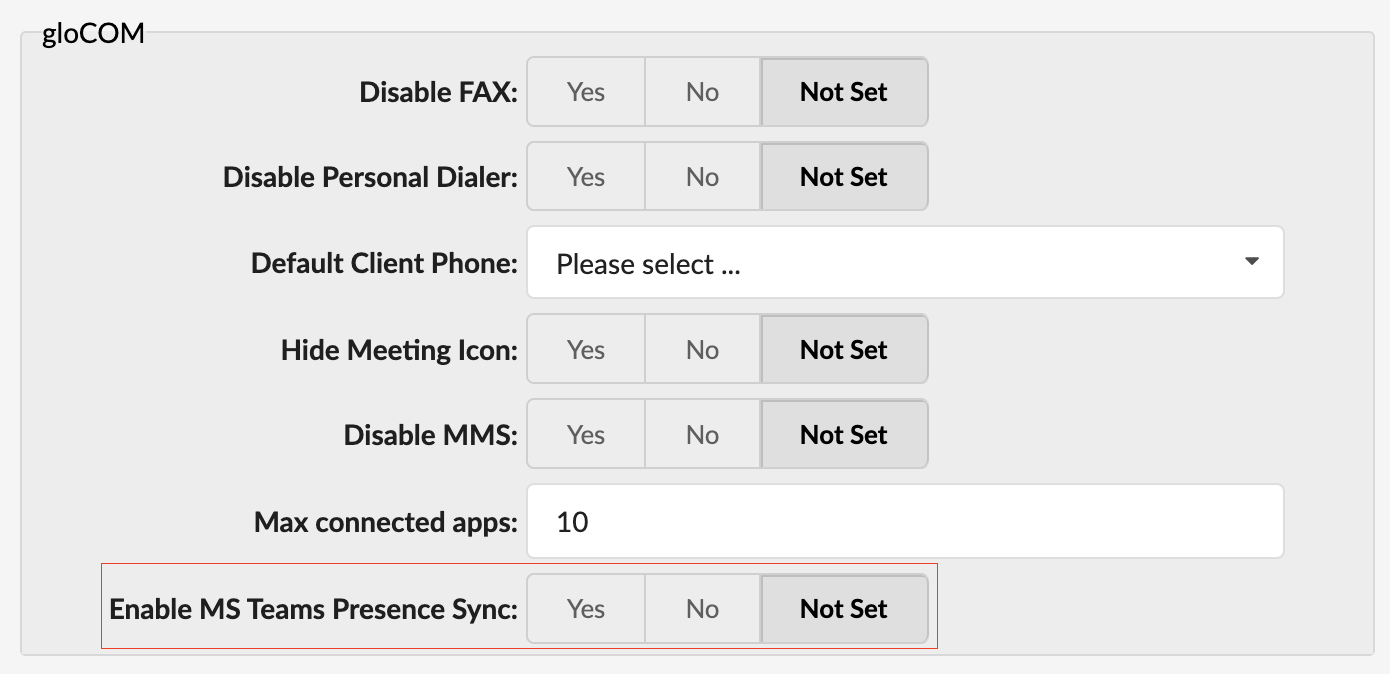
When the "Teams Presence Sync" option does not have the same value at the tenant and extension levels, the extension setting takes precedence:
- If the "Teams Presence Sync" option is set to "Yes" at the extension level, the same option will be overridden at the tenant level. "Teams Presence Sync" is turned on.
- If the "Teams Presence Sync" option is set to "No" at the extension level, the same option will be overridden at the tenant level. "Teams Presence Sync" is turned off.
- If the "Teams Presence Sync" option is set to "Not Set" at the extension level, it will only be turned on if the same option is set to "Yes" at the tenant level.