¶ Settings
The Settings section in PBXware's Omnichannel application allows administrators to configure various operational parameters. The section is divided into six main categories:
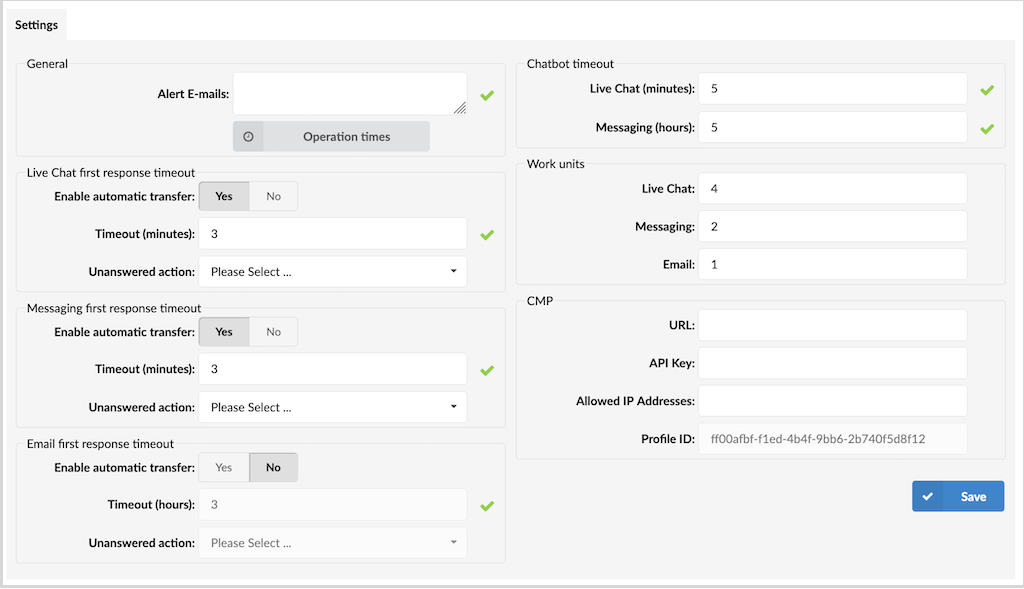
¶ 1. General
¶ Alert E-mails
This section allows you to designate an email address to receive alert notifications in various situations. For instance, if the system identifies malicious behavior and bans a user from live chat or SMS, an alert email will be sent to the specified address, providing timely insights into the incident.
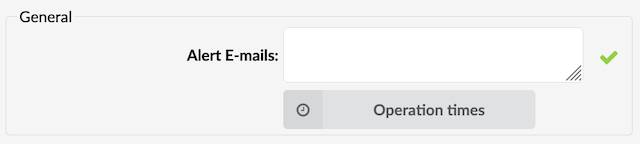
¶ Operation Times
If a message is received outside of these hours, the customer will be informed that they have reached the system outside of its operating times. This is where users globally configure operation times.
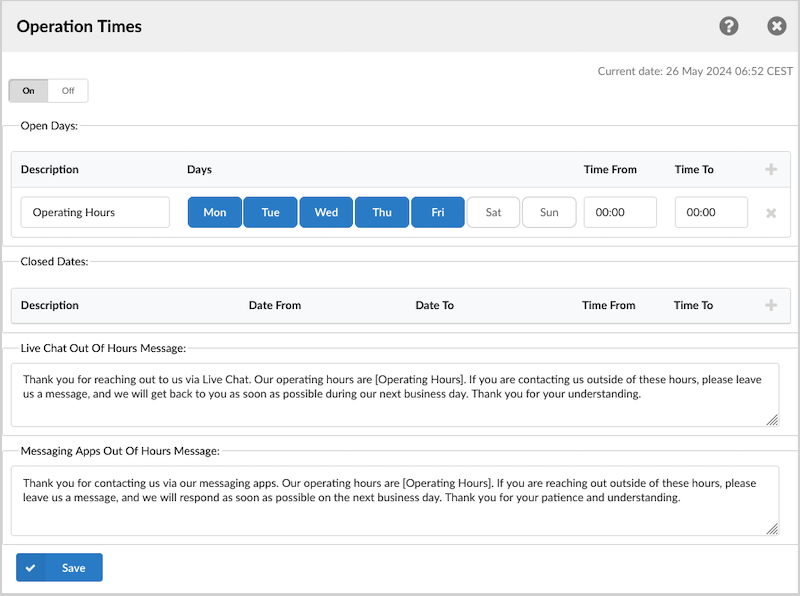
Operation Times
- Operation Times:
Enable operation times.
(E.g., Yes, No, Inherit)
(Option buttons)
Description of destinations follows in this priority order:
-
Open days: The "Open Days" section enables you to define the days of the week and time intervals during which your services are available. The section lists all days from Monday to Sunday, alongside "Time From" and "Time To" fields for each day.
By setting these ranges, you establish the window of time during which users can send messages, emails, or engage in live chats with your service. For example, if you set the "Time From" to 9:00 AM and "Time To" to 5:00 PM for Monday through Friday, users will be able to communicate with you during these specific hours on weekdays.
This configuration helps manage customer expectations and also ensures that your team is adequately staffed during the times when interaction is possible. -
Closed dates: The "Closed Dates" is a section within the "Operation Times" settings that allows you to specify particular dates and times when your service will be unavailable. This section includes fields:
Description: This field allows you to provide a brief explanation or reason for the closure, such as "Public Holiday" or "Scheduled Maintenance."
Date From and Date To: These fields enable you to define a date range during which your service will be closed. It can be a single day or multiple days.
Time From and Time To: These fields allow you to further narrow down the specific hours of unavailability within the chosen date range.
By configuring the "Closed Dates" section, you ensure that users are aware that they will not be able to send messages, emails, or engage in live chats during the specified times. This helps to manage customer expectations and allows you to plan your staffing needs accordingly. -
Live Chat Out Of Hours Message allows you to set an automated response for customer inquiries that come in outside of operational hours. This message informs customers when they can expect a reply, enhancing their experience and managing expectations.
-
Messaging Apps Out Of Hours Message setting enables you to configure an automated response for customer queries received via messaging apps when you're out of operation. This auto-reply helps manage customer expectations about when they'll hear back from you.
¶ 2. Survey
This section allows us to configure the behavior after the customer feedback survey is finished or interrupted, and the time interval at the survey will be sent to the same customer again.
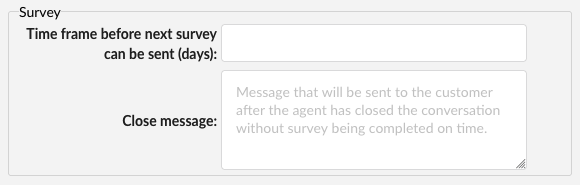
¶ Time frame before next survey can be sent (days)
This option allows us to set the minimum number of days that must pass before a customer can receive another survey. This helps prevent survey spamming by ensuring that customers are not overwhelmed with frequent survey requests, thereby improving the quality and reliability of the feedback received.
By default, this field is empty, which means that the survey will always be sent after the conversation is over.
¶ Close message
This is a message that will be sent to the customer after the agent has closed the conversation without completing the survey on time.
Example: After the customer finishes a conversation with the Agent, a survey is sent. If the customer only rates the Agent but does not give any additional comment, after some time, when the Agent closes the ticket, this message will be sent. At first, this can be confusing to the end customer, but it's our recommendation to always leave an additional comment after rating the conversation with the Agent.
Note 1: It is recommended that these messages not exceed one message limit.
Note 2: To enable the surveys, you should navigate to the Messaging queues section, select the desired queue, and, from the dropdown list, select the survey you want to use for that queue.
¶ 3. First Response Timeouts
¶ Live Chat First Response Timeout
This feature enables automatic ticket transfers when Live Chat's first response timeout expires. Users can set a timeout duration in minutes and specify an action, such as logging off or pausing an agent if they do not respond to a Live Chat conversation within the designated time frame. This system ensures that customer queries are secured by redirecting them to an available agent from a specified queue.
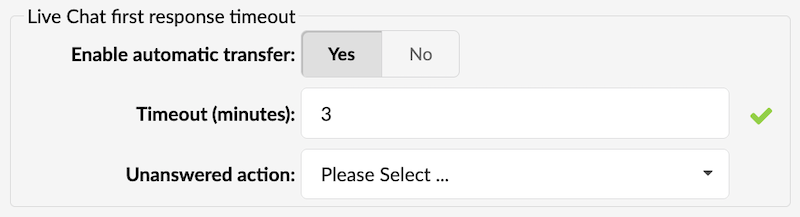
¶ Enable Automatic Transfer
- Yes: Enables the automatic transfer of Live Chat conversations.
- No: Disables the automatic transfer.
¶ Timeout (minutes)
Set the duration (in minutes) for a timeout. If no response is received within this time, the system will take the defined "Unanswered Action."
¶ Unanswered Action
Choose the action to be taken when no response is received within the defined timeout.
- Auto Pause: Automatically places the agent on pause if they do not respond to a Live Chat conversation.
- Auto Logoff: Automatically logs off the agent.
¶ Messaging First Response Timeout
This functionality ensures automatic ticket transfers when the first response timeout is reached for messaging conversations, including SMS, Facebook, and WhatsApp. Users can define a timeout period in minutes and determine actions, such as logging off or pausing an agent if they do not respond to a messaging conversation within the set time. This mechanism guarantees that customer queries are promptly addressed by redirecting them to an available agent in a designated queue.
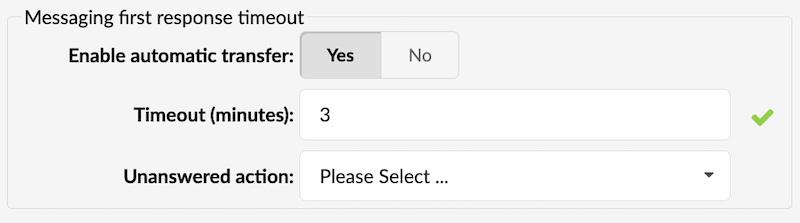
¶ Enable Automatic Transfer
- Yes: Enables the automatic transfer of messaging conversations.
- No: Disables the automatic transfer.
¶ Timeout (minutes)
Set the duration (in minutes) for a timeout. If no response is received within this time, the system will take the defined "Unanswered Action."
¶ Unanswered Action
Choose the action to be taken when no response is received within the defined timeout.
- Auto Pause: Automatically places the agent on pause if they do not respond to a messaging conversation.
- Auto Logoff: Automatically logs off the agent.
¶ Email First Response Timeout
This feature provides automatic ticket transfers when a first response timeout is exceeded for email conversations. Users can set a timeout period in hours and choose actions, such as logging off or pausing an agent if they fail to respond to an email within the specified timeframe. This system ensures customer emails are answered by redirecting them to an available agent from a designated queue.
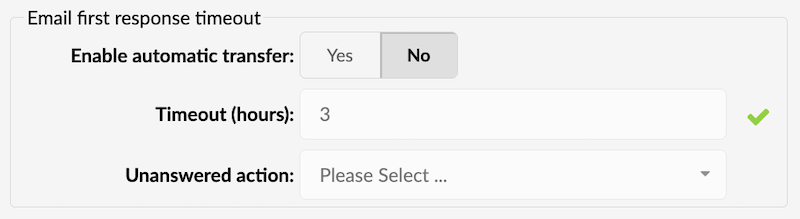
¶ Enable Automatic Transfer
- Yes: Enables the automatic transfer of email conversations.
- No: Disables the automatic transfer.
¶ Timeout (minutes)
Set the duration (in minutes) for a timeout. If no response is received within this time, the system will take the defined "Unanswered Action."
¶ Unanswered Action
Choose the action to be taken when no response is received within the defined timeout.
- Auto Pause: Automatically places the agent on pause if they do not respond to a email conversation.
- Auto Logoff: Automatically logs off the agent.
¶ 4. Chatbot Timeout
This section is designed to manage system resources efficiently. If a customer engages with the chatbot but doesn't make any selections, the session will automatically close after the time specified in this section. This helps to free up system resources that might otherwise be unnecessarily consumed.

¶ Live Chat (minutes)
Set the timeout (in minutes) for a Live Chat. If no response is received within this time, the system will end the live chat session.
¶ Messaging (hours)
Set the timeout (in hours) for messaging (SMS). If no response is received within this time, the system will end the messaging session.
¶ 5. Work Units
Configure the following work units for calculating the workload in the Agent app:
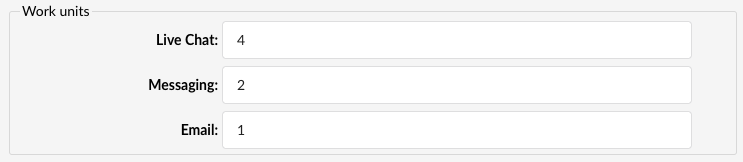
- Live Chat: Set the value for live chat work units.
- Messaging: Set the value for messaging work units.
- Email: Set the value for email work units.
Work units are metrics used to determine an agent’s workload by multiplying them with the agent's capacity settings, which are configurable when adding or editing an agent’s profile. The resulting workload is then displayed in the ‘My Workload’ section, found under the ‘My Performance’ panel within the gloCOM Agent panel’s Dashboard tab.
¶ 6. CMP Settings
Within the messaging settings, configurable options are crucial for integrating social channels such as Facebook and WhatsApp into the PBXware system via the COMMSware Messaging Platform (CMP) service.
Available Options
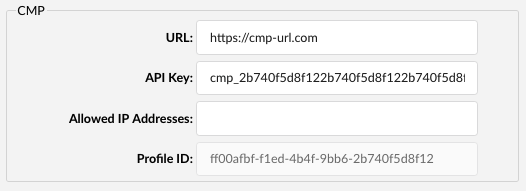
- URL - Specify the URL for your CMP service.
- API Key - Provide the API Key from your CMP service. The API key is one requirement that must be generated on the CMP service and then entered into this field within the PBXware system.
- Allowed IP Adresses - Define permitted IP addresses for your CMP service. This feature empowers users to establish specific CMP IP addresses, preventing unwanted or potential spam from sources like Facebook, WhatsApp, DDoS attacks, etc.
- Profile ID - This represents a unique ID exclusive to the particular tenant or, in this context, the contact center (CC). The Omni server generates this ID during startup, and it remains constant thereafter, never subject to change.
To integrate channels like Facebook and WhatsApp into their PBXware system via the COMMSware Messaging Platform (CMP) service, users need to input their CMP service domain, enter a previously generated API key from the CMP service, and then save their settings by clicking the "Save" button.
Installation of CMP mandatory service is essential, as CMP functions as a router, facilitating seamless interactions between PBX systems and Facebook/WhatsApp accounts. This allows end users to effortlessly configure their settings within the PBX system regarding Facebook accounts, WhatsApp accounts, phone numbers, and more.
¶ Signature Templates
The Signature Templates feature allows you to create and manage personalized signature templates within the GUI. The agent can use these templates directly in gloCOM as ready-to-use signatures or customize them as needed. This feature is designed to help you maintain a professional appearance and ensure consistent branding in all your communications.
With Email Signatures, you can:
-
Create Professional Signatures: Design signatures that include your name, title, contact information, and any other details you choose.
-
Maintain Brand Consistency: Ensure that all emails from your organization reflect your brand’s identity, including logos, and colors.
-
Save Time: Your signature will be automatically included in every email, saving you the effort of manually adding it each time.
This feature is perfect for individuals who want to add a personal touch to their emails, as well as businesses aiming for a uniform corporate look in their communications.

Upon clicking on this option, a new page will open, and the list of all created signature templates will show, along with following information:
- Search
Search for a specific signature template by typing the first letter or part of the template's name. Search will start right away after you start typing.

- Name
This field displays the signature template name. By clicking on the related icons right of the name label, we can sort the template list in ascending or descending order.
- Edit

Pressing this button (or on the template's name) lets users modify signature template settings such as Signature Name and Content.
- Delete

This button allows users to delete the Signature template from the system. Upon clicking, a confirmation dialog may pop up, seeking final approval before the template is permanently removed.
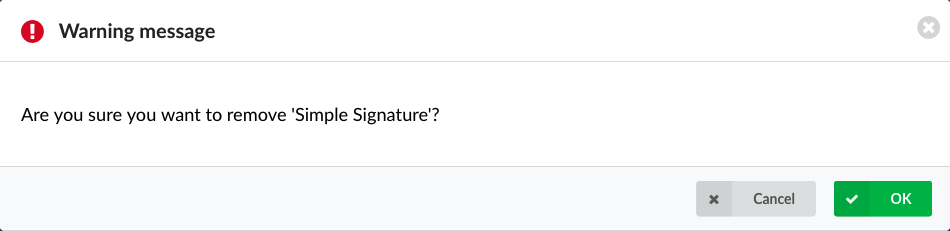
Clicking on the OK button confirms the deletion of the signature template from the system.
¶ Add/Edit Signatures Template
When you click on Add Email Signature, a new page will open with the Signature Name and the Content field.
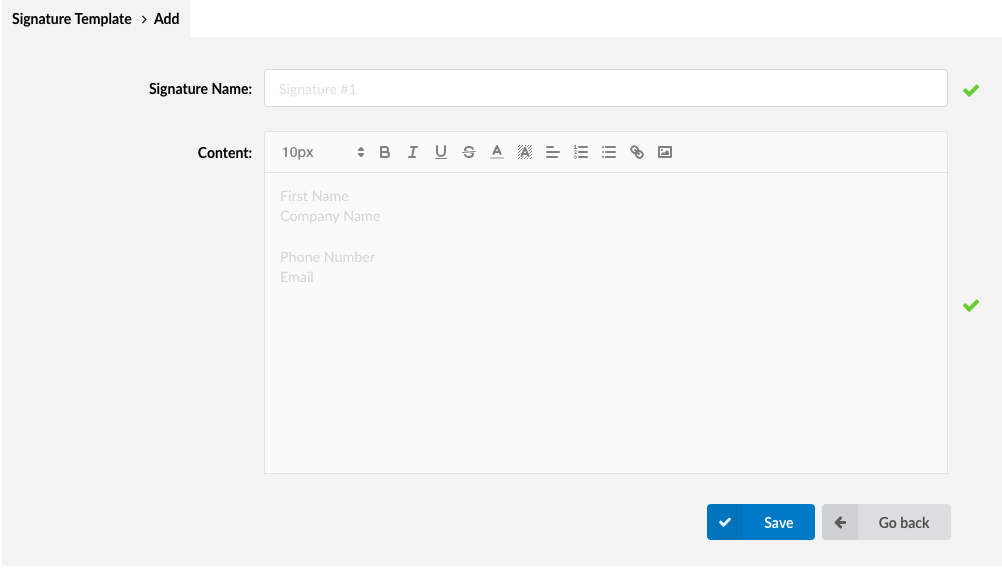
Only the Signature name field will be available for editing when you add the template for the first time. To create your signature, you must first enter the name of the signature template and then click on save. A message with a signature saved successfully will appear at the top of the page.
After the initial save step, you will get access to the Content Editor field, where you can write and customize your signature according to your needs.
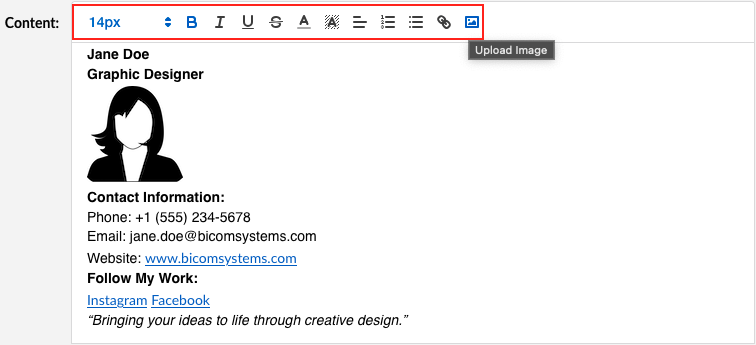
The editor is designed with an intuitive interface, making it easy for users to format text, insert images, and add links without needing to know any HTML or coding. Options available in this editor toolbar are:
-
Text Formatting: You can apply bold, italic, or underlined styles to your text, adjust the size and color, create lists, or adjust text alignment.
-
Inserting Images: You can add images to your signature by uploading them from your computer. The supported picture formats are PNG, jpeg, jpg, and SVG. If we try to upload a picture that is not one of these formats, a warning pop-up window will appear:
Keep in mind that the maximum allowed picture size is 2MB. If we try to upload a picture that is bigger than 2MB, a pop-up warning will appear:
Maximum allowed number uploaded pictures is limited to 5. If you attempt to upload more than five pictures through the GUI, a warning pop-up window will appear.
-
Adding Links: The editor lets you hyperlink text to websites or email addresses, making your signature interactive.
Note: For links to work correctly, they must contain https in front of the web address. Example: https://www.yoursite.com
Hovering over any of these options will give you a short brief on what they are and (for some of them) a shortcut you can use to activate them.
After customizing your signature, click the Save button to keep all changes. If you need to edit any signature, go to the main page and click on the template's name (or on the designated icon). The same edit window will open to modify your signature.