¶ Meetings
Meetings is an application that allows users to manage and connect geographically dispersed teams, increase productivity, and ensure high-quality performance. Its implementation in PBXware makes communication easier, enabling users to organize and conduct meetings while taking into consideration their location, time zone, or personal schedules. To navigate to Meetings, select one of the desired Tenants. Once selected, the application will appear in the side menu bar.
On PBXware, the Meetings application is visible on Slave Tenants.
¶ Create a Meeting
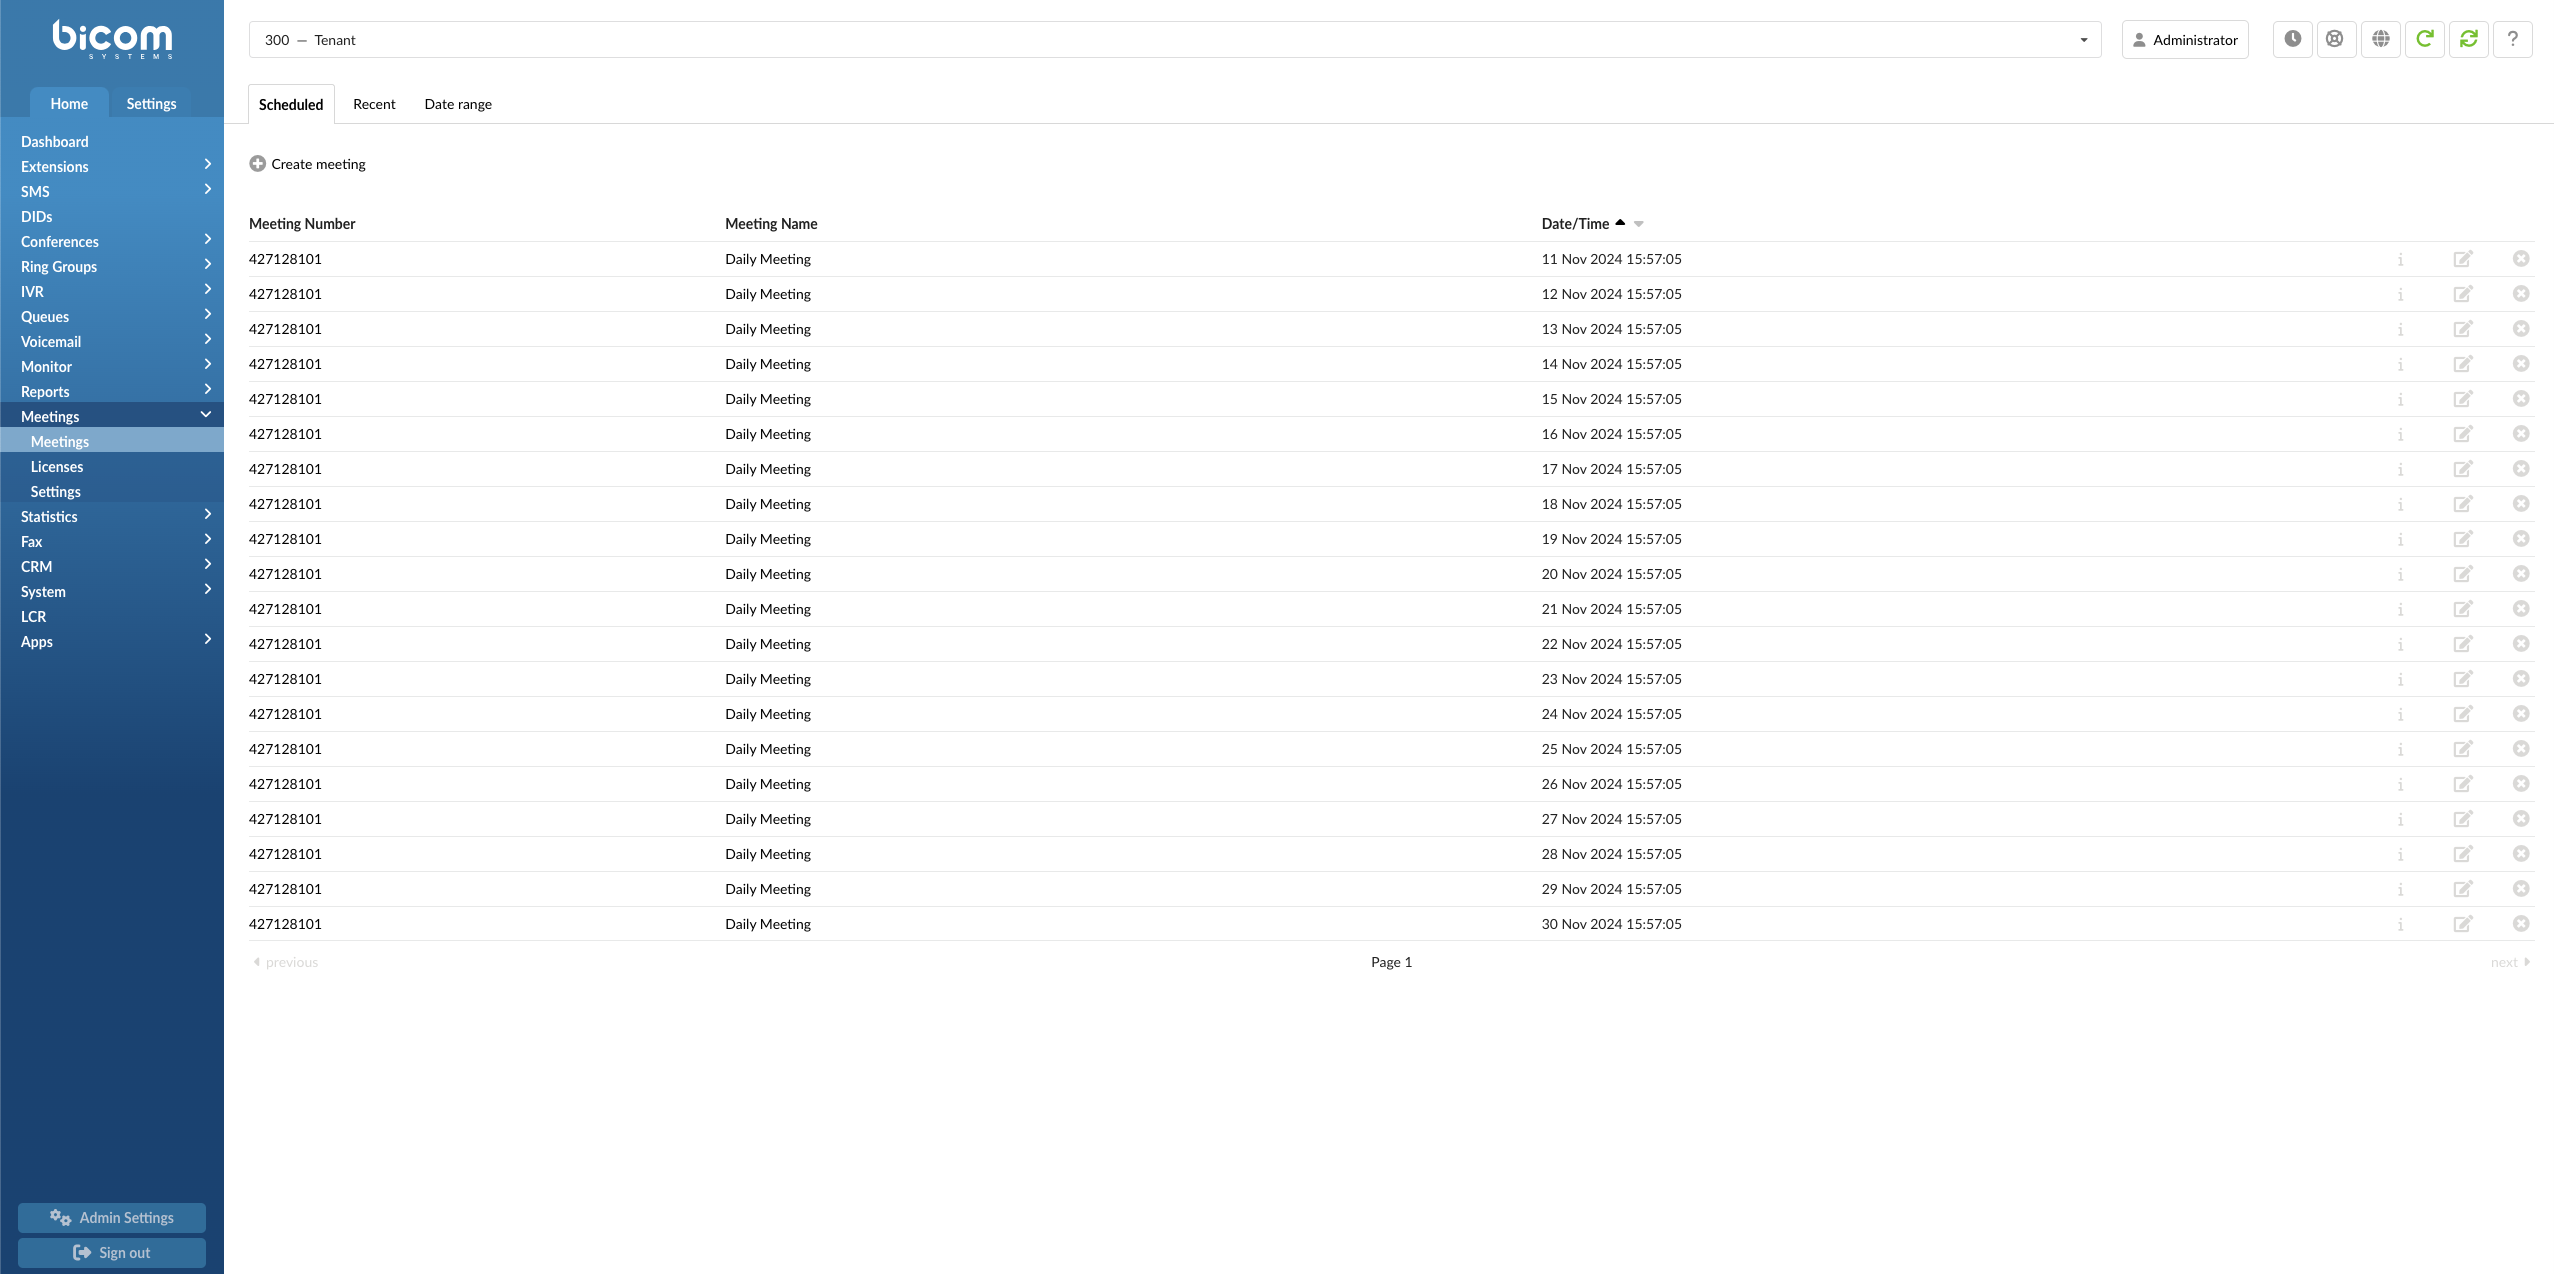
To create a meeting, please select the desired tenant and navigate to the Home -> Meetings and click the Create meeting button.
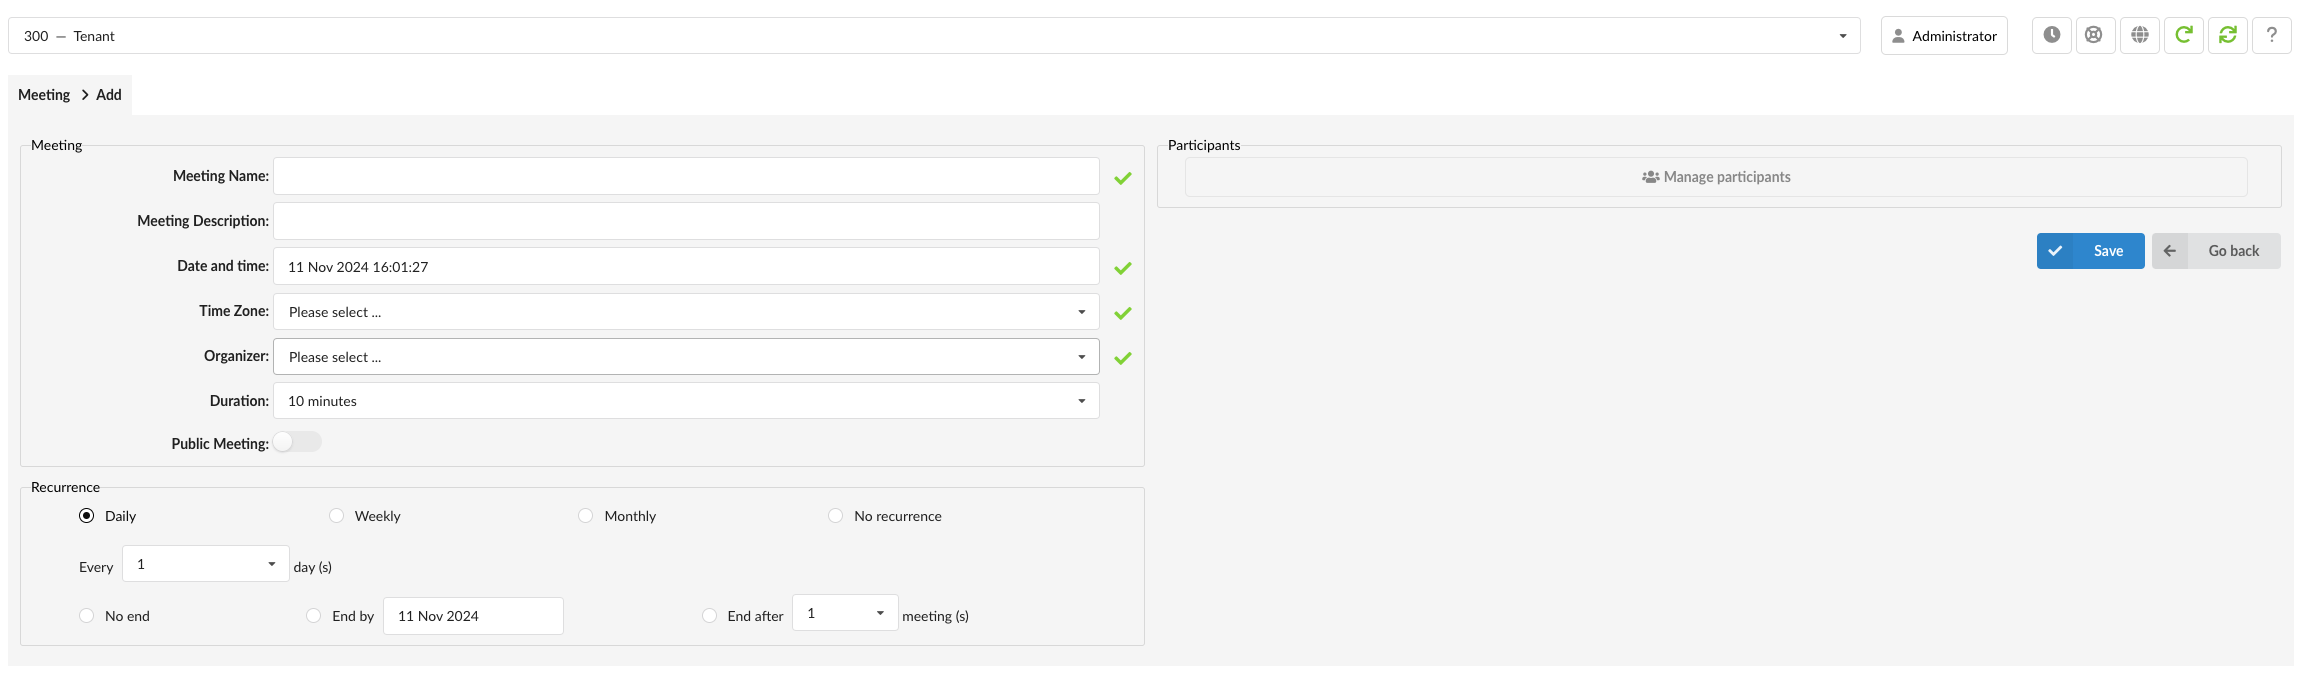
"Meeting Name", "Date and time", "Time Zone", and "Organizer" are four required fields. Not defining those fields will result in the warning messages being shown.
While creating a meeting, the following information needs to be provided:
- Meeting Name (Required): Provides the user to enter a meeting name. (E.g. Daily Meeting)
- Meeting Description: Provides the user to describe a meeting in a few sentences. (E.g. Revision)
- Date and time (Required): Choose the meeting's date and time. Date and time cannot be set in the past. (E.g. 06 Sep 2020 12:01:00)
- Time Zone (Required): Provides information on the time zone in which a meeting will be scheduled.
- Organizer (Required): Select the organizer of the meeting from the list of Extensions. (E.g. Ronald Krause (1000))
- Duration: Set the meeting's duration.
- Public Meeting: Provides the user with the ability to choose whether the Meeting will be public or private.
- Recurrence: Provides information on whether the meeting is recurring or not (If it will repeat, e.g., every Thursday at 3 pm) and how long it will recur (e.g., stop after ten meetings).
- Participants: Provide information on who is supposed to attend the meeting.
¶ Recurrence Options
¶ Daily
If "Daily Recurrence" is selected, meetings can be repeated every 1 to 90 days.
(E.g. If "1" is selected, the meeting will be repeated every day, or if "4" is selected, the meeting will be repeated every four days, and so on.)
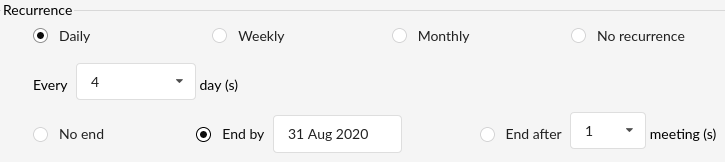
Users can select the recurrence's end type as follows:
- No end: A meeting is held every day with no further date limitations. (E.g. Date limitation will not affect the meeting's recurrence.)
- End by: A meeting will stop recurring on a specific date. (E.g. Once 31st of August is reached, the meeting will stop recurring, so in September there will be no meetings.)
- End after: A meeting will stop recurring after a specified number of meetings. (E.g. If "8" is selected, the meeting will stop recurring after eight conducted meetings.)
Only one type of recurrence can be selected at a time.
| DAILY | ||
|---|---|---|
| Repetition | (in) Days | |
| Repetition Period | (from) 1 - 90 (days) | |
| Recurrence End Type | No End/End By/End After |
¶ Weekly
If "Weekly Recurrence" is selected, meetings can be repeated every 1 to 12 weeks.
(E.g. If "1" is selected together with days from Monday to Friday, the meeting will be repeated every week on the specified days.)
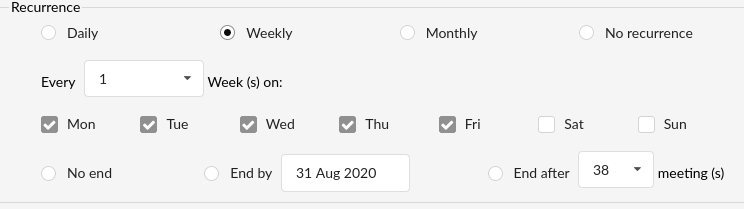
Users can also identify specific days in a week with the range being from Monday to Sunday. (E.g. Mon, Tue, Wed, Thu, Fri)
Users can select the recurrence's end type as follows:
- No end: A meeting is held every week with no further date limitations. (E.g. Date limitation will not affect the meeting's recurrence.)
- End by: A meeting will stop recurring on a specific date. (E.g. Once 31st of August is reached, the meeting will stop recurring, so in September there will be no meetings.)
- End after: A meeting will stop recurring after a specified number of meetings. (E.g. If "38" is selected, the meeting will stop recurring after thirty-eight conducted meetings.)
Only one type of recurrence can be selected at a time.
| WEEKLY | ||
|---|---|---|
| Repetition | (in) Weeks | |
| Repetition Period | (from) 1 - 12 (weeks) | |
| Week Days | (on) Mon - Sun | |
| Recurrence End Type | No End/End By/End After |
¶ Monthly
If "Monthly Recurrence" is selected, there are two ways that recurrence can be configured.
- First way: Meetings can be repeated every 1 to 6 months with the specific date selected ranging from the 1st to the 31st. (E.g. If "20" is selected for the "Date" together with "1" for months, the meeting will be repeated every month on the 20th.)
- Second way: Meetings can be repeated from every 1st to 4th and from Mon to Fri within the range of 6 months. (E.g. If "2" is selected for the date, "Mon" for days and "1" for months, the meeting will be repeated every second Monday in a month.)
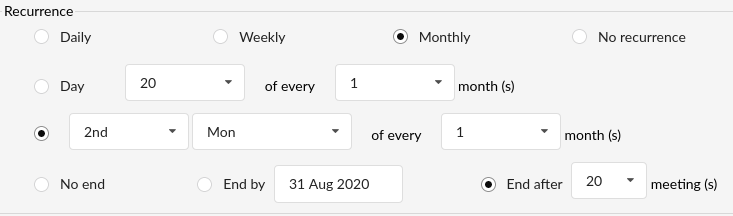
Users can select the recurrence's end type as follows:
- No end: A meeting is held every month with no further date limitations. (E.g. Date limitation will not affect the meeting's recurrence.)
- End by: A meeting will stop recurring on a specific date. (E.g. Once 31st of August is reached, the meeting will stop recurring, so in September there will be no meetings.)
- End after: A meeting will stop recurring after a specified number of meetings. (E.g. If "20" is selected, the meeting will stop recurring after twenty conducted meetings.)
Only one type of recurrence can be selected at a time.
| MONTHLY | ||
|---|---|---|
| Repetition | (in) Months | |
| Repetition Period | (every) 1st - 31st (in) 1 - 6 (Months) | |
| Days/Months | (every) 1st - 4th Mon - Sun (in) 1 - 6 (Months) | |
| Recurrence End Type | No End/End By/End After |
¶ No Recurrence
If "No Recurrence" is selected, meetings are not repeated.
| NO RECURRENCE | ||
|---|---|---|
| Repetition | None | |
| Repetition Period | None | |
| Recurrence End Type | None |
¶ Participants
When creating a meeting, users can add numerous participants. If the meeting is created for the first time, the Manage participants button will be grayed out as shown in the picture.
To make the field clickable, all required fields and additional information regarding Recurrence must be populated.

Once done, press the Save button, and the Manage participants button becomes clickable as shown in the picture.

¶ Add Participants
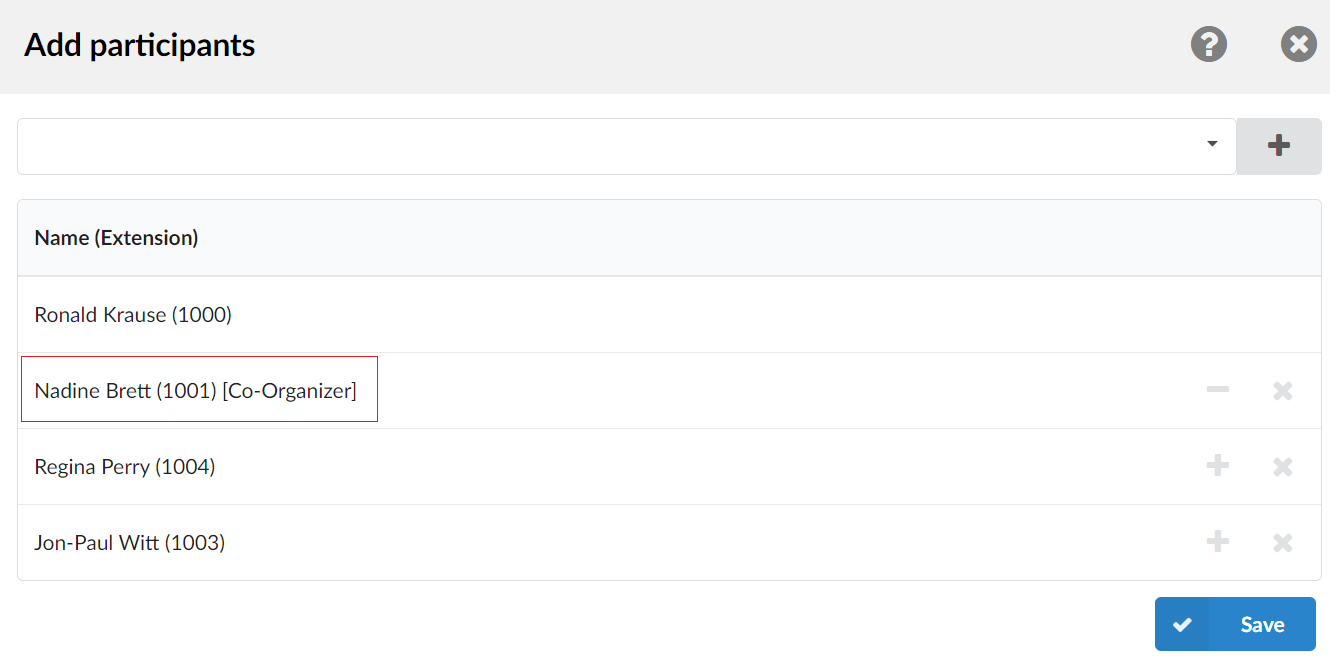
Upon clicking the Manage participants button, users will be prompted to the Add Participants page. From here, they can see, add, or delete the Extensions.
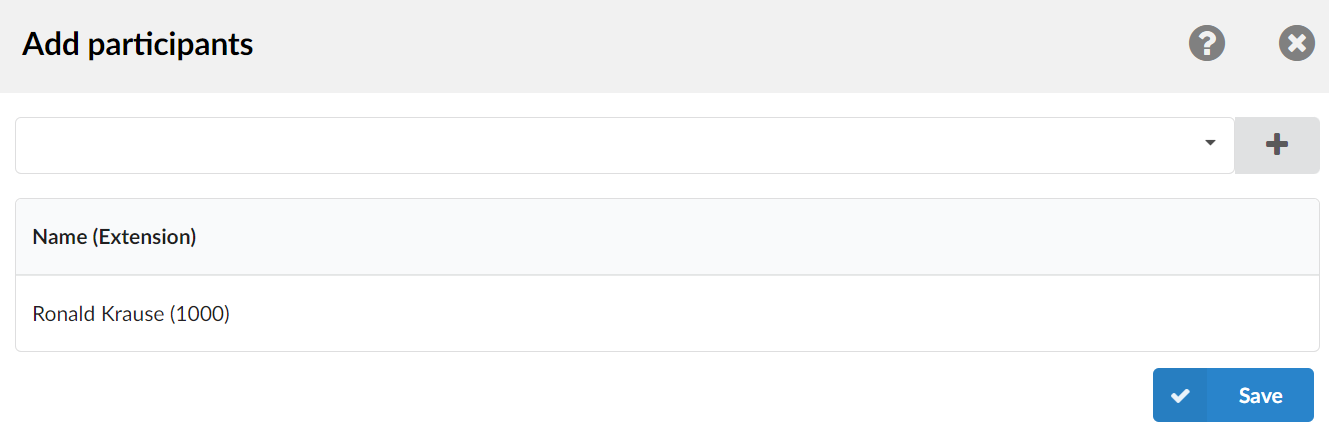
Please note that the organizer's Extension only will be visible at first. (E.g. Ronald Krause (1000))
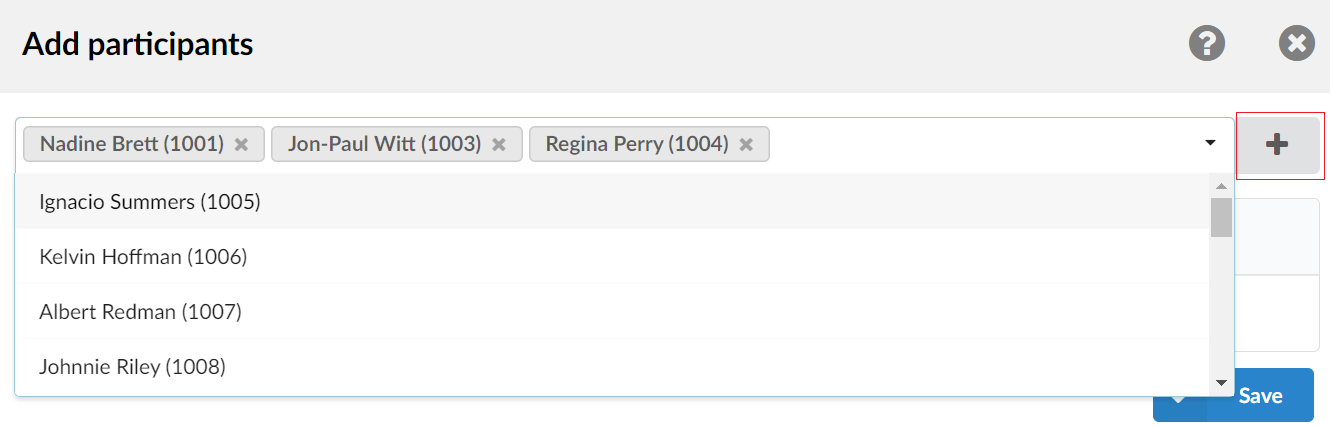
Once the organizer chooses desired Extensions from the drop-down list found at the top of a page, they need to press the plus sign as shown in the picture. The list will display all Extensions for that specified meeting.
(E.g. Nadine Brett (1001), Jon-Paul Witt (1003), Regina Perry (1004))
If everything is done successfully, the message saying “Participants edited successfully” is displayed as shown in the picture.

 Click this button to delete a participant from the Participants' list.
It is not possible to delete the organizer of the meeting.
¶ Add/update the Co-Organizer list in Scheduled Meetings
Using the Co-Organizer role in meetings ensures that there is more than one person that can manage important settings in a meeting. It is a very useful role if the organizer will not be present and as a support to the organizer in terms of being able to co-manage.
¶ Assign Co-Organizers
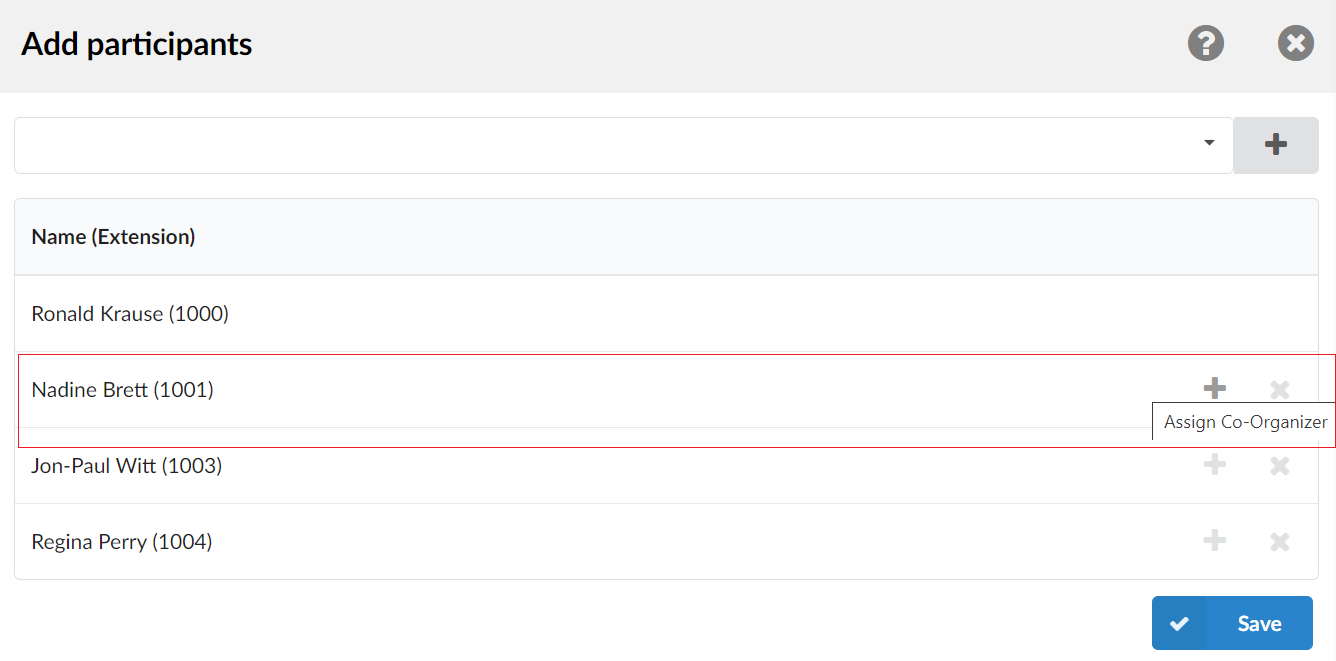
One single meeting can have multiple Co-Organizers. Meeting participants can be promoted to Co-Organizers from the Meeting Participants’ list.
After adding participants to the meeting, participants will be listed in the table below. To assign the Co-Organizer role to a certain participant, press the "+" button related to that participant.
The participants promoted to the Co-Organizers get the Co-Organizer label next to their name. And, at the same time, the option to Assign a Co-Organizer ("+" button) for that participant is changed to an option for removing the Co-Organizer role ("-" button).
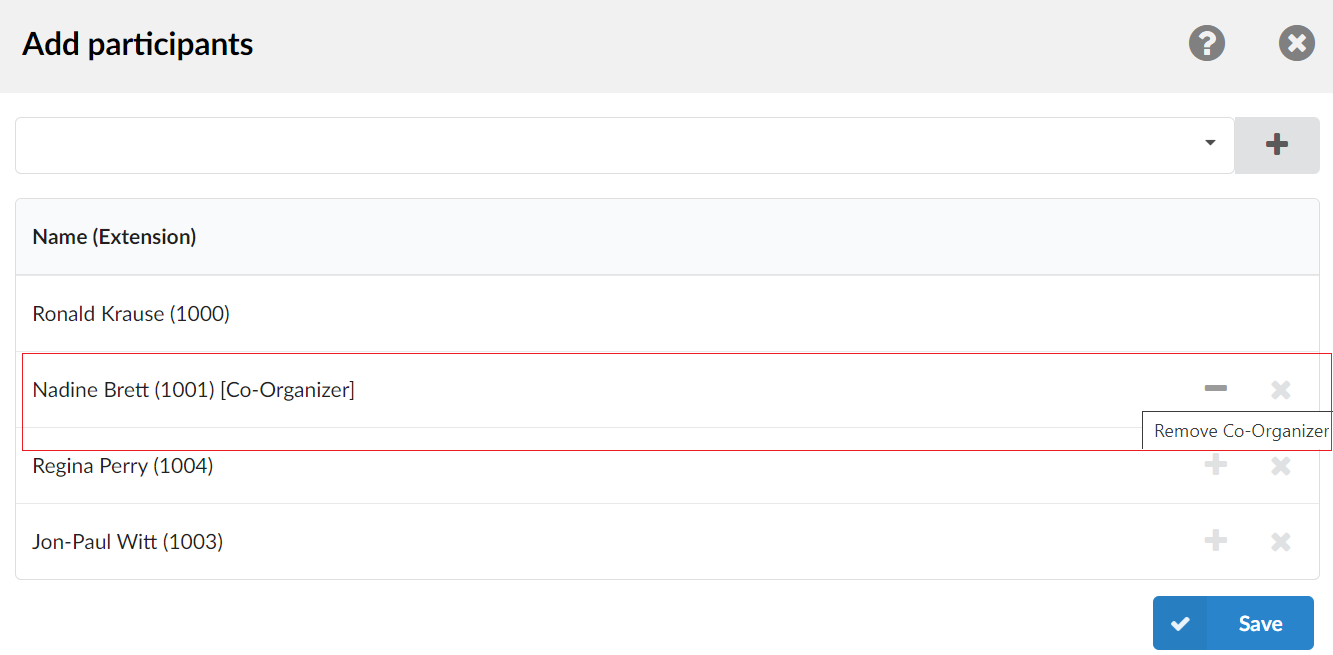
¶ Remove Co-Organizers
So, if you mistakenly promote some participants to be Co-Organizers and want to remove them from Co-Organizers, it is possible by clicking on the "-" button that is in line with the Co-Organizer name. This way, the Co-Organizer role will be removed from that participant, and the option Assign Co-Organizer ("+" button) will be available again, so that you are able to assign the role again to the same participant if needed.
¶ Meetings Tabs
When using the Meetings application, it is possible to see three tabs: "Scheduled", "Recent", and "Data Range". They all display different information on meetings that are planned to be held or have been held.
¶ Scheduled
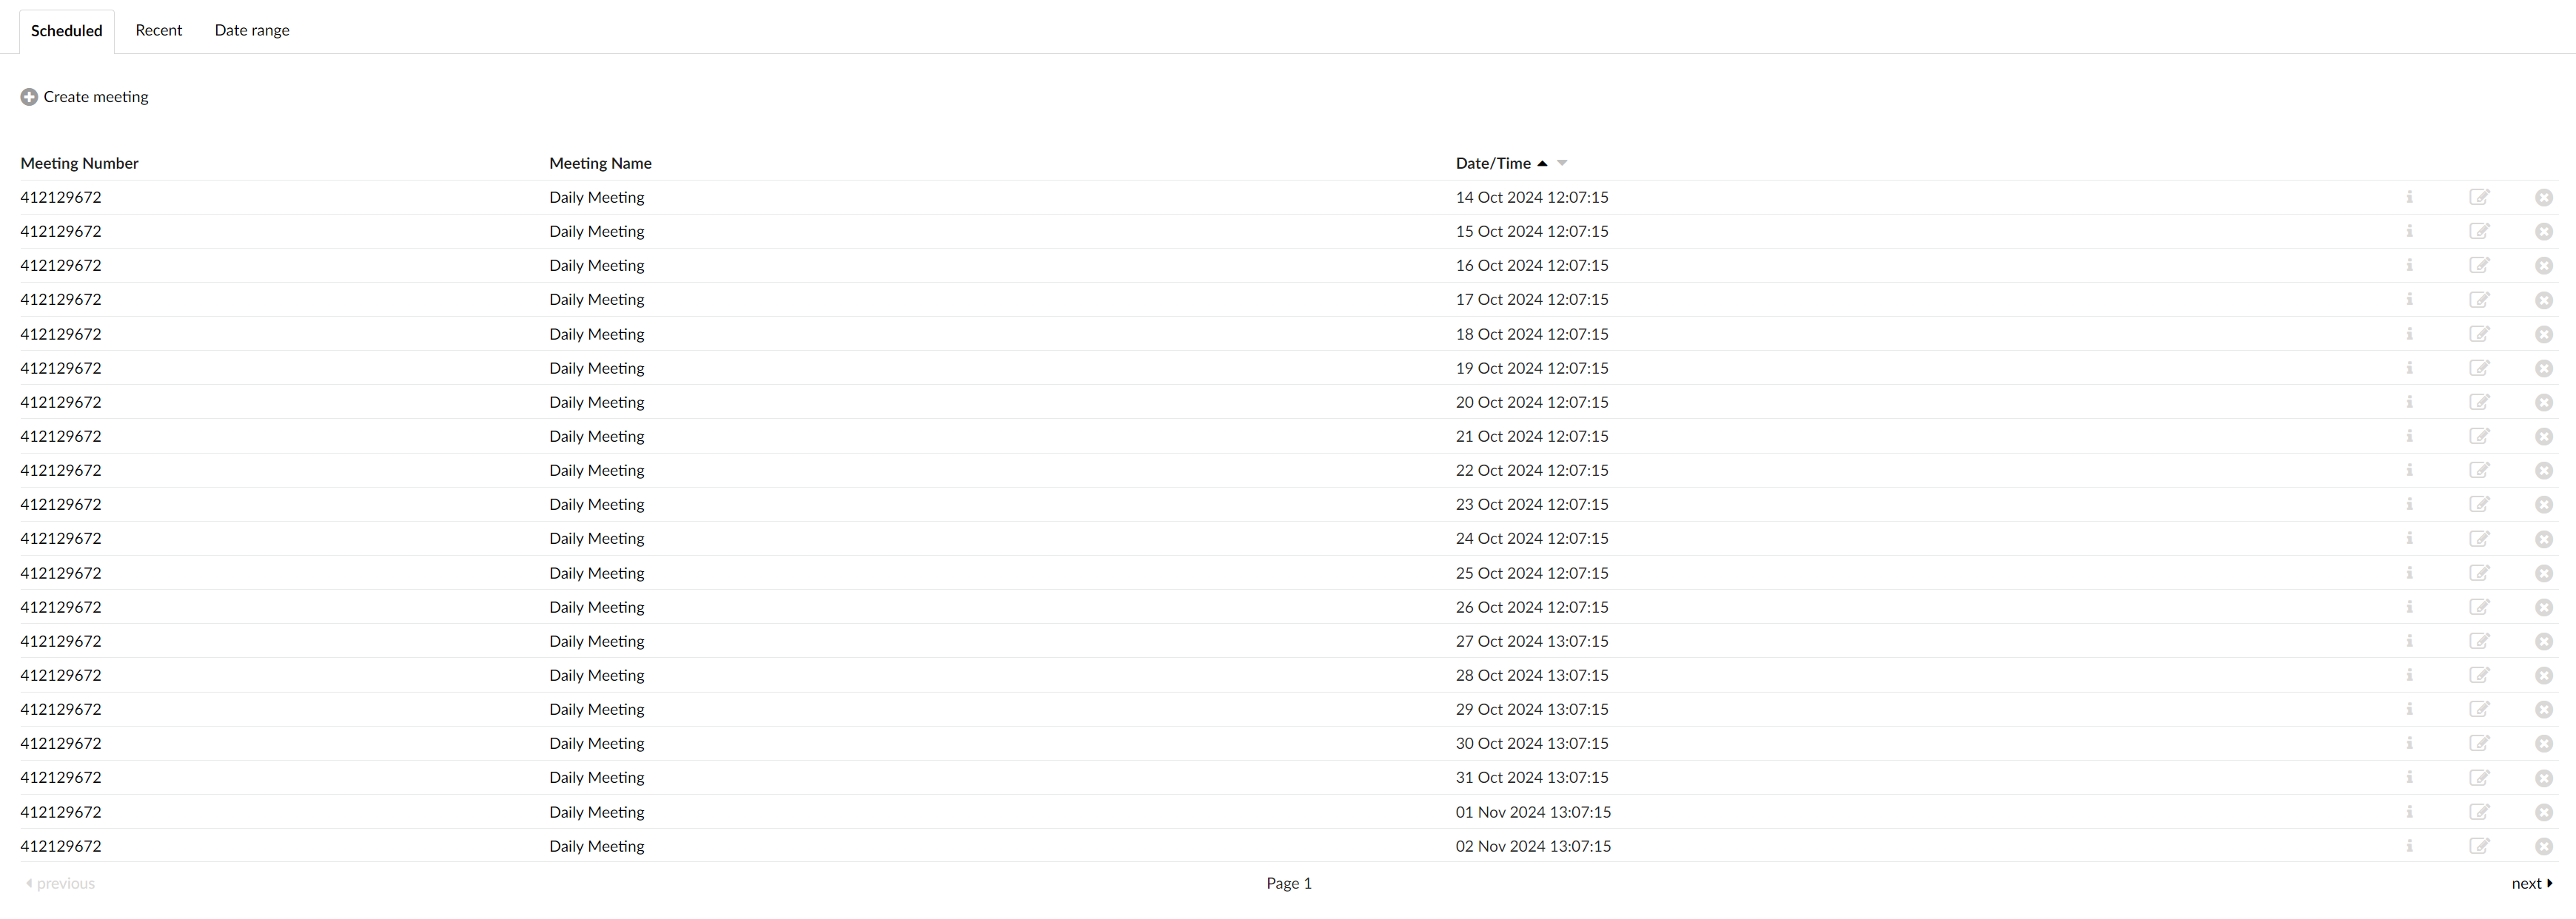
The list displays all scheduled meetings found on the selected Tenant with the following details:
-
 : Click this button to create a meeting.
 -
Meeting Number: A randomly assigned number associated with a scheduled meeting. Unique number on the system with 9 digits. (E.g. 301027545)
Clicking the 9 digit meeting number will prompt users to the Meeting Details page.
- Meeting Name: Name given by the organizer when creating a meeting. (E.g. Daily Meeting)
Clicking the meeting name will prompt users to the Meeting Details page.
- Date/Time: Meeting's date and time. (E.g. 28 Jul 2020 09:49:27)
It displays the date and time of current and planned meetings.
Additional buttons:
-
 : Click this button to see the Meeting Details page.
 -
 : Click this button to update the meeting.
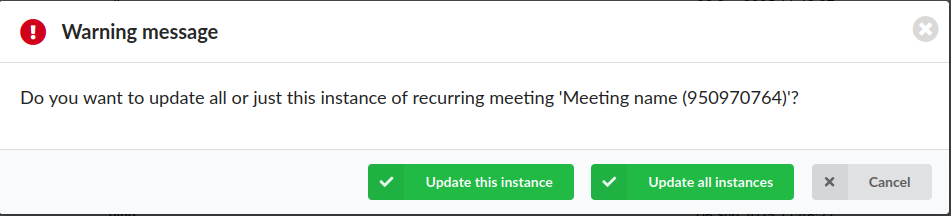
Upon clicking the button, the following warning message will appear: "Do you want to update all or just this instance of recurring meeting?". If Update this instance button is clicked, then any changes made to the meeting will be applied only to this recurring meeting. Otherwise, if users click the Update all instances button, then changes will be applied to all meetings on the list. Please, see the picture below
 : Click this button to delete the meeting.
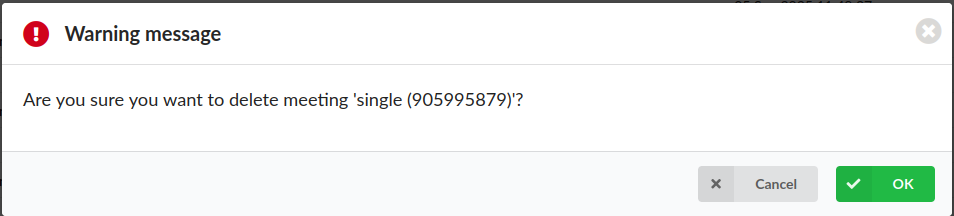
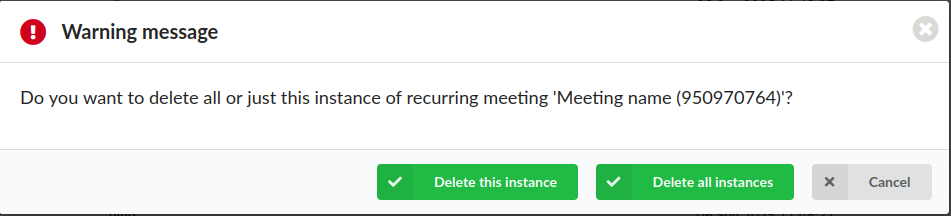
Upon deleting a single meeting, the warning message will appear saying "Are you sure you want to delete this meeting?". However, if a user deletes a recurrent meeting, the following warning message will appear: "Do you want to delete all or just this instance of recurring meeting?". If Delete this instance button is clicked, then only this recurring meeting will be deleted. Otherwise, if users click the Delete all instances button, then all meetings on the list will be removed. Please, see the pictures below
¶ Recent
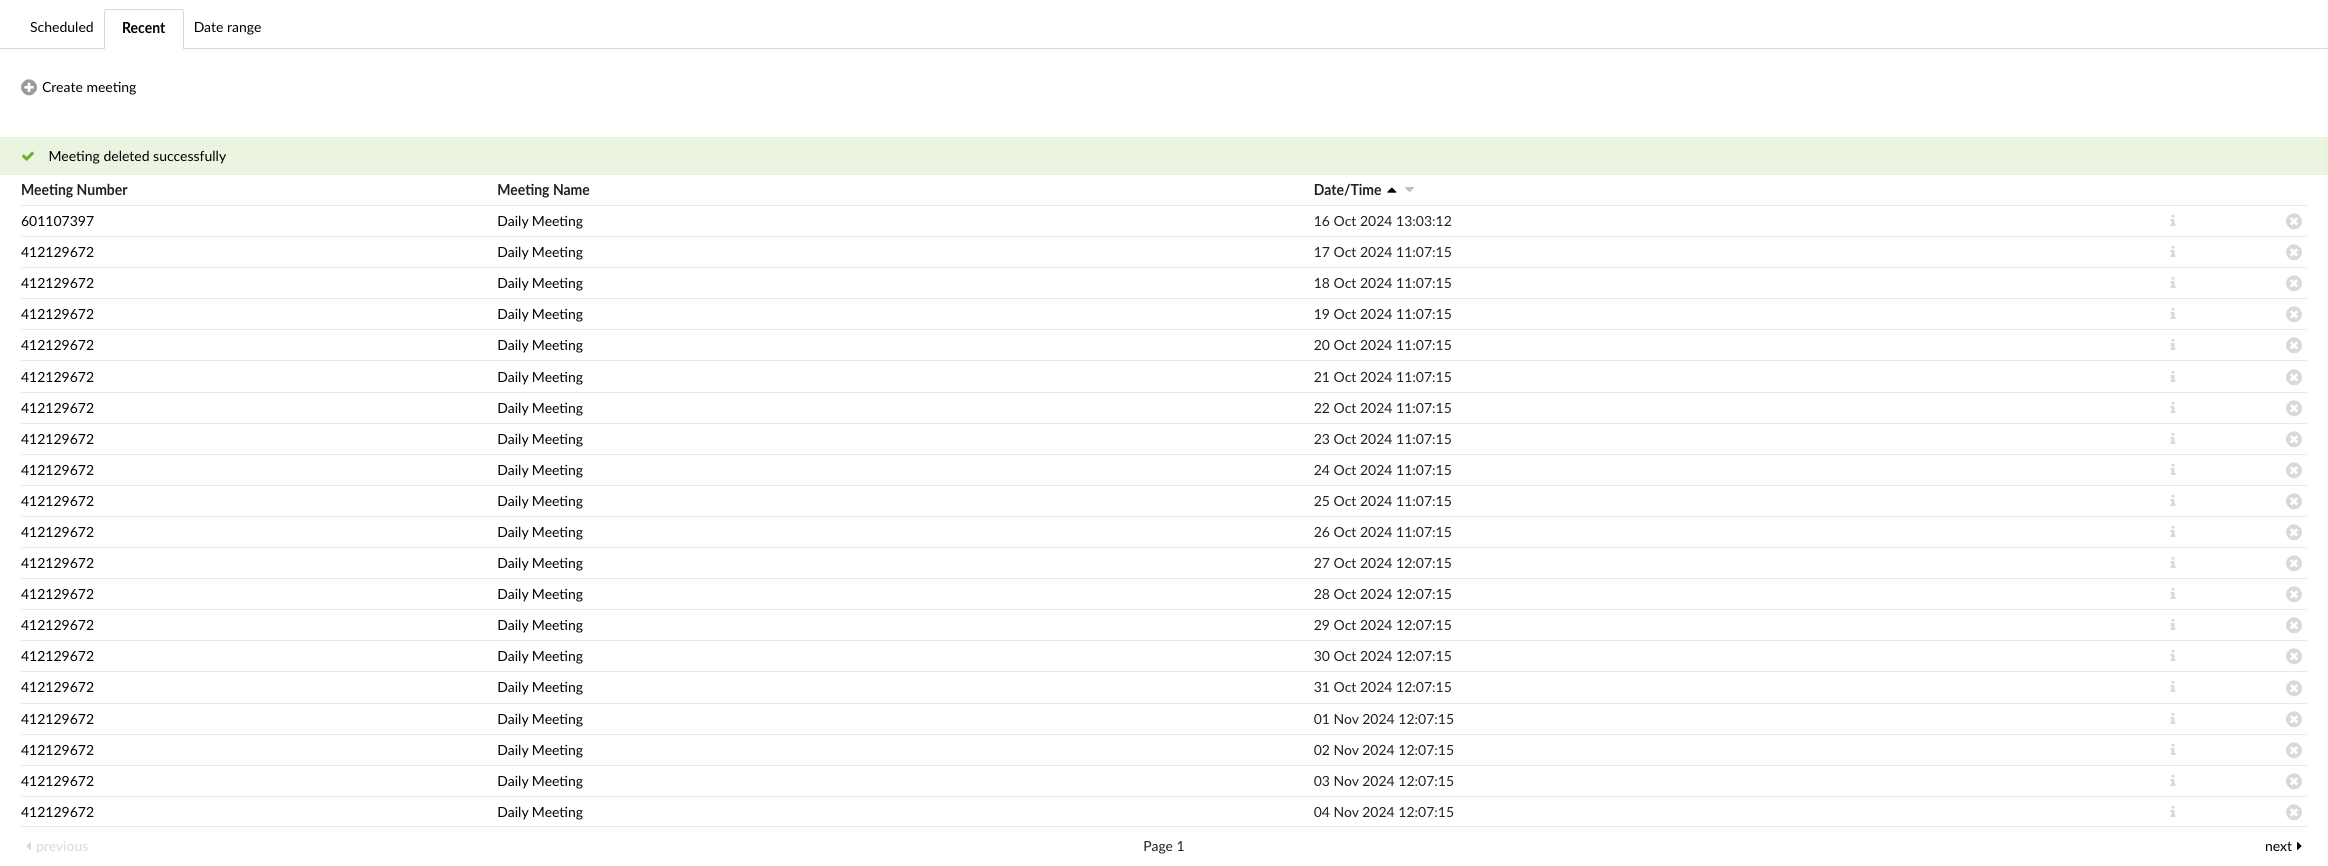
The list displays all recently finished meetings found on the selected Tenant with the following details:
-
: Click this button to create a meeting.
-
Meeting Number: A randomly assigned number associated with a scheduled meeting. Unique number on the system with 9 digits. (E.g. 301027545)
Clicking the 9 digit meeting number will prompt users to the Meeting Details page.
- Meeting Name: Name of a meeting. (E.g. Daily Meeting)
Clicking the meeting name and will prompt users to the Meeting Details page.
- Date/Time: Meeting's date and time. (E.g. 28 Jul 2020 09:49:27)
It displays the date and time of meetings.
Additional buttons:
-
: Click this button to see the "Meeting Details" page.
-
: Click this button to delete the meeting.
Upon deleting a single meeting, the warning message will appear saying "Are you sure you want to delete this meeting?". However, if a user deletes a recurrent meeting, the following warning message will appear: "Do you want to delete all or just this instance of recurring meeting?". If Delete this instance button is clicked, then only this recurring meeting will be deleted. Otherwise, if users click the Delete all instances button, then all meetings on the list will be removed.
If users delete a recurrent meeting on the Recent page by pressing Delete all instances button, all instances of the meeting will be deleted including the ones found on the Scheduled page.
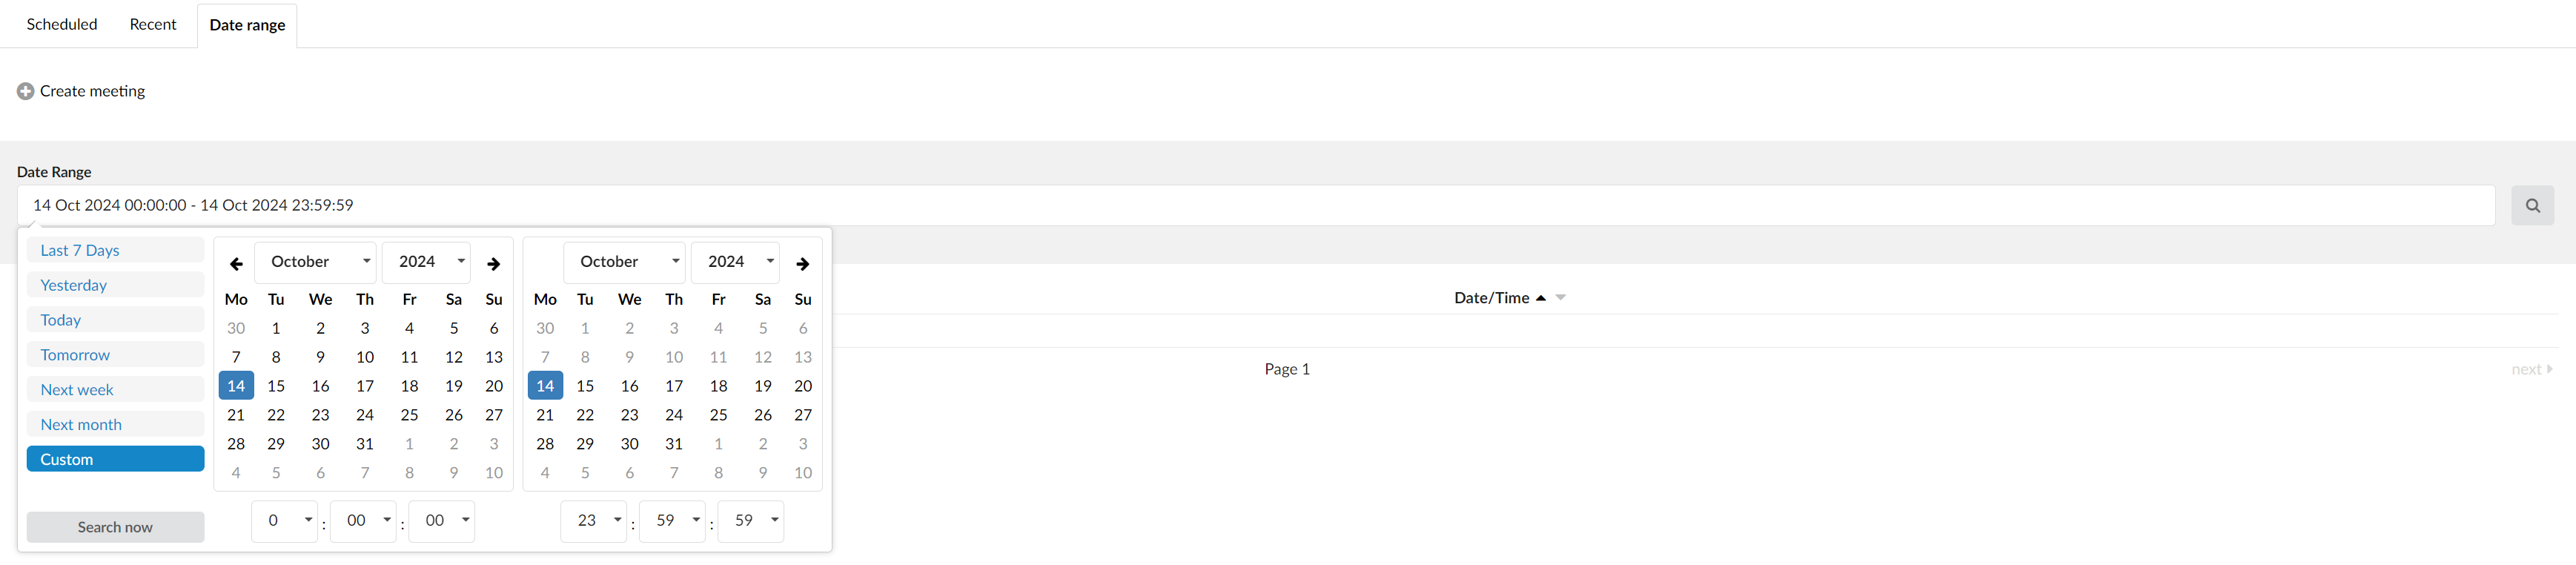
¶ Date Range
The list shows all meetings found on the selected Tenant for the period selected, beginning from the start date and finishing with the end date.
-
: Click this button to create a meeting.
-
Date Range: Select the start and end date by using search/filter. After making any changes to the search filter, click the search icon. (E.g. Click the Date Range button and select the desired dates.)
Lists can be sorted by Date/Time in the ascending or descending order.
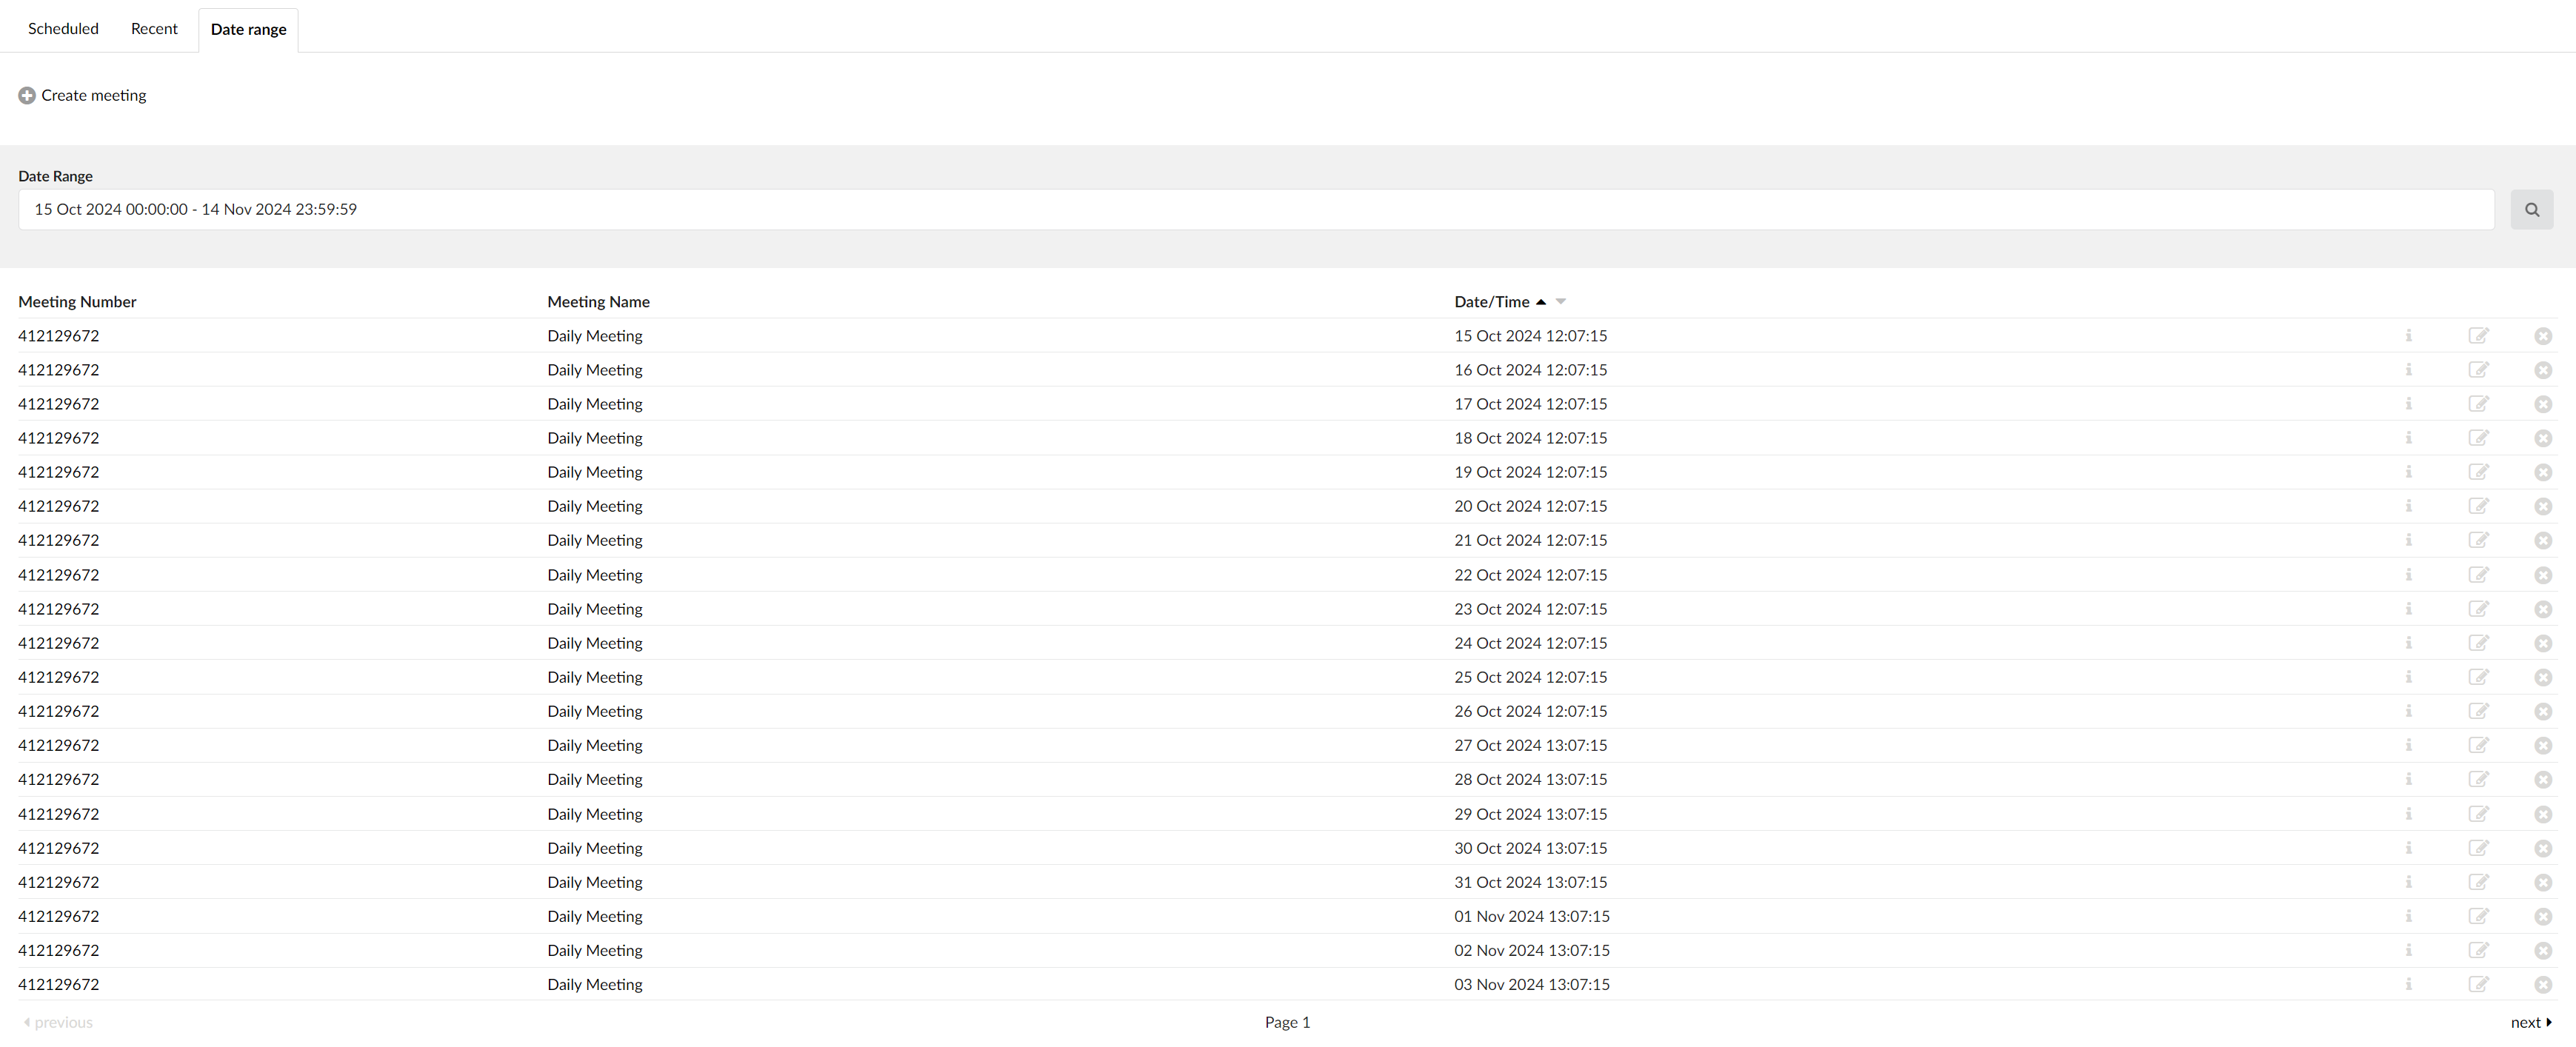
- Meeting Number: A randomly assigned number associated with a scheduled meeting. Unique number on the system with 9 digits. (E.g. 301027545)
Clicking the 9 digit meeting number will prompt users to the Meeting Details page.
- Meeting Name: Name of a meeting. (E.g. Daily Meeting)
Clicking the meeting name will prompt users to the Meeting Details page.
- Date/Time: Meeting's date and time. (E.g. 28 Jul 2020 09:49:27)
It displays the date and time of meetings on this Tenant.
Additional buttons:
-
: Click this button to see the Meeting Details page.
-
: Click this button to update the meeting.
Upon clicking the button, the following warning message will appear: "Do you want to update all or just this instance of recurring meeting?". If Update this instance button is clicked, then any changes made to the meeting will be applied only to this recurring meeting. Otherwise, if users click the Update all instances button, then changes will be applied to all meetings on the list.
Only meetings that have not been held yet can be updated on the Date Range page.
- : Click this button to delete the meeting.
Upon deleting a single meeting, the warning message will appear saying "Are you sure you want to delete this meeting?". However, if a user deletes a recurrent meeting, the following warning message will appear: "Do you want to delete all or just this instance of recurring meeting?". If Delete this instance button is clicked, then only this recurring meeting will be deleted. Otherwise, if users click the Delete all instances button, then all meetings on the list will be removed.
¶ Meeting Details
To open the Meeting Details page, users can click Meeting Name, Meeting Number, or the Info button.
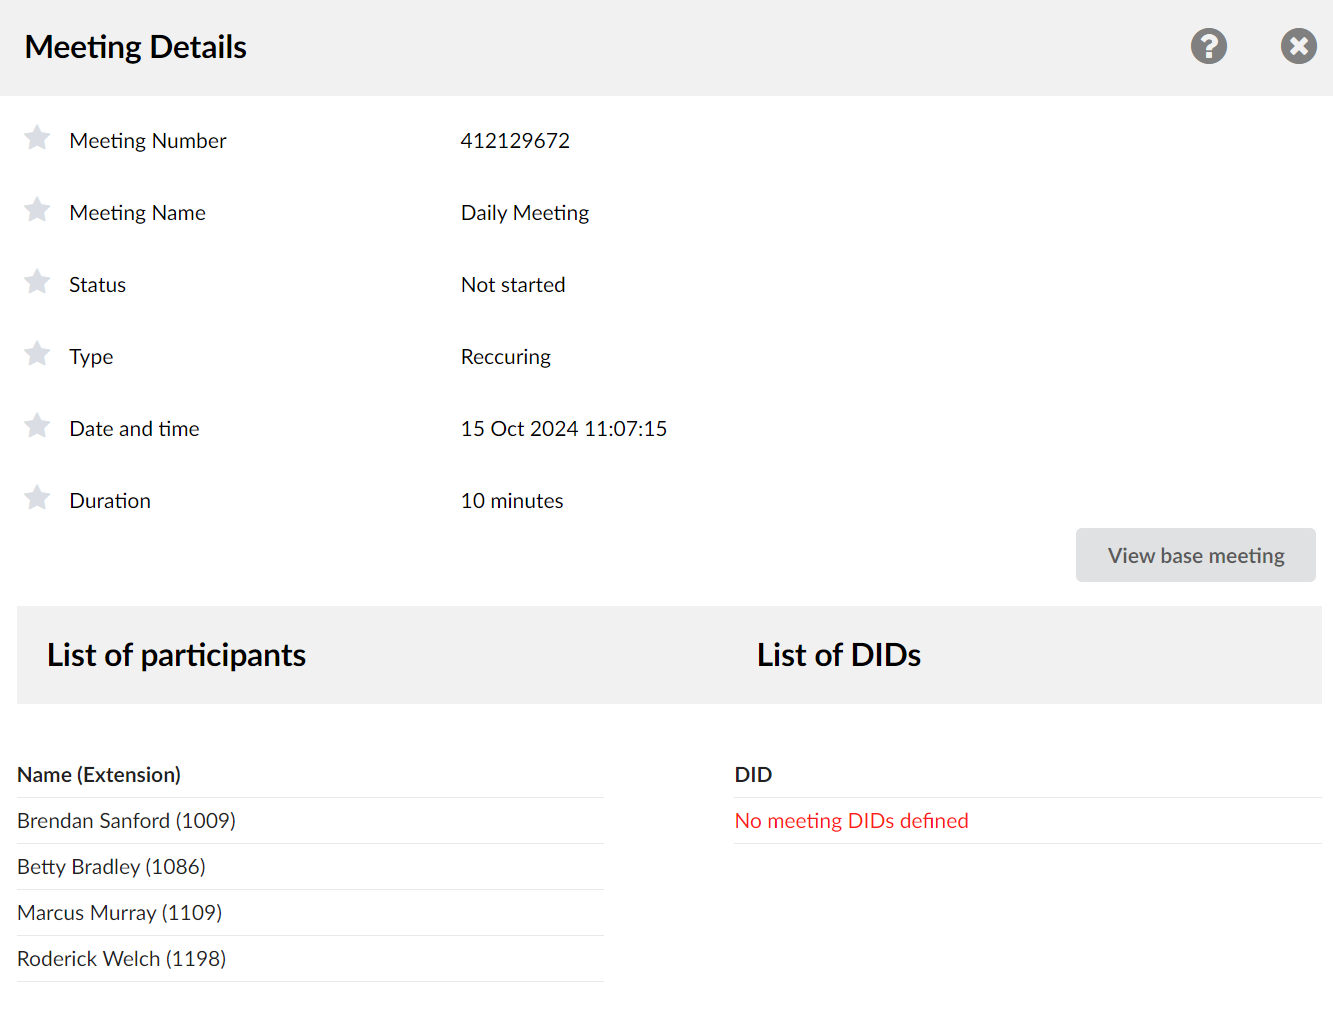
If the meeting is recurrent, the View base meeting button will be accessible.
The Meeting Details page contains the following information:
- Meeting Number: A randomly assigned number associated with a scheduled meeting. Unique number on the system with 9 digits. (E.g. 301027545)
- Meeting Name: Name given by the organizer when creating a Meeting. (E.g. Daily Meeting)
- Meeting Description: Provides the user to describe a meeting in a few sentences. (E.g. Revision) [(a-z)(0-9)]
- Status: Shows the meeting's status.
- Status can be one of the following:
- Not started: A meeting has not been started yet.
- In progress: A meeting has already been started.
- Ended: A meeting has been held.
- Status can be one of the following:
- Type: This field will be displayed only for the Recurring meetings. (E.g. Type Recurring)
- Date/Time: Displays the date and time of the meeting.
- Duration: Time duration of a meeting. (E.g. 10 minutes)
- Organizer: Name of the meeting's organizer and their Extension number (Only for recurring meetings). (E.g. Ronald Krause (1000))
¶ List of Participants
The Meeting Details page allows users to see the list of meeting's participants as well as the list of DIDs.
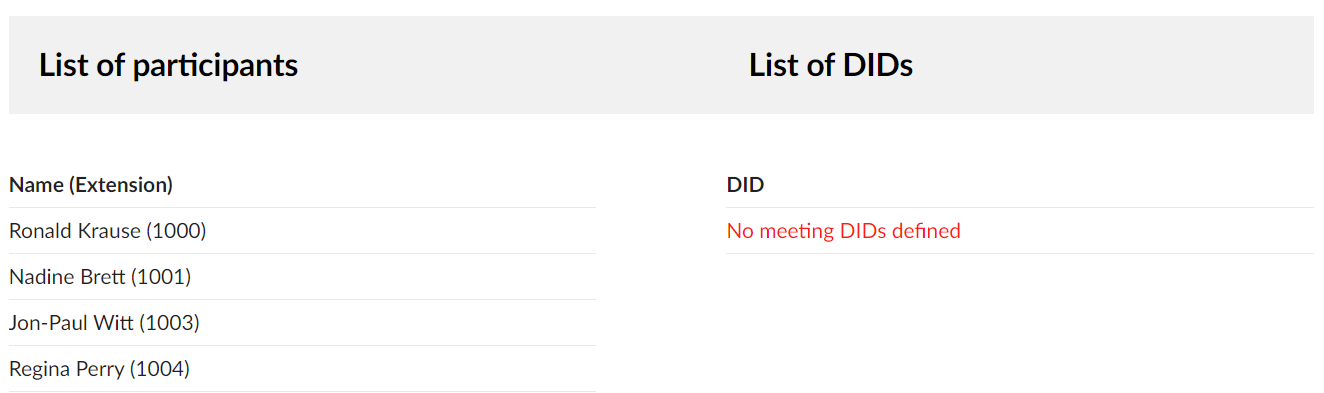
- List of Participants: Shows Name and Extension of every participant in a meeting. (E.g. Ronald Krause (1000))
For recent meetings, it is possible to see participants' Join and leave time.
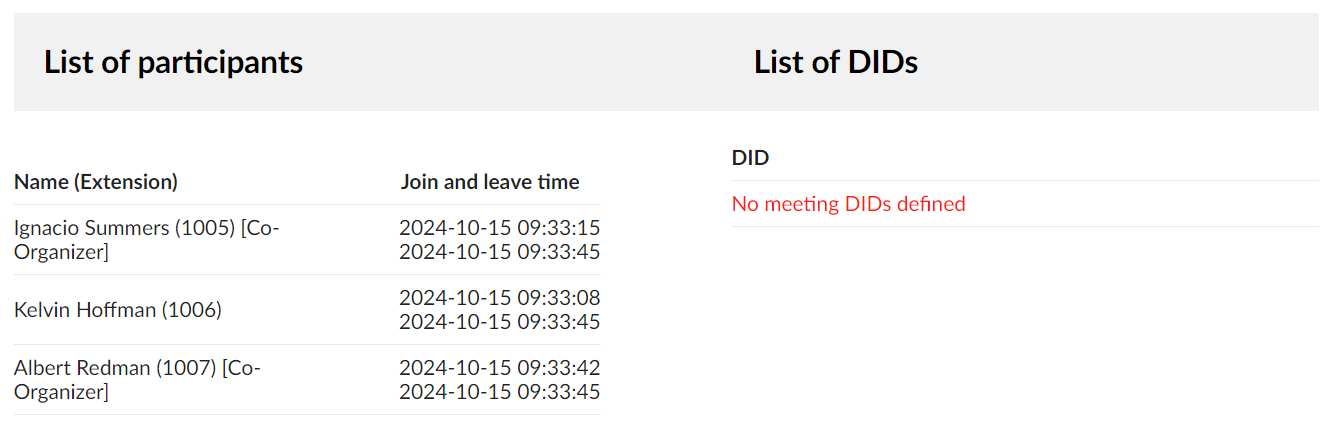
- List of DIDs: Shows the list of DIDs found in the meeting. (E.g. No meeting DIDs defined)
¶ View Base Meeting
 : Click to view base meeting details. (E.g. Once clicked, users will be prompted to a different page. This page shares the same information found on the Meeting Details page, however, from here, a user cannot manage participants.)
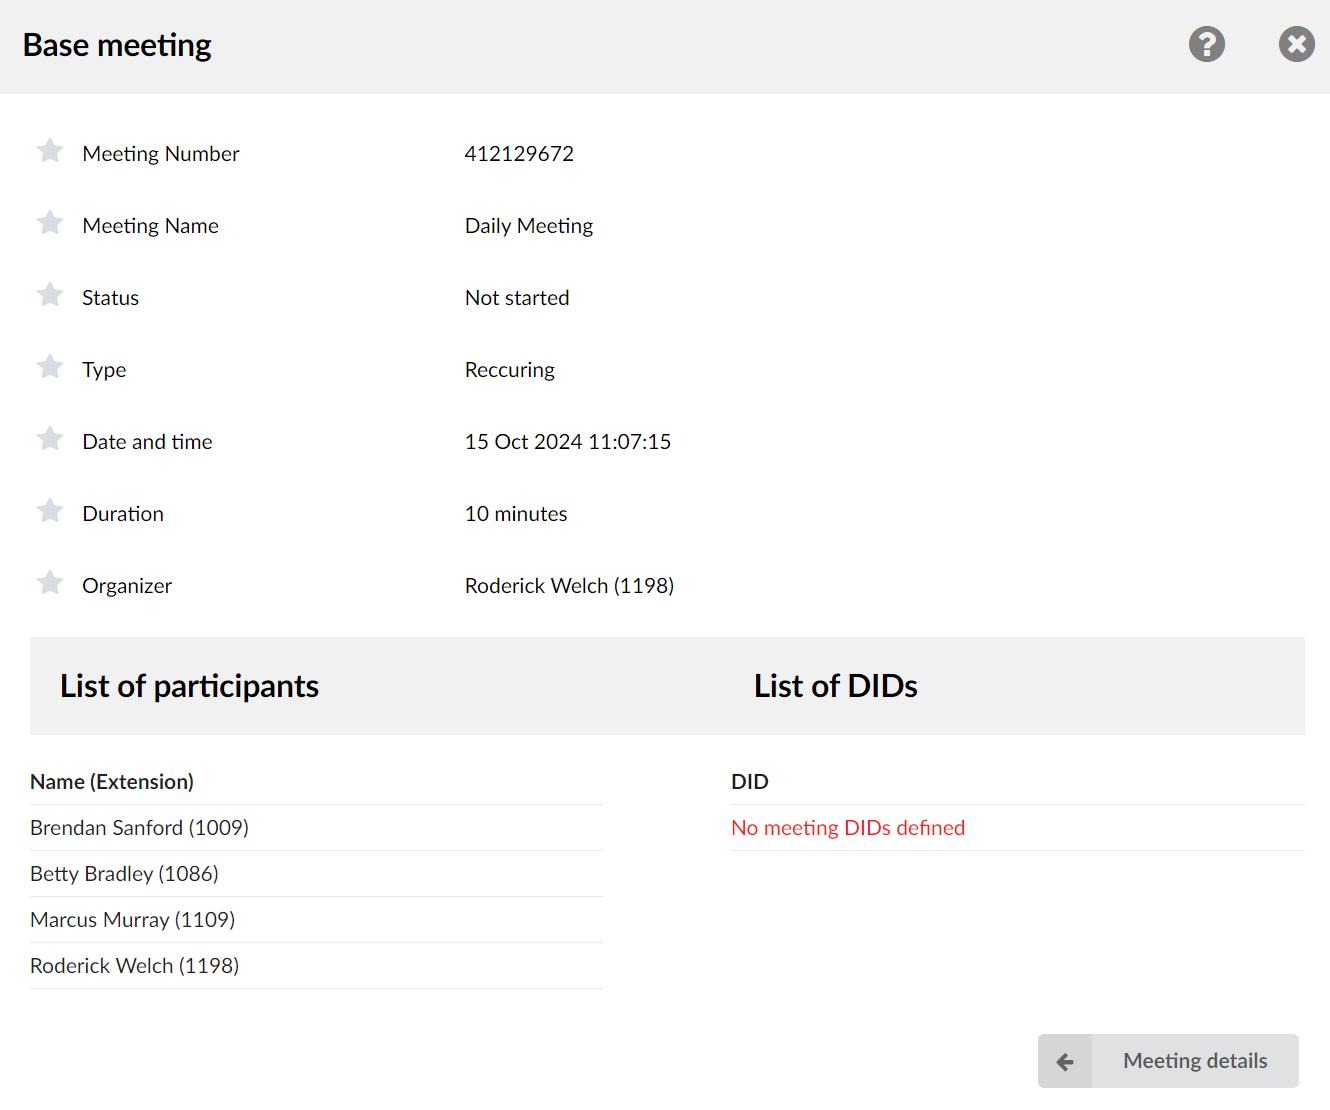
The View base meeting button is visible only if a meeting is recurrent.
 : Click the button to return to the Meeting Details page.
¶ Licensing
In PBXware 6.7 we are introducing a new page in the Meeting section, named Licensing. The licensing page enables a PBXware administrator to easily assign Meeting edition permissions to one or more extensions on a system from a central point. This feature should severely speed up the workflow of assigning a large volume of meeting licenses.
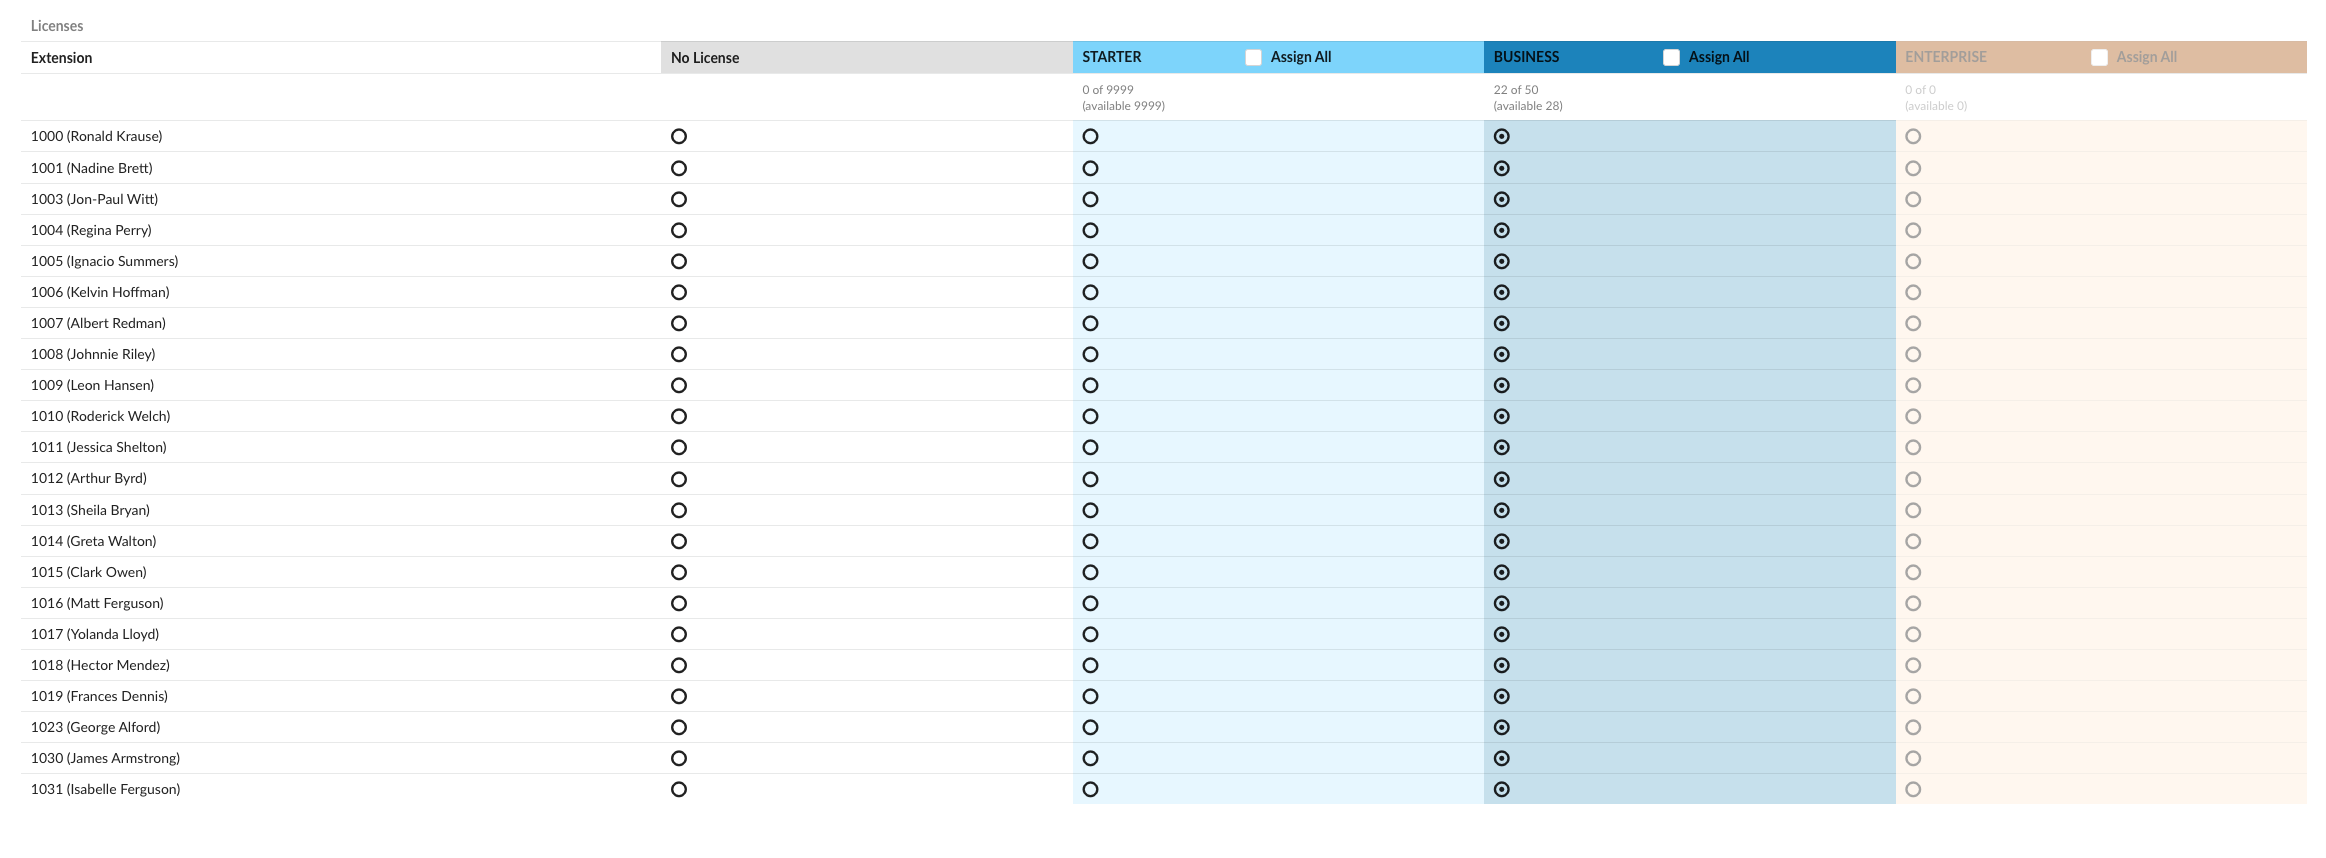
The status bar at the top of the page provides information about the edition and current status of assigned meeting licenses.

Assigning licenses is straightforward. To assign a specific edition license to an extension, the administrator simply needs to click on the corresponding edition button associated with the extension number to which the edition is to be assigned.
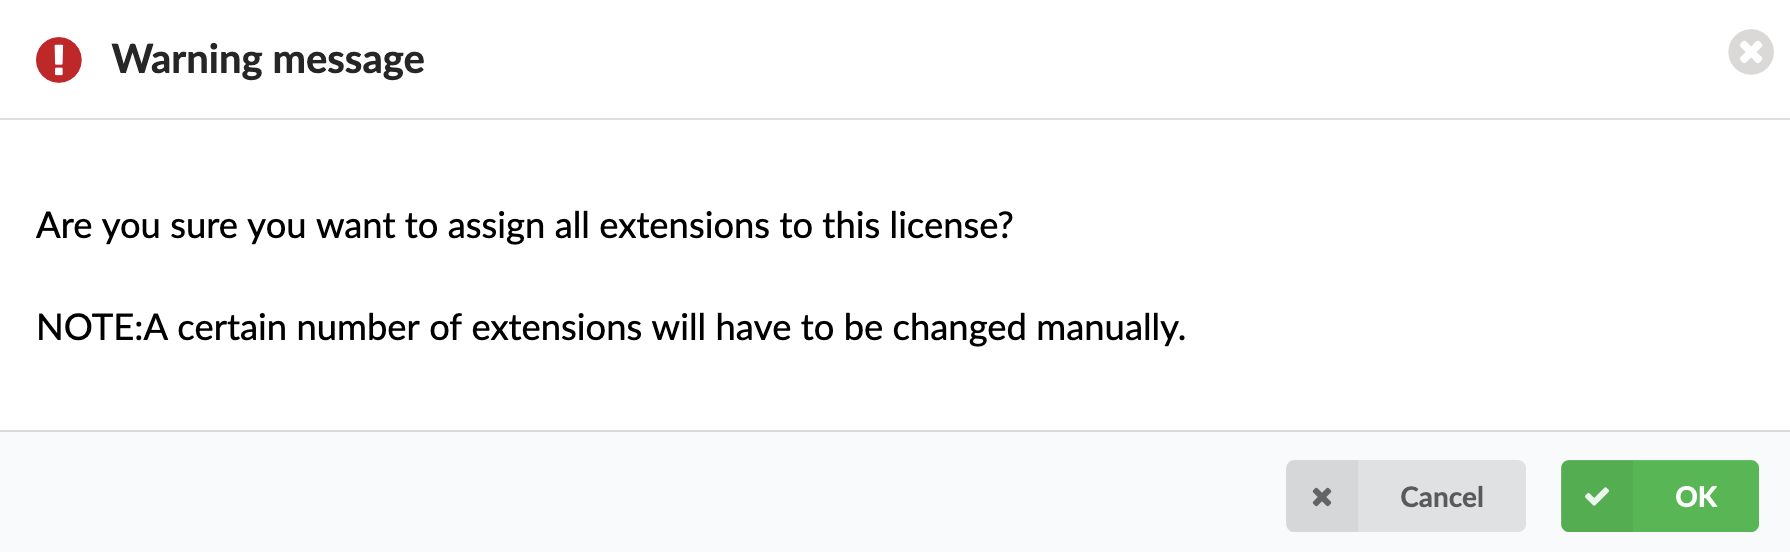
In addition to manually assigning a preferred edition to one or more extensions, the administrator can also select the Assign All checkbox, located next to the edition name, to assign a specific edition to all extensions on a tenant. When the checkbox next to the Assign All option is selected, a confirmation dialog will pop up asking for the confirmation.
¶ Meeting Licensing Changes (v6.7)
With the update of our products to v6.7, a new version of BRM for Meeting pricing will be released, affecting all Meeting users regardless of their software version.
All current Meeting users will be automatically assigned Starter packages for all the extensions in the tenant with a Meeting license, which includes the following gloCOM editions: Business, CC, and Supervisor. Office edition does not have Meeting licenses.
So, all current Meeting users (regardless of whether they have upgraded to v6.7 or stayed on v6.6 and lower) will still have Meeting. It will be free but at a limited capacity (Starter limitation).
In order to buy a Business package, users will have to upgrade to v6.7 of PBXware.
The limitations of the Meeting packages are as follows:
| Licenses | Starter (free) | Business |
|---|---|---|
| Max no. of participants | 10 | 100 |
| Max duration of the meeting | 45 min | 240 min |
| Max. no. of concurrent meetings on a tenant | 1 for all starter licenses | X = no. of licenses |
¶ Settings
¶ Daily Digest
Daily digest is used for setting a reminder about receiving any daily e-mails for meetings on a specific Tenant.
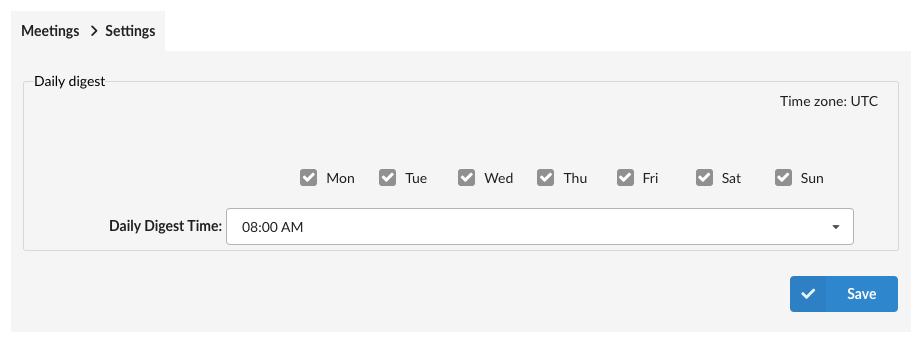
- Time Zone: Tenant's time zone.
- Week Days: Specifies days in a week when e-mails will be sent. (E.g. Mon, Tue, Wed, Thu, Fri)
- Daily Digest Time: Select time for receiving daily e-mails. (E.g. 08:00 AM)
Time for receiving meetings' daily e-mails is saved in UTC (Universal Time Coordinated). The administrator will see the time set according to their time zone. It can be set per Extension.