¶ Introduction
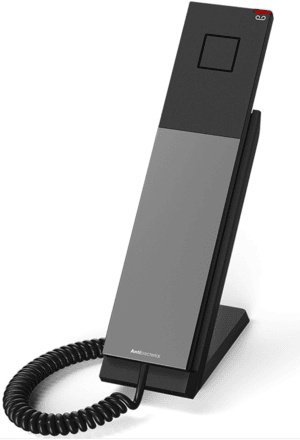
This Configuration Guide is written as general guide on how to configure the Snom phone model HD300 to work with PBXware v7.6.4 and v8.1.
¶ Requirements
¶ Identifying the Phone Model
To ensure a successful registration, first confirm that you have the correct Snom phone model.
The model information can be found on the back of your Snom phone. This guide is designed for the Snom HD300. Other models may require different configuration steps, so verifying you have the HD300 ensures proper setup.
¶ Phone Firmware
- Ensure that the phone is running firmware version 1.0.5.0.
- To verify the firmware version, open a web browser and enter the IP address of the Snom device to access the web administration interface. Example:
http://192.168.1.22 - In the left navigation menu, select System Information.
- Verify the installed firmware version in the Firmware Version field.
¶ DHCP Server
Fully configured and operational DHCP server.
¶ PBXware Version
PBXware version 8.1
To check the PBXware version:
- Log in to PBXware
- Navigate to Settings: About.
At the top of the About page, you will see a code block similar to this:
PBXware Edition: Multi-Tenant, Release: 8.1 (387597b7), Running: 18.15.0.-gc-b47edc45, PBXware Proxy v8 (62b7bcd), API: 8, libmemcached version: 1.0.18
The Release field indicates the exact version of your PBXware.
¶ Installation
This section describes how to connect the device to power and the network, and how to restore the device to its factory default settings.
Topics covered:
- Power over Ethernet (PoE)
- Factory Settings
¶ Power over Ethernet (PoE)
The device supports Power over Ethernet (PoE), allowing both power and network connectivity to be provided through a single Ethernet cable.
- Connect an Ethernet cable between the device's Internet port and an available PoE-enabled port on the network switch or router.
- The PoE connection supplies both electrical power and network access to the device.
¶ Find the Phone's IP Address
To access the device web interface, first identify the IP address assigned to the Snom HD300.
- Lift the handset while the phone is idle.
- Dial **** to access the Voice Menu.
- Press 1 for Network Configuration.
- Press 2 for IP Address.
The phone will announce its current IP address.
¶ Factory Reset the Phone
This step is not required for brand-new, out-of-the-box phones. However, if the phone has been previously used, performing a factory reset is recommended.
To restore the Snom HD300 to factory default settings:
- Open a web browser and enter the phone's IP address to access the web administration interface. Example:
http://192.168.1.22. - Log in using administrator credentials.
- In the left navigation menu, select Advanced.
- Open the Update tab.
- Click Reset and confirm the action.
- The phone will restore its factory default settings and automatically reboot.
- Wait for the reboot process to complete before proceeding.
Note: Do not disconnect power or network connectivity while the factory reset process is in progress.
¶ Registering Phone
This section describes how to identify the Snom phone model, requirements that must be met, and how to register the phone using manual configuration or auto-provisioning.
The following topics are covered:
- Manual Configuration
- Auto Provisioning
¶ Manual Configuration
This section describes how to set the UAD settings, create a PBXware Extension, and register the phone.
The following topics are covered:
- UAD Settings
- Creating an Extension
- Registering the Phone
¶ UAD Settings
1. Log in to PBXware's web administration interface
- Open a new browser window and enter the PBXware IP address to access the administration login screen. Example:
http://192.168.1.10 - Log in to PBXware with your e-mail address and password.
2. UAD settings
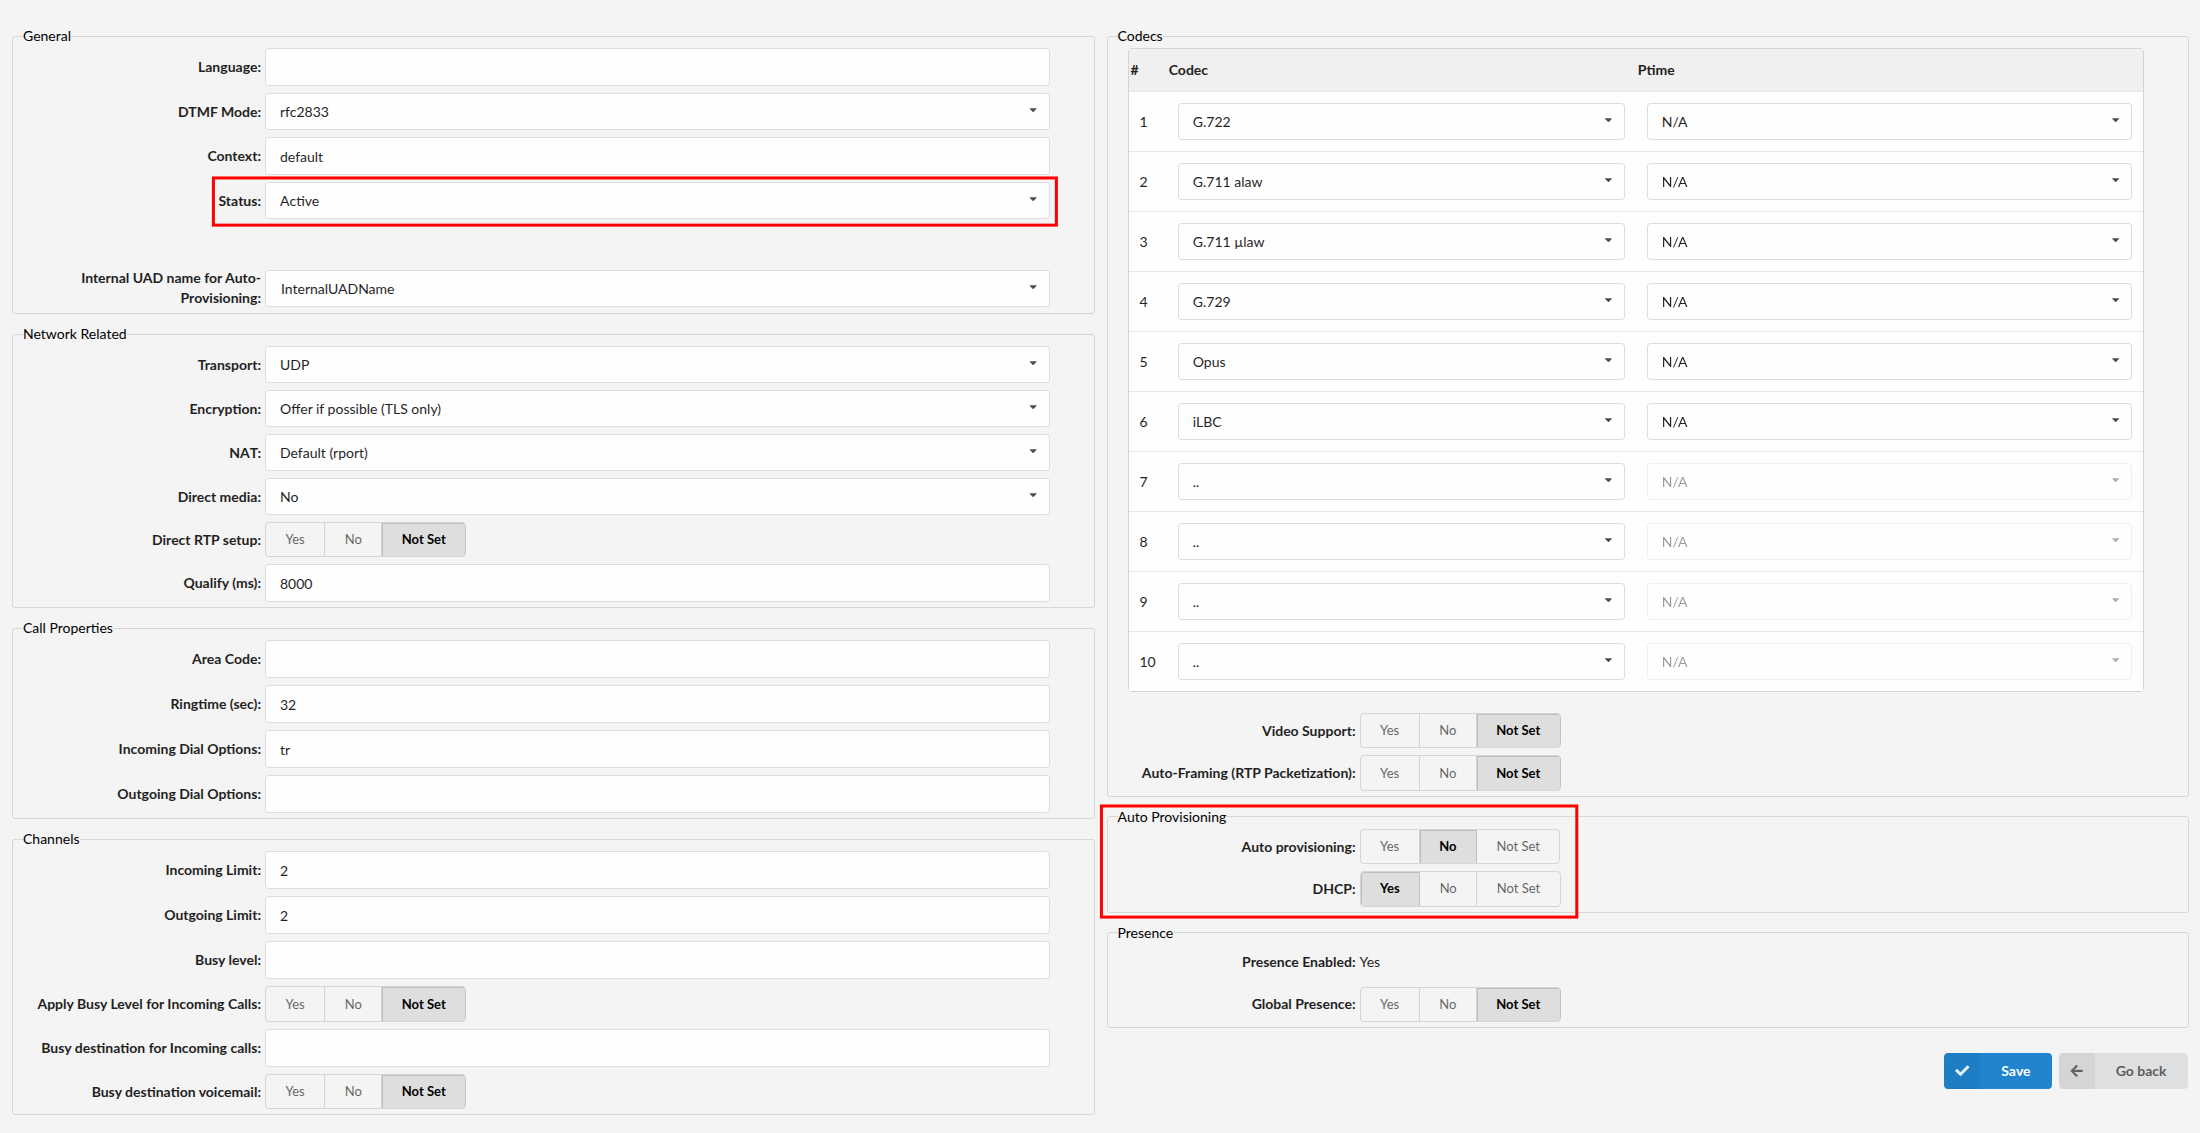
- Navigate to Settings > UAD.
- Ensure that the Snom HD300 UAD is enabled. To check the UAD status, click the Edit icon corresponding to the Snom HD300 phone.
- Verify that Status is set to Active, Auto provisioning is set to No, and DHCP is set to Yes.
- Click the Save button.
¶ Creating extension
1. Add Extension
-
Navigate to Extensions, then click Add Extension.
-
The standard options window will open.
-
Select the Snom HD300 phone model from the UAD dropdown menu.
-
Select the Location: Local or Remote.
- Local is for all Extensions registered on the LAN
- Remote is for all Extensions registered from remote networks, WAN, Internet etc.. -
Click the Next step button.
2. Extension Values
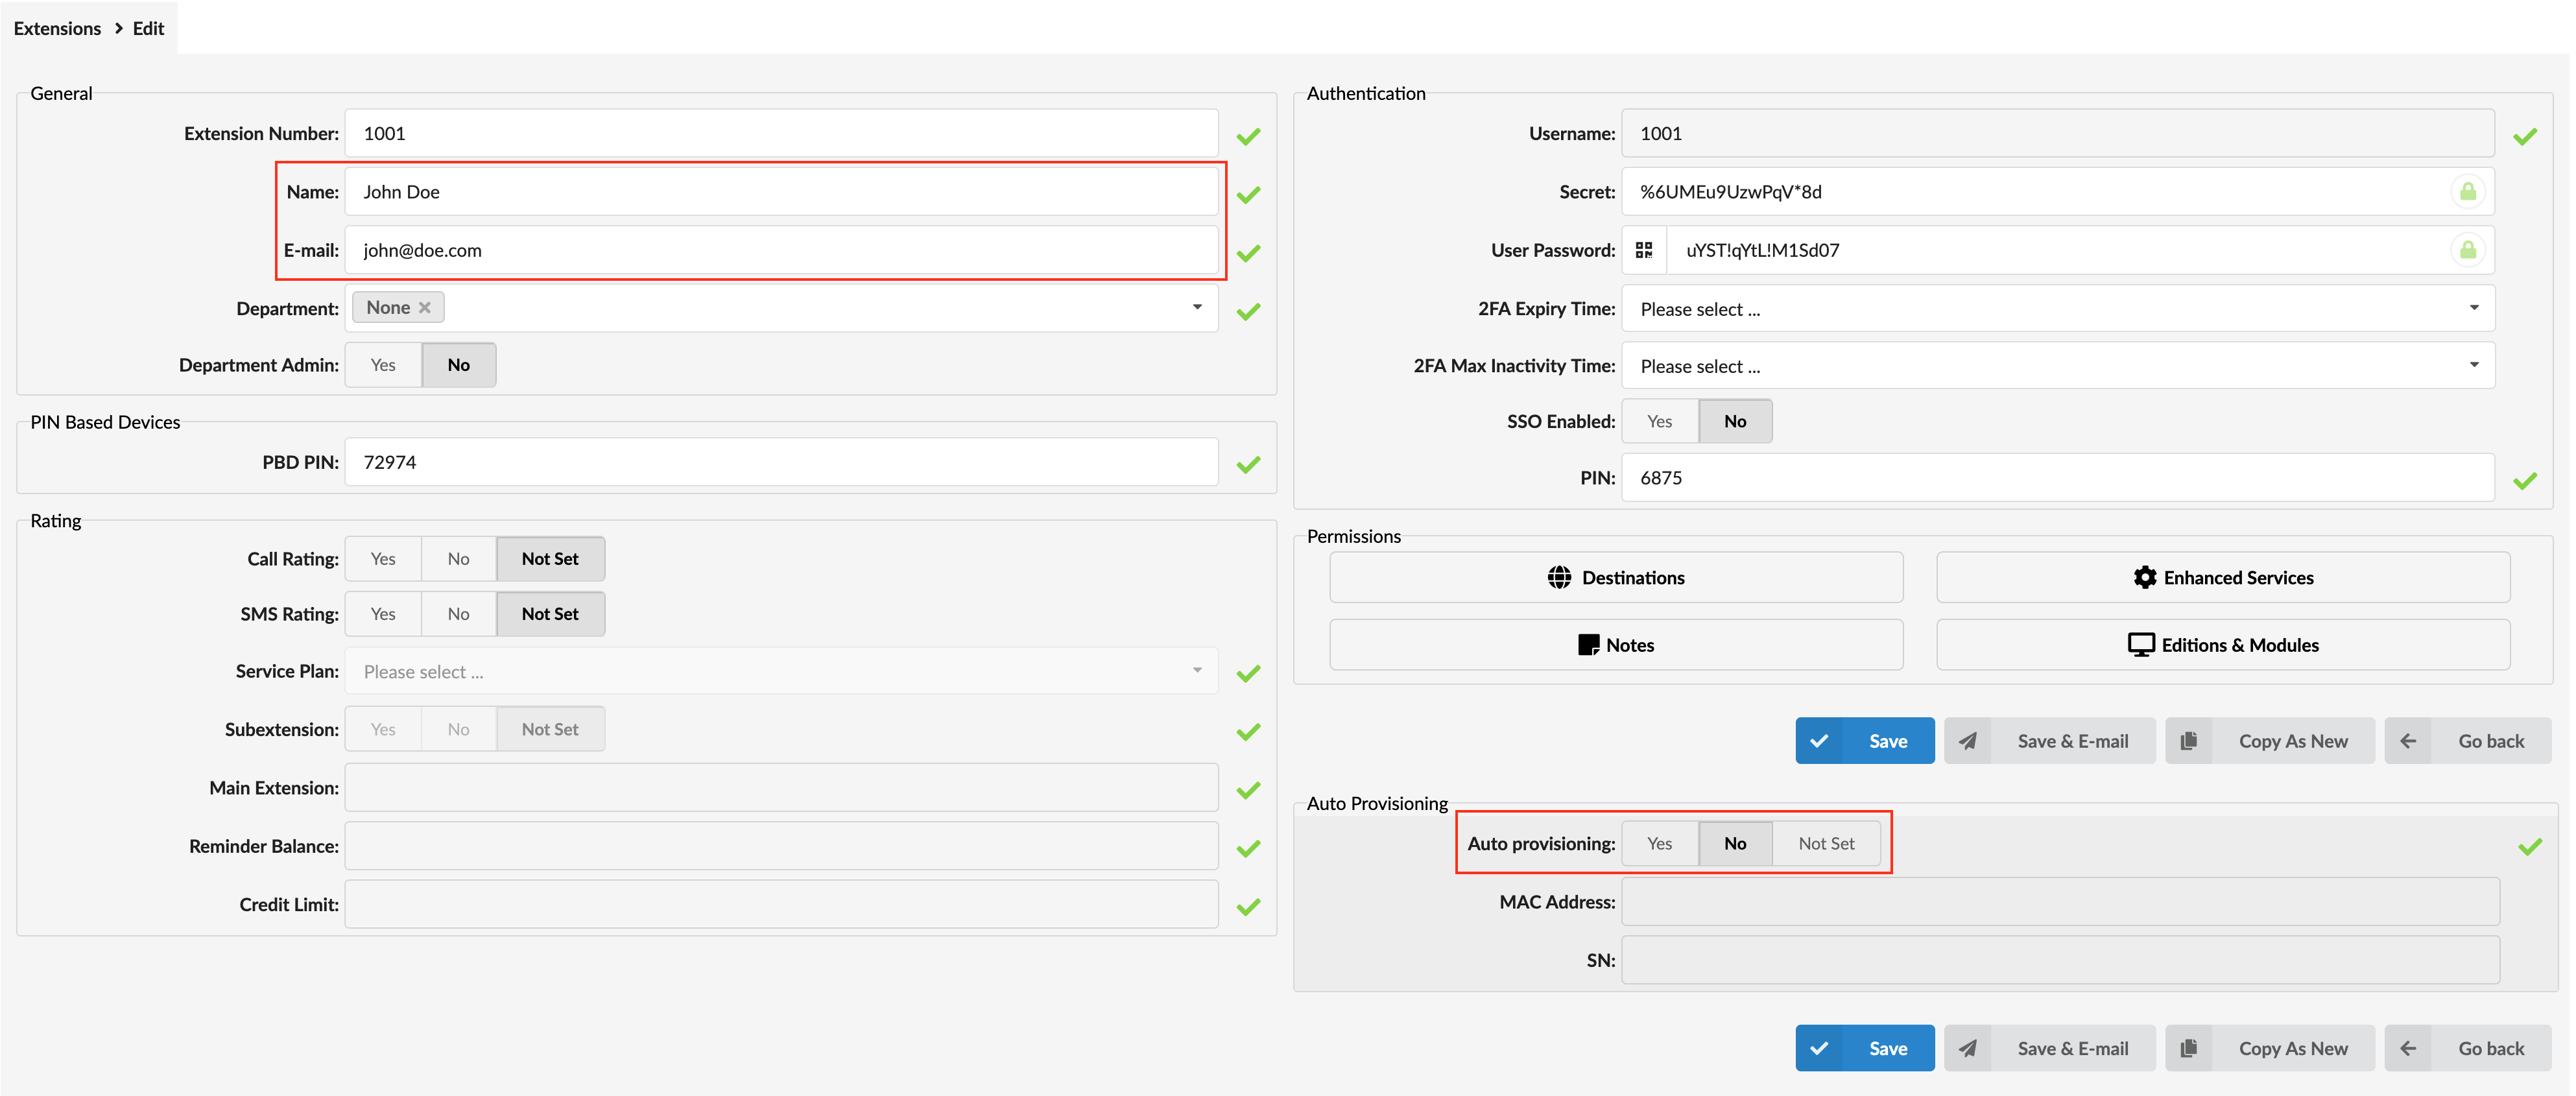
Enter values into the required field text boxes.
REQUIRED FIELDS:
- Name
Enter a name for the extension being created. Example: John Smith.
Enter the e-mail address associated with this extension. This e-mail address will receive all system notification messages. Example: john.smith@bicomsystems.com
- Click on the Save button.
¶ Registering the Phone
This section describes how to register the Snom phone using Hostname or IP Address.
¶ Hostname or IP Address
- Log in to the phone's web administration interface.
- Open a new browser window and enter the phone's IP address in order to access the phone's web administration interface login screen. Example:
http://192.168.1.22 - Click on Identity 1 in the left navigation menu.
- Enter the following details in the respective fields.
REQUIRED FIELDS:
- Identity Active
Make sure the On is selected.
- Display Name
PBXware extension name. Example: John
- Account
PBXware extension number. Example: 103
- Password
The Secret of the extension as received in the e-mail associated with this extension. Example: _%Z4M3*Ts9y7. A password is generated automatically for each newly created extension.
- Registrar
Enter the Hostname or IP Address of the PBXware.
-
Example for Hostname:
voip.bicomsystems.com -
Example for IP Address:
192.168.1.10 -
Click on the Apply button.
-
You'll have to wait sometime prior for the device to reboot. If everything is done as above described, you should have successfully registered your phone to PBXware.
-
Dial *123 to verify registration.
¶ Auto Provisioning
This section describes how to set UAD settings, create a PBXware Extension, and register the phone using DHCP or Static IP address.
The following topics are covered:
- UAD Settings
- Creating an Extension
- Registering the Phone
¶ UAD Settings
1. Log in to PBXware's web administration interface
- Open a browser window and enter the PBXware IP address to access the web administration login screen. Example:
http://192.168.1.10 - Log in to PBXware with your e-mail address and password
2. UAD settings
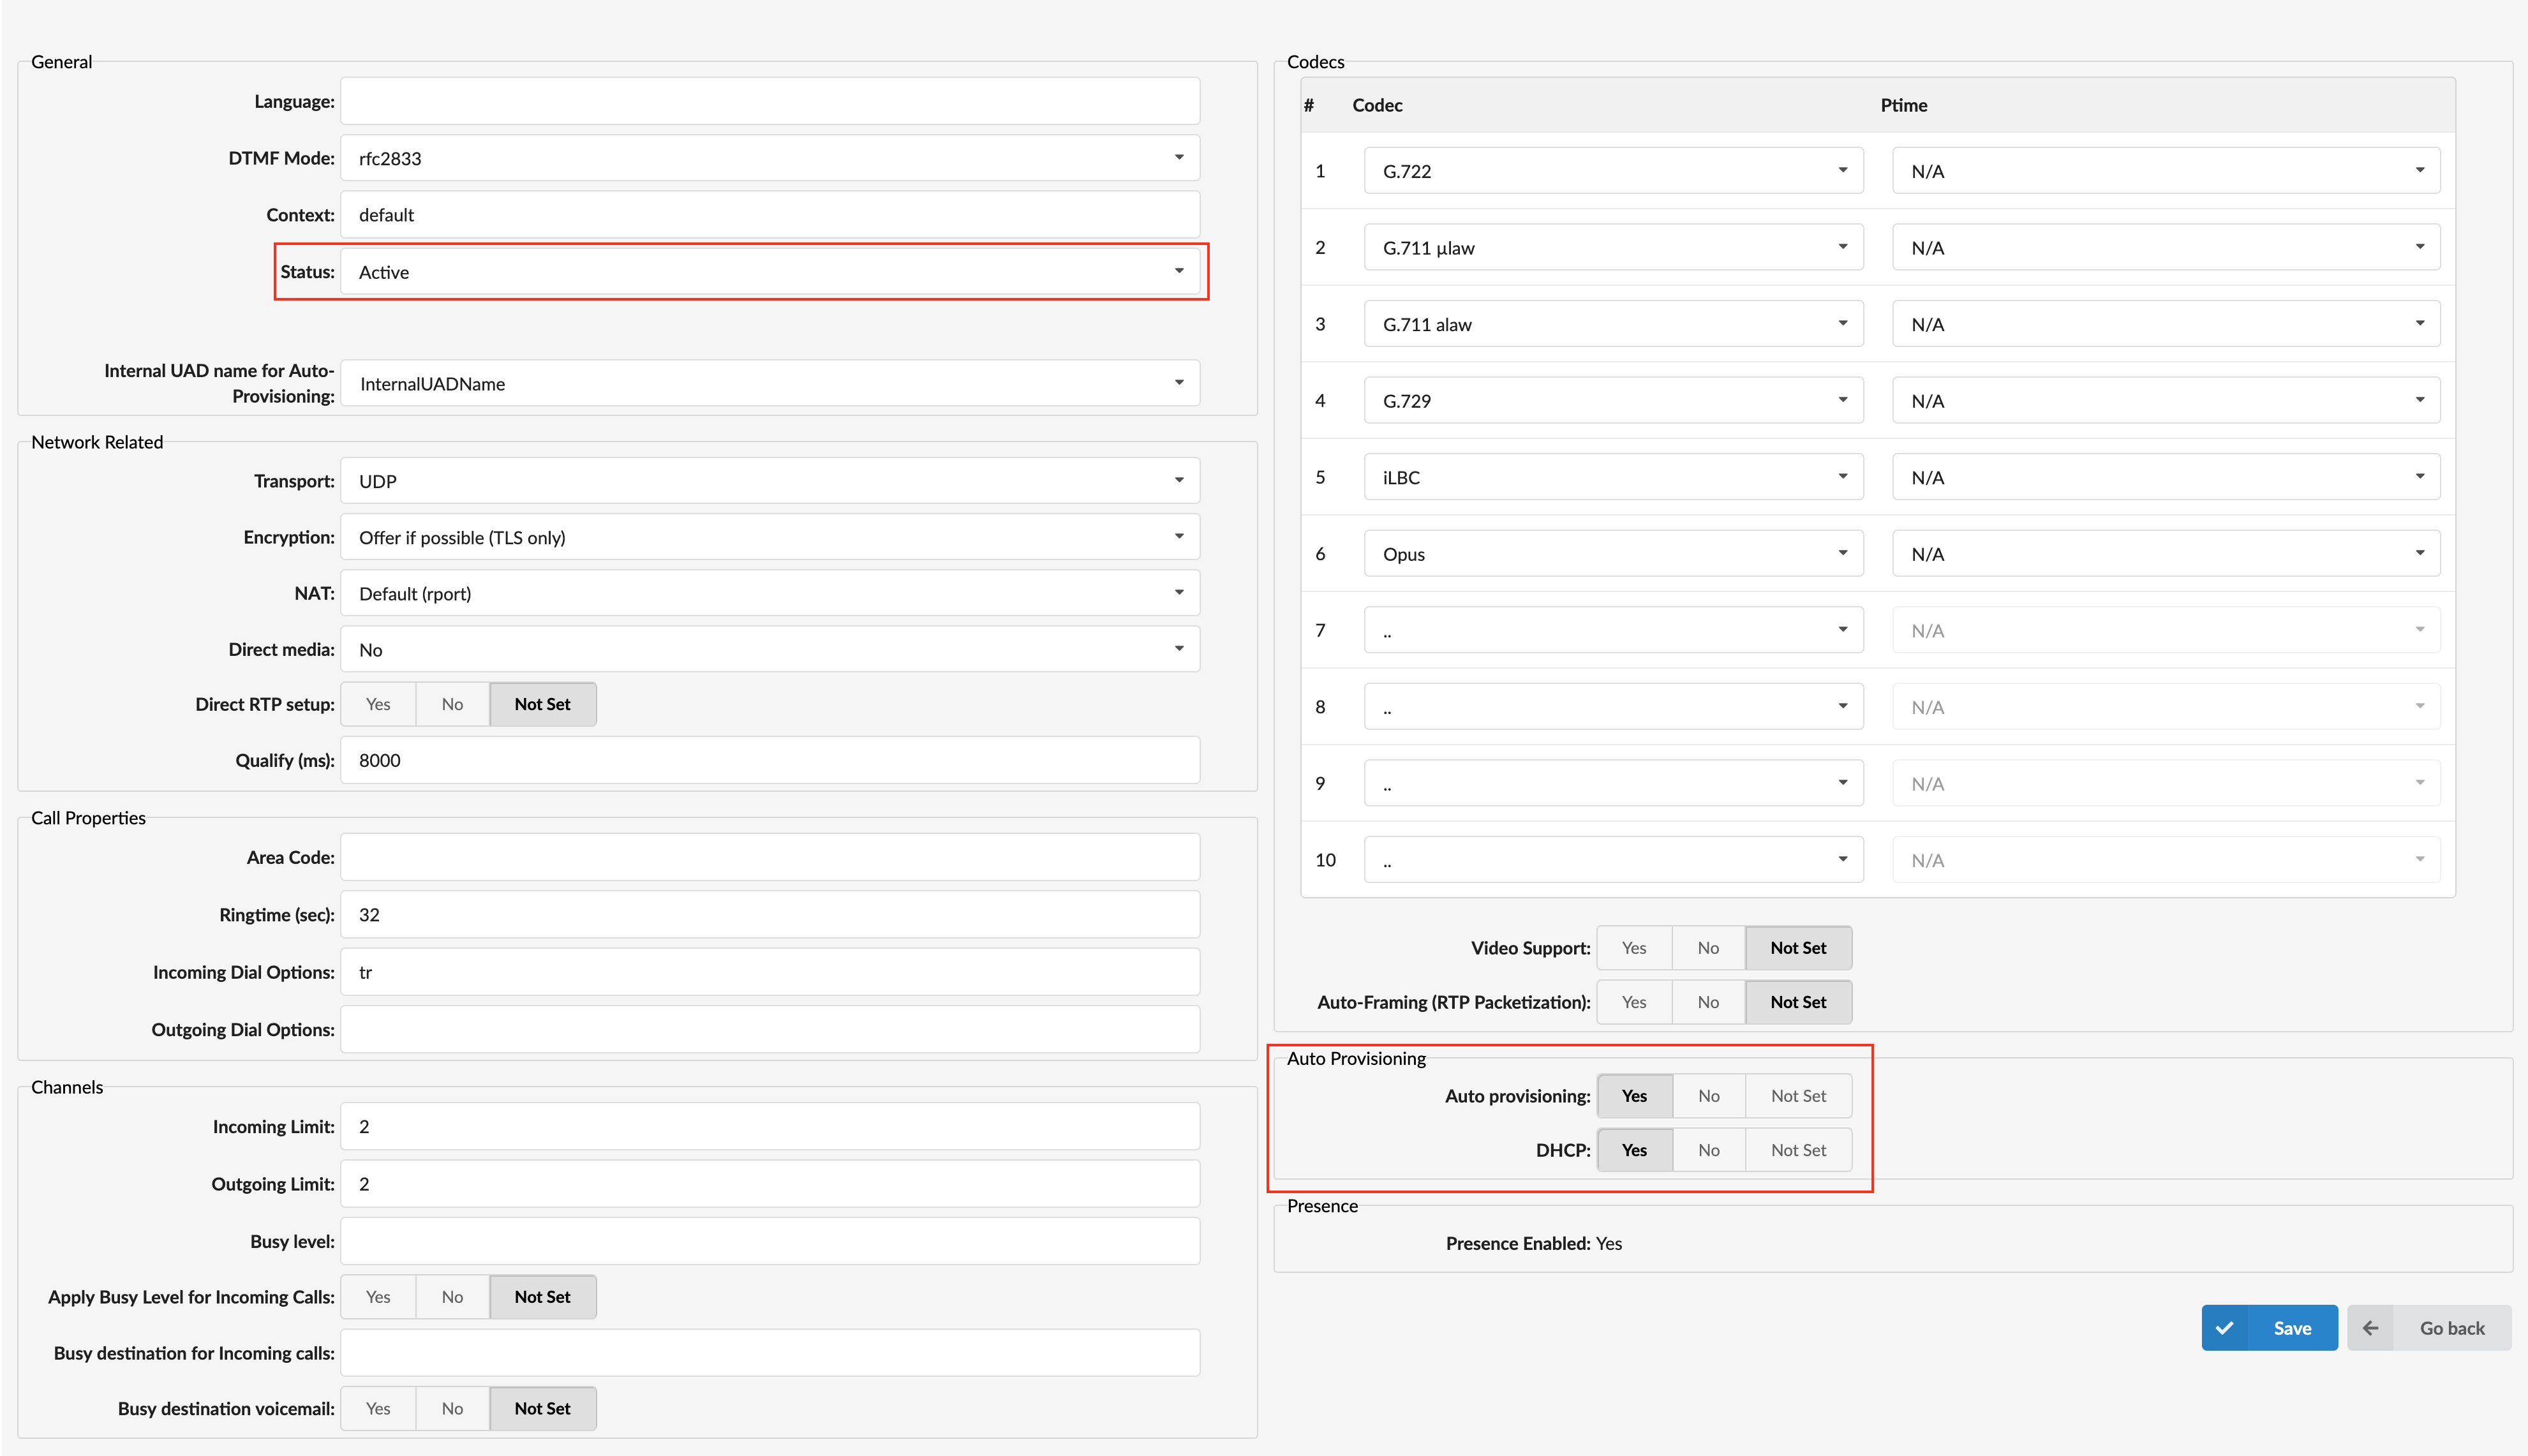
- Navigate to Settings > UAD.
- Ensure that the Snom HD300 UAD is enabled. To check the UAD status, click the Edit icon corresponding to the Snom HD300 phone.
- Verify that Status is set to Active, Auto provisioning is set to Yes, and DHCP is set to Yes.
- Click the Save button.
¶ Creating an Extension
1. Add Extension
-
Navigate to Extensions, then click Add Extension.
-
The standard options window will open.
-
Select the Snom HD300 phone model from the UAD dropdown menu.
-
Select the Location: Local or Remote.
- Local is for all Extensions registered on the LAN
- Remote is for all Extensions registered from remote networks, WAN, Internet etc. -
Click the Next step button.
2. Extension Values
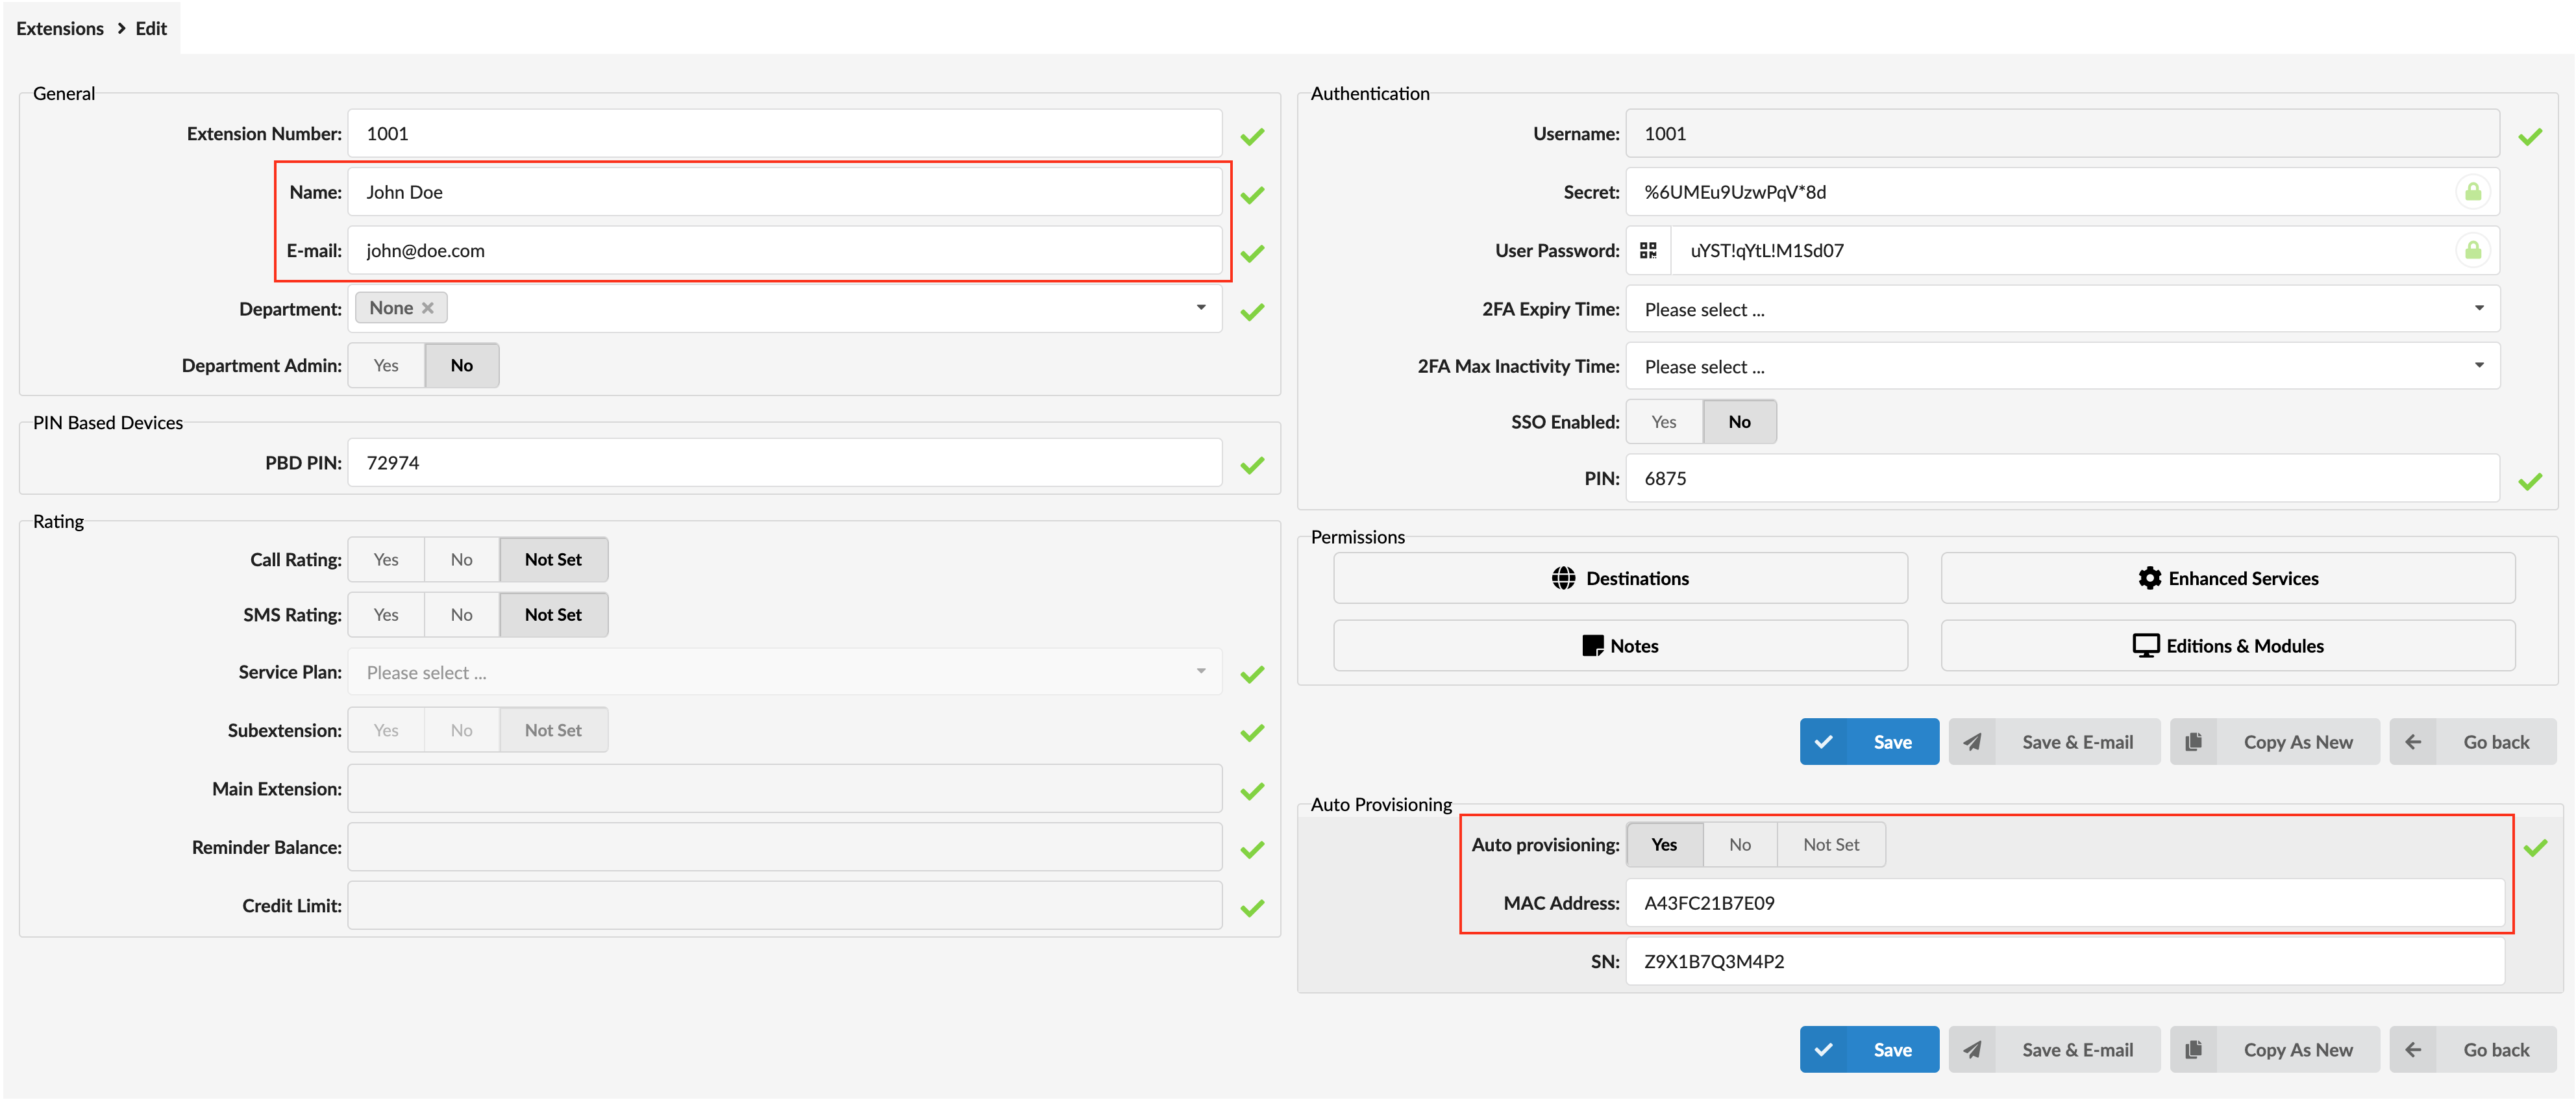
Enter values into the required field text boxes.
REQUIRED FIELDS:
- Name
Enter a name for the extension being created. Example: John Smith.
Enter the e-mail address associated with this extension. This e-mail address will receive all system notification messages. Example: john.smith@bicomsystems.com
- Auto Provisioning
Set to Yes.
- MAC Address
Enter Snom phone MAC address. Example: 000413123456. MAC address can be found at the back of the phone.
- Click on the Save button.
¶ Registering the Phone
This chapter describes how to register Snom phone using HTTP and HTTPS
¶ HTTP or HTTPS
¶ Auto Provisioning
- Open a web browser and enter the phone's IP address. Example:
http://192.168.1.22 - In the left navigation menu, select Advanced.
- Open the QoS/Security tab.
- Under HTTP Client, enter the Auto Provisioning username and password in the User and Password fields.
- Click Apply.
- Open the Update tab.
- In the Setting URL field, enter the provisioning URL.
Choose the server type you want to use: HTTP or HTTPS. Note: HTTP is the recommended option.
- If you decide to use HTTP, enter http:// followed by Hostname or IP Address, and then followed by /prov/snomhd300-{mac}.xml
Example using a hostname: http://abc.bicomsystems.com/prov/snomhd300-{mac}.xml
Example using an IP address: http://192.168.1.10/prov/snomhd300-{mac}.xml
-
Click the Apply button.
-
If you decide to use HTTPS, enter https:// followed by Hostname or IP Address, and then followed by /prov/snomhd300-{mac}.xml
Example using a hostname: https://abc.bicomsystems.com/prov/snomhd300-{mac}.xml
Example using an IP address: https://192.168.1.10/prov/snomhd300-{mac}.xml
- Click the Apply button.
- Click Reboot.
- Wait for the phone to reboot. Note: Do not power off the phone during the provisioning process.
- During reboot, the phone will automatically download the appropriate configuration file from PBXware and complete the registration process.
- To verify that the phone has been successfully registered, dial *123.
¶ Additional Configuration Template
If you want to include some additional UAD configuration for Snom HD300, just add fields to User Agent General Auto Provisioning Template in Settings -> UAD -> Snom HD300 menu, or add them directly to the Extension in the UAD Auto Provisioning Template section.