¶ Product Overview
My Account is part of the Bicom Systems ecosystem where our customers are available to access all information regarding their accounts. Once logged in, our customers can quickly and easily maintain their licences, check their invoices, complete payments, track their subscriptions, and account balance.
From the My Account dashboard, they can check and create new support tickets and also gain access to the Bicom Systems store, downloads page, access company resources, etc.
¶ Dashboard
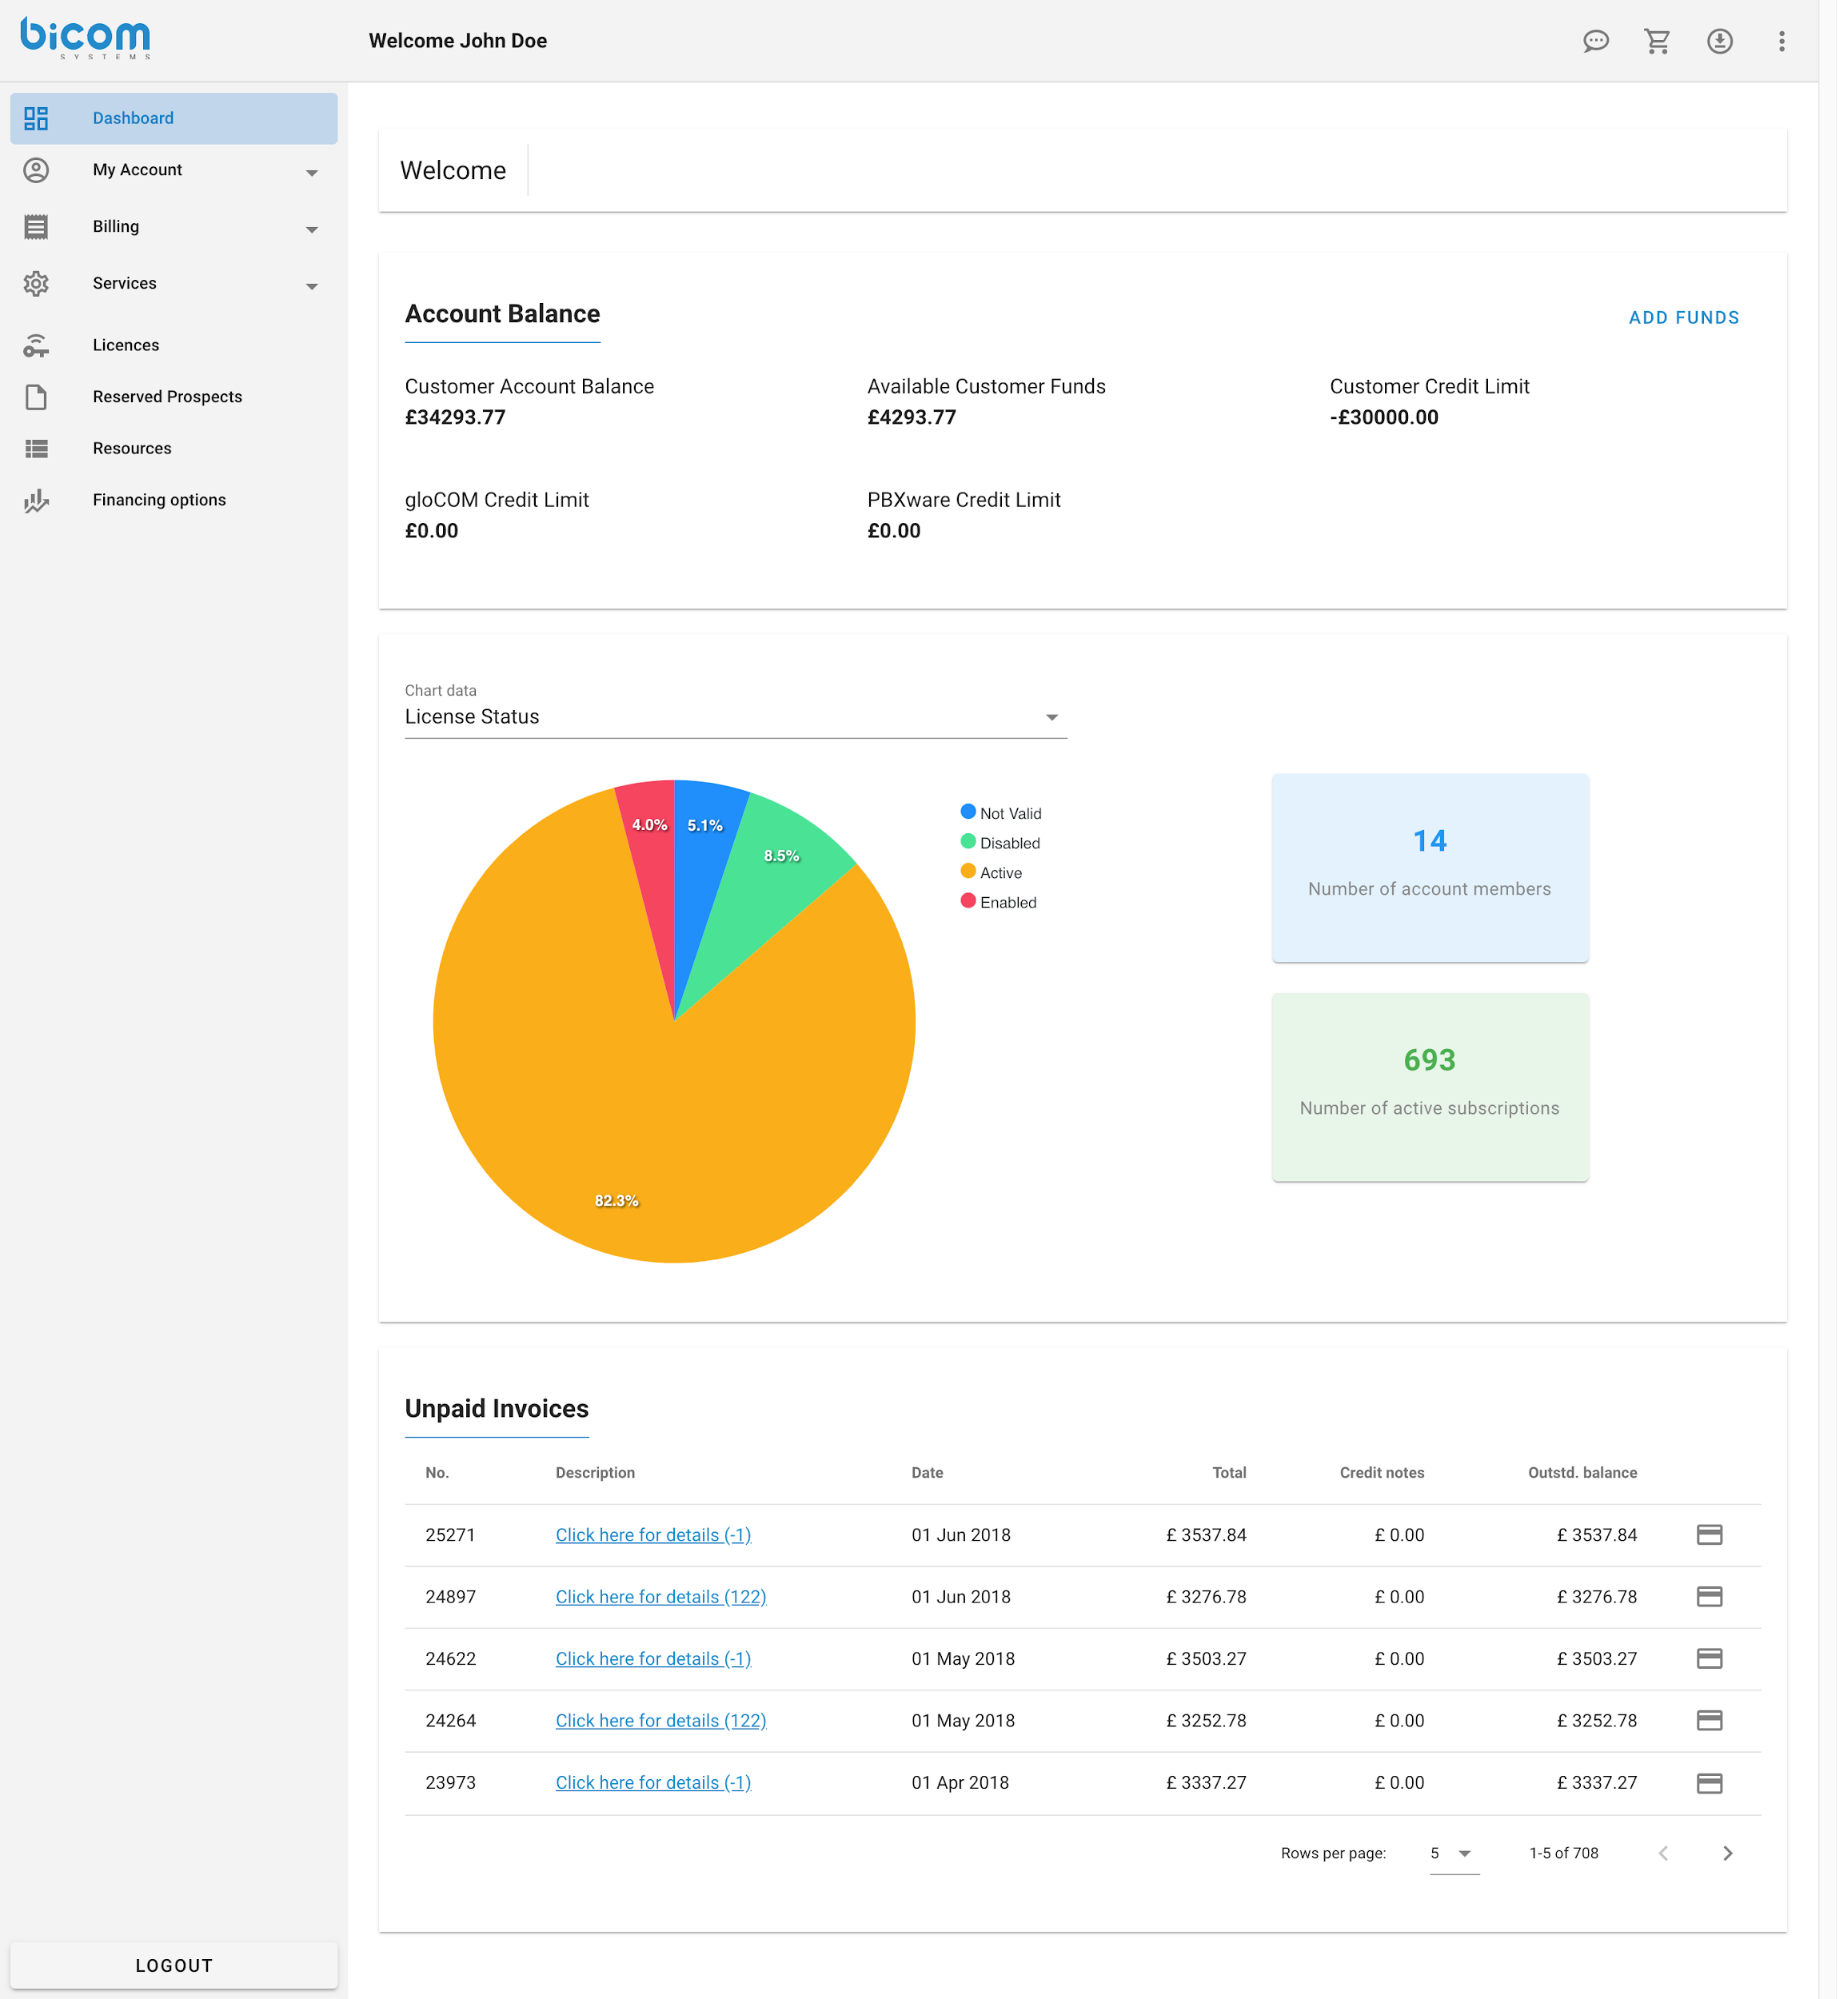
After successful login users are now redirected to the Dashboard which allows you to see the account balance and add funds, view the total number of your licences, and visually display it on the Pie Chart. There is also a detailed list of unpaid invoices.
¶ My account
¶ Account Settings
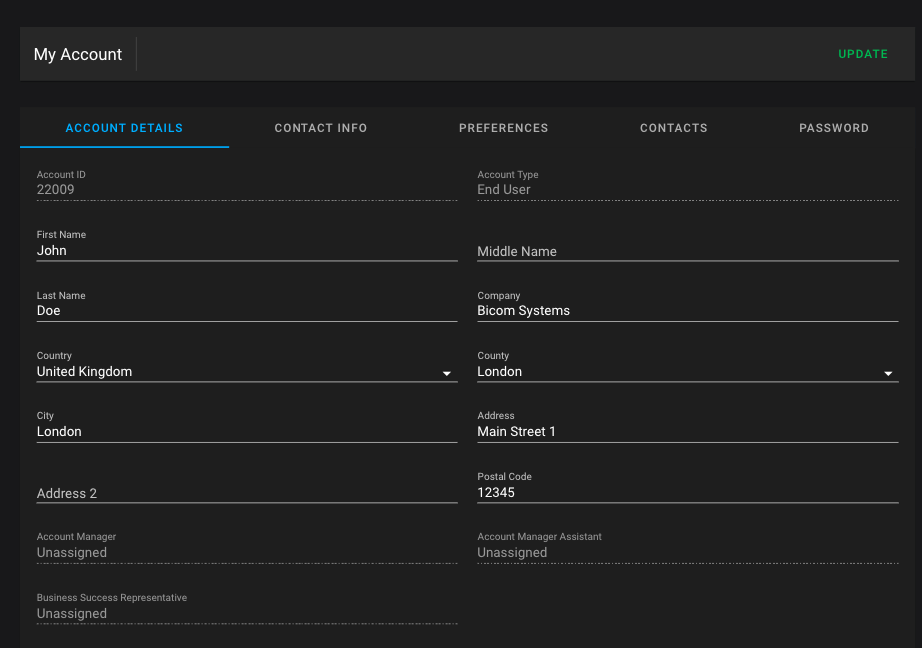
This section provides Account information and options to edit account information. In account settings, you can see details concerning the users account. Users information can be updated by changing the provided fields and then clicking on the Update button.

Also in the Account settings section users can change their password.
¶ Account Members
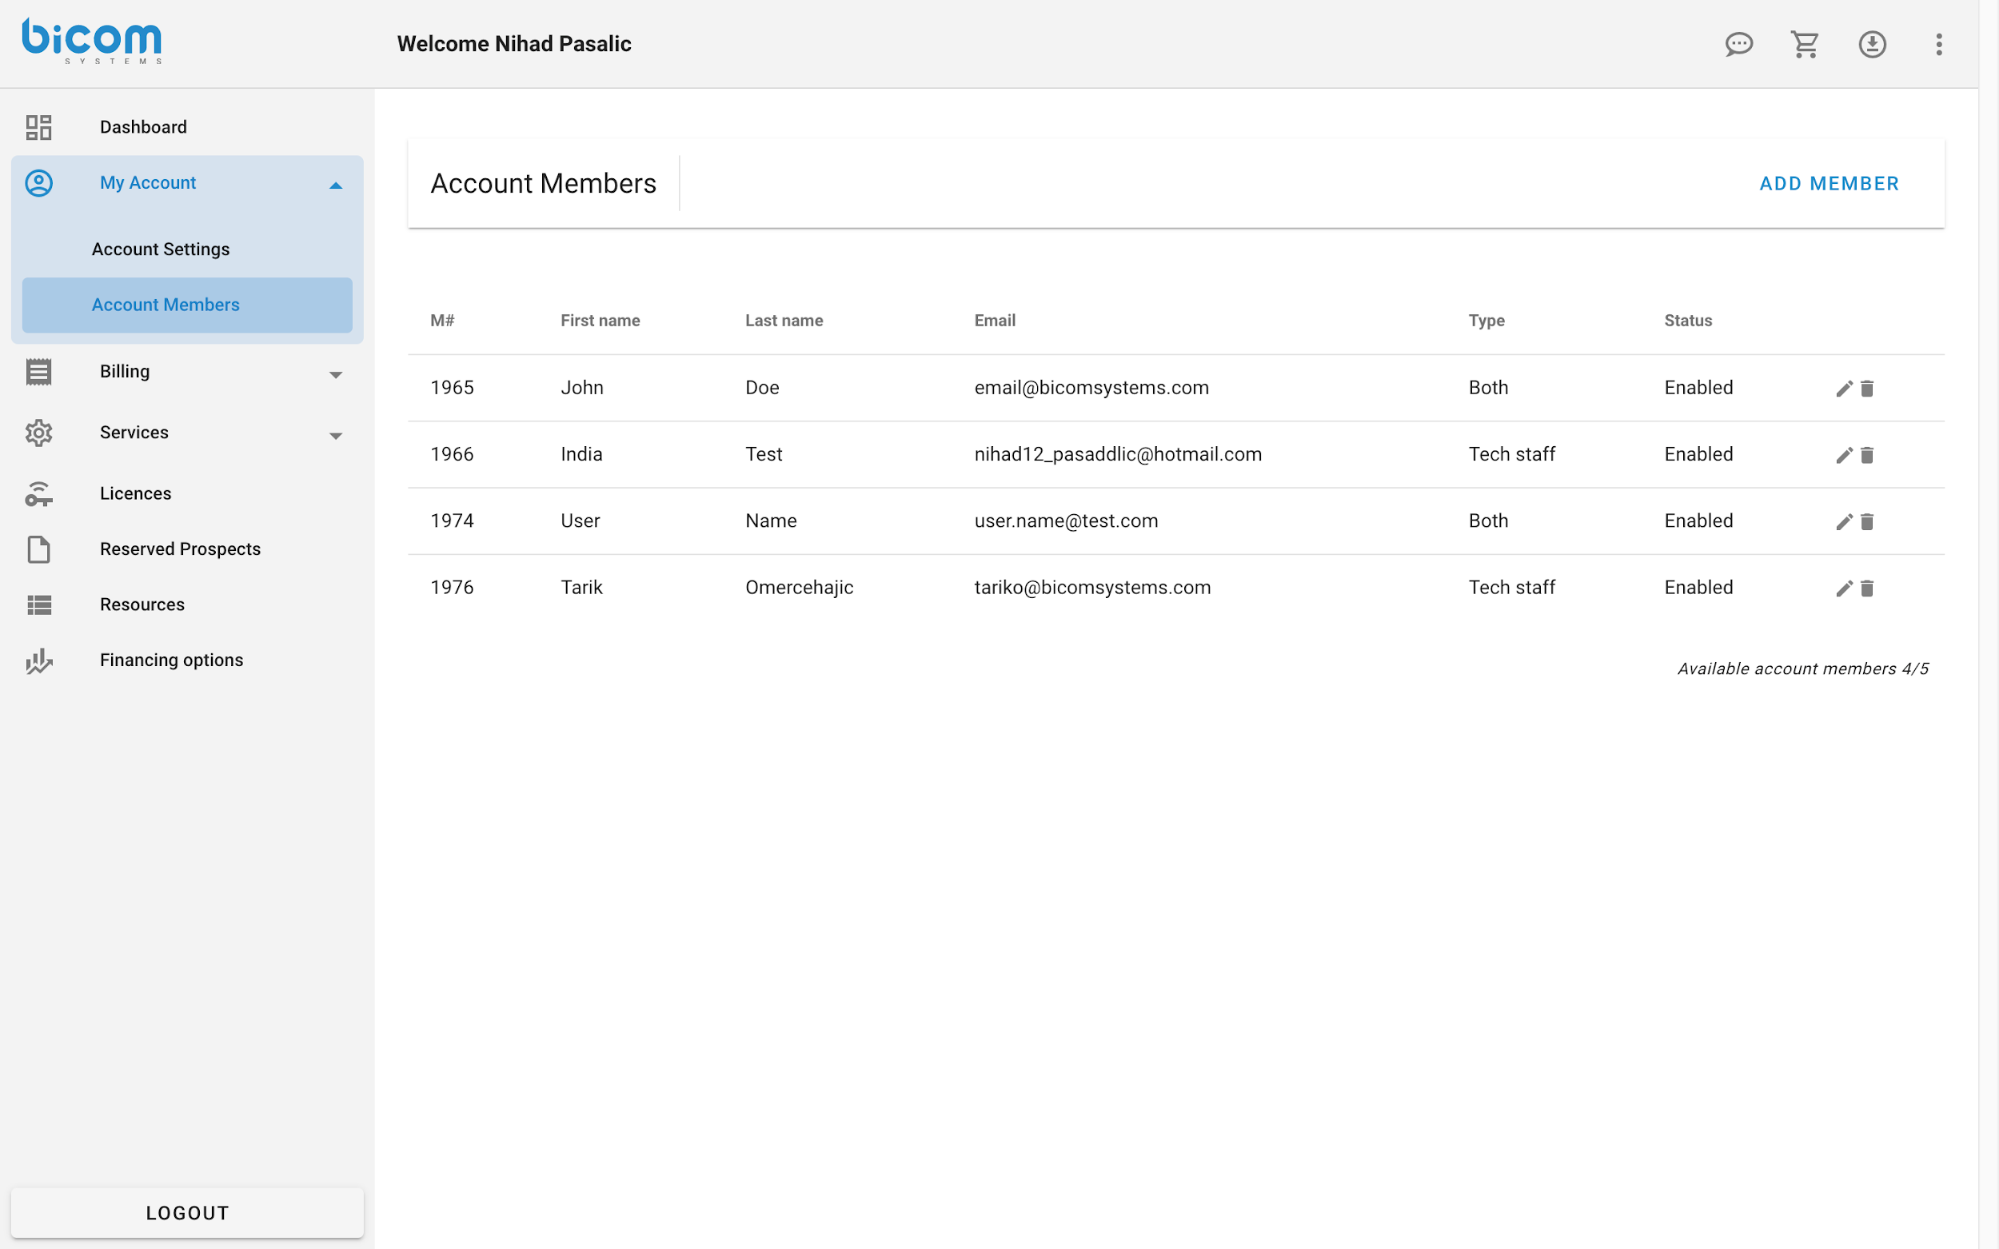
This section displays a list of Account Members.

Users can add new account members by clicking at Add Member.
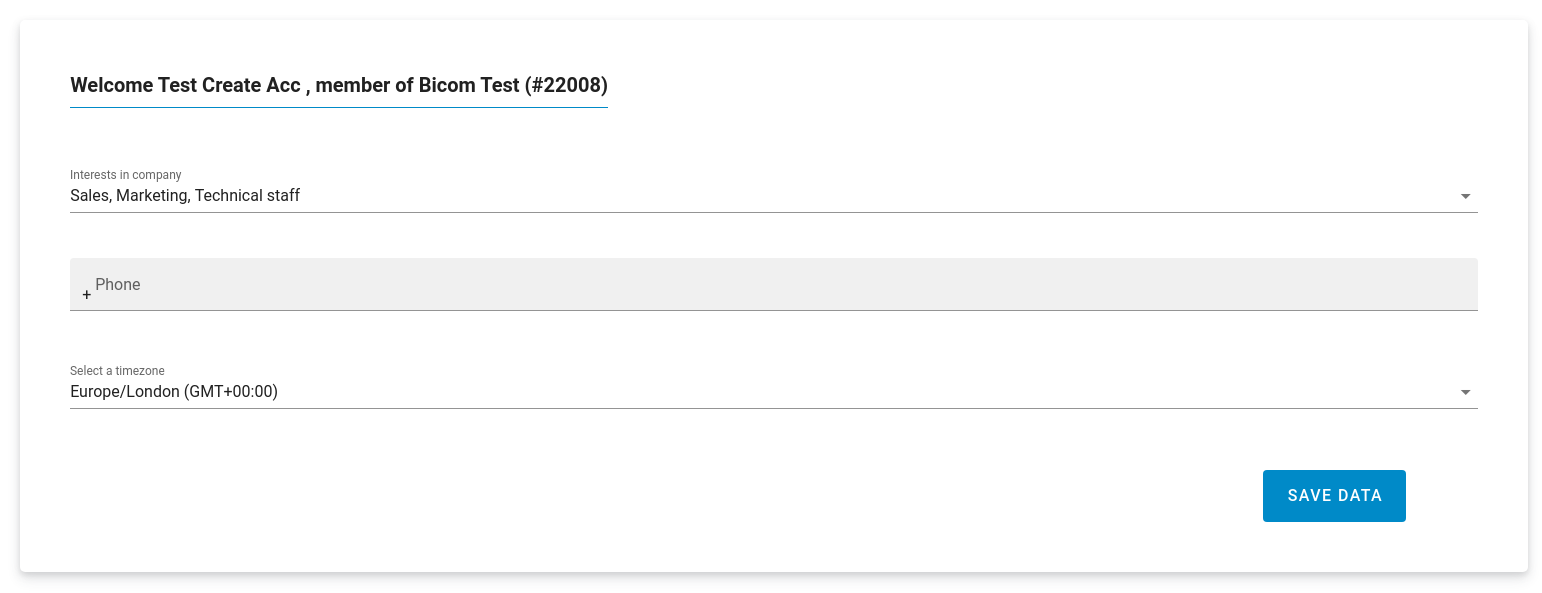
When you finish adding account member information click on the “ADD NEW” button to add a new account member. This information will be previewed in the form to account members on the first login for them to validate/modify data:
You can also edit or delete account members by clicking on one of the buttons on the right.

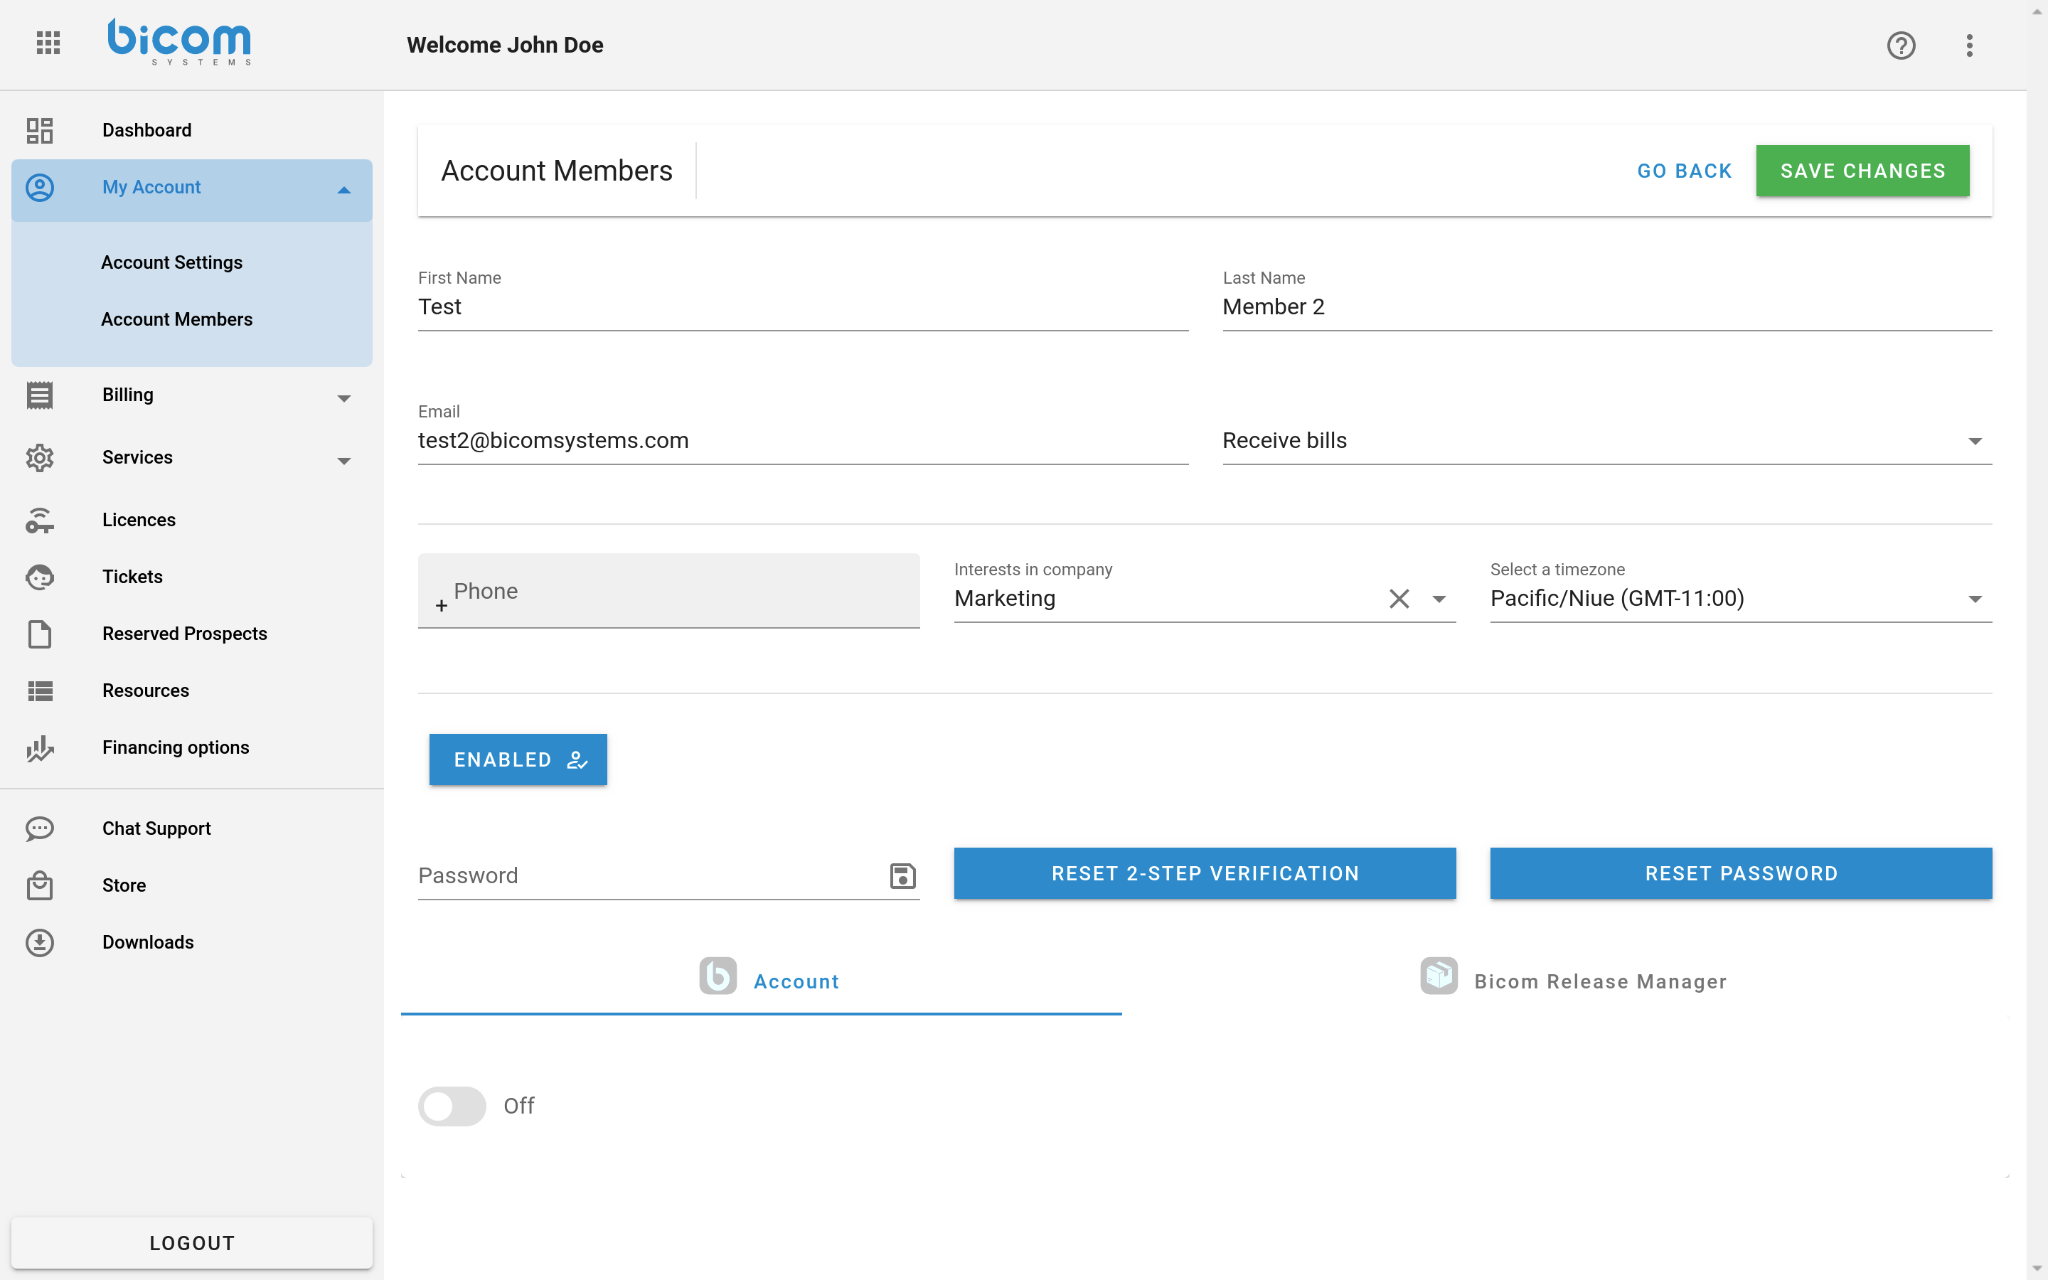
When you finish editing click the button “EDIT MEMBER” to save changes.
Here you can edit:
- First name
- Last name
- Type
- Phone
- Interests in company
- Timezone
- Password
Also by clicking on the “ENABLED/DISABLED” button users can change account member status. By clicking on the “RESET 2-STEP VERIFICATION” the user can reset 2-step verification for the account member. The button “RESET PASSWORD” sends a randomly generated password to the account member email.
Customer Portal Roles For Account Member
On the Account tab, Account owners can turn on/off access and change roles on the Customer Portal for account members.
As a Bicom user, you can grant to your account members one of the following roles :
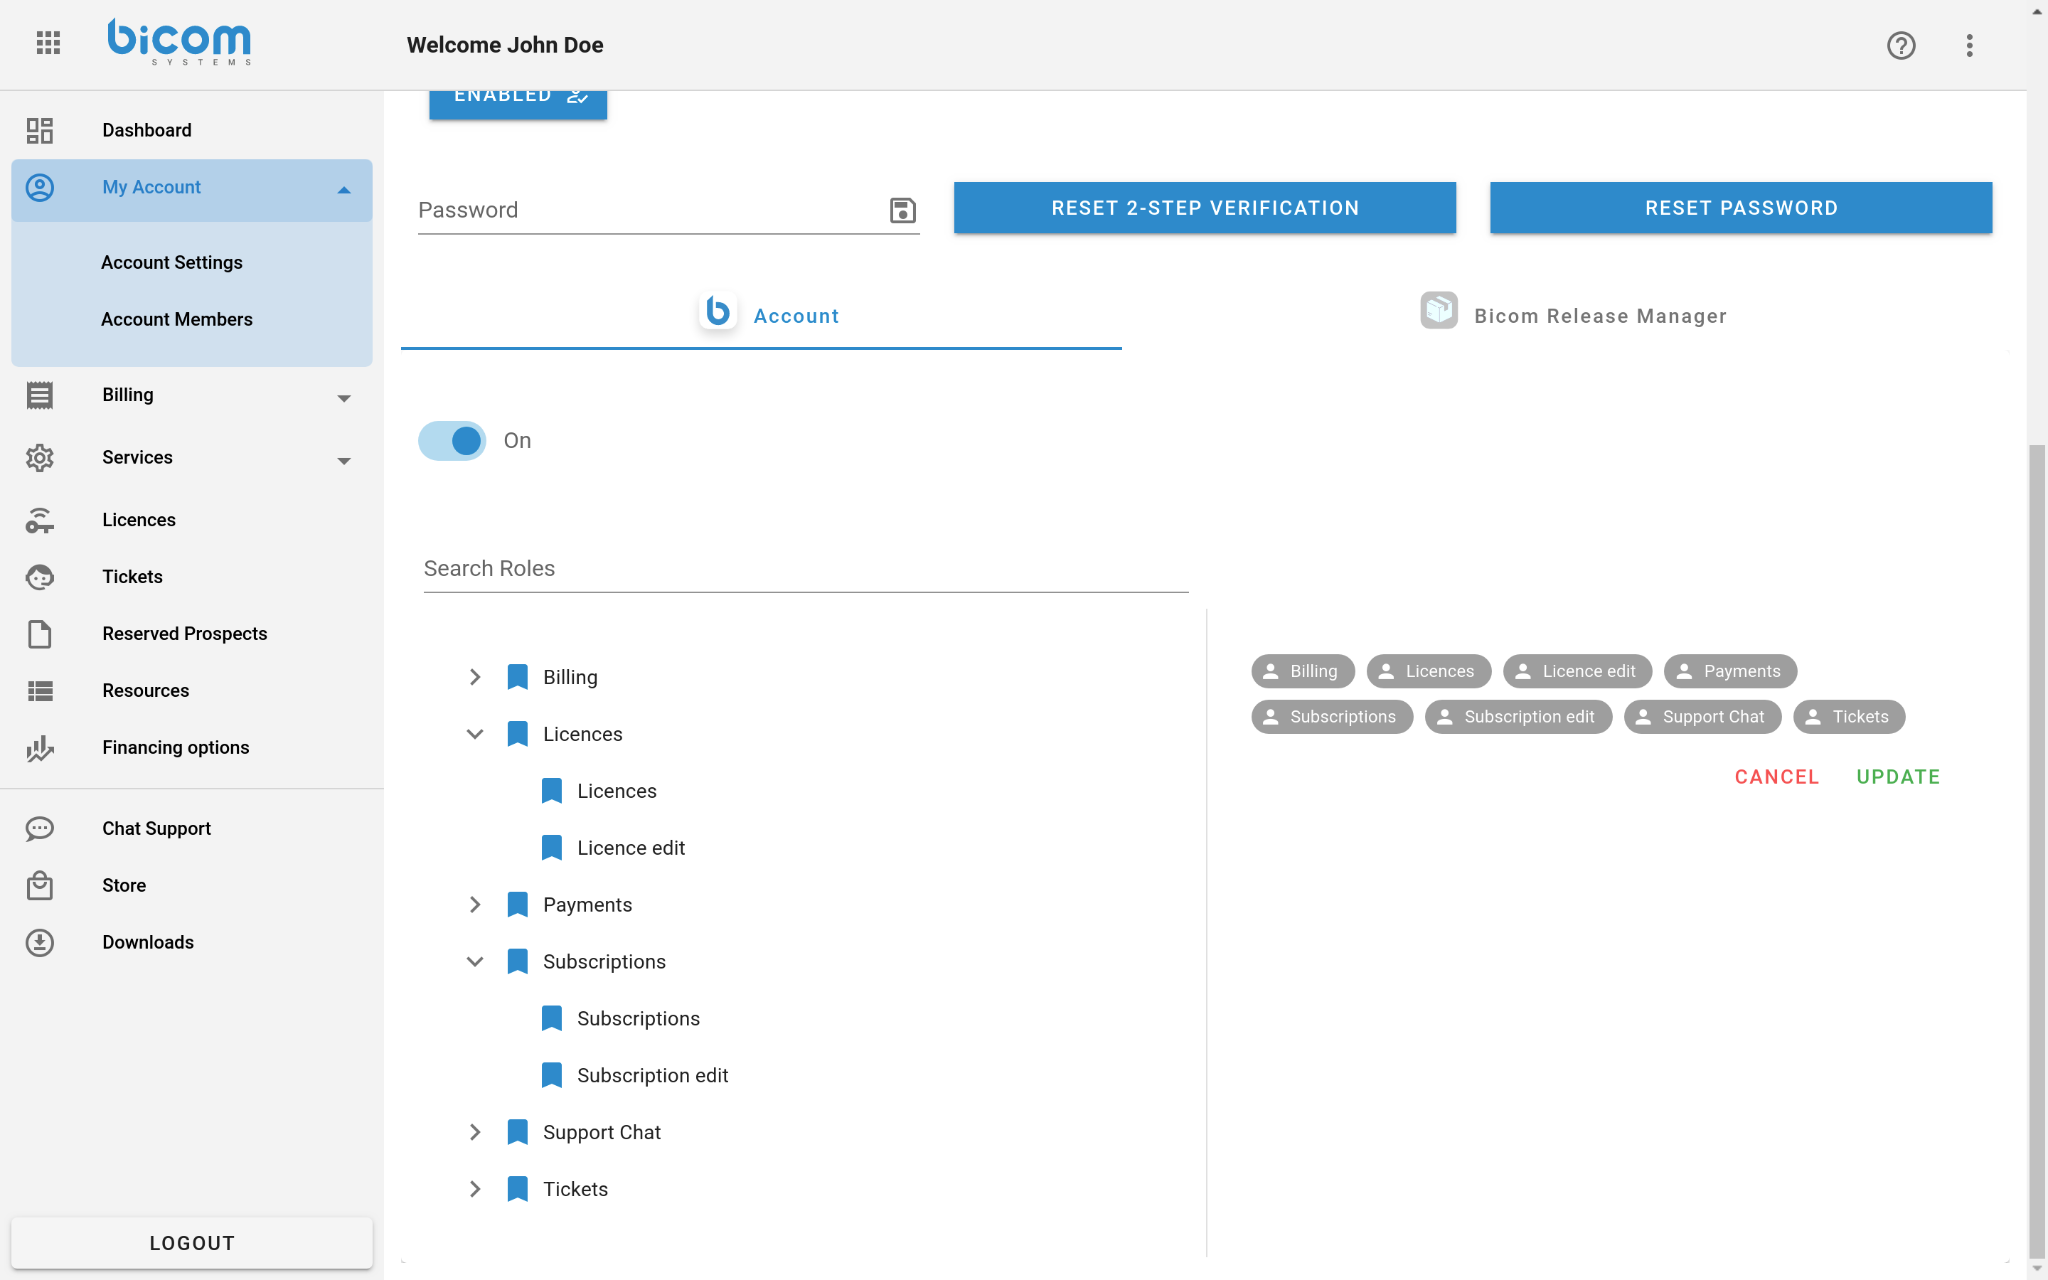
- Billing - grants permission to read Invoices, Credit Notes, and Statements
- Licences
- Licences - grants permission to read Licences
- Licences edit - grants permission to edit Licences
- Payments - grants permission to read Invoices, Credit Notes, Statements, and all Payments on account, allowing account members to pay in Account name Invoices.
- Subscriptions
- Subscriptions - grants permission to read Subscriptions
- Subscriptions edit - grants permission to edit Subscriptions
- Support Chat - grants access on Account Support Chat
- Tickets - grants permission to read/write Tickets
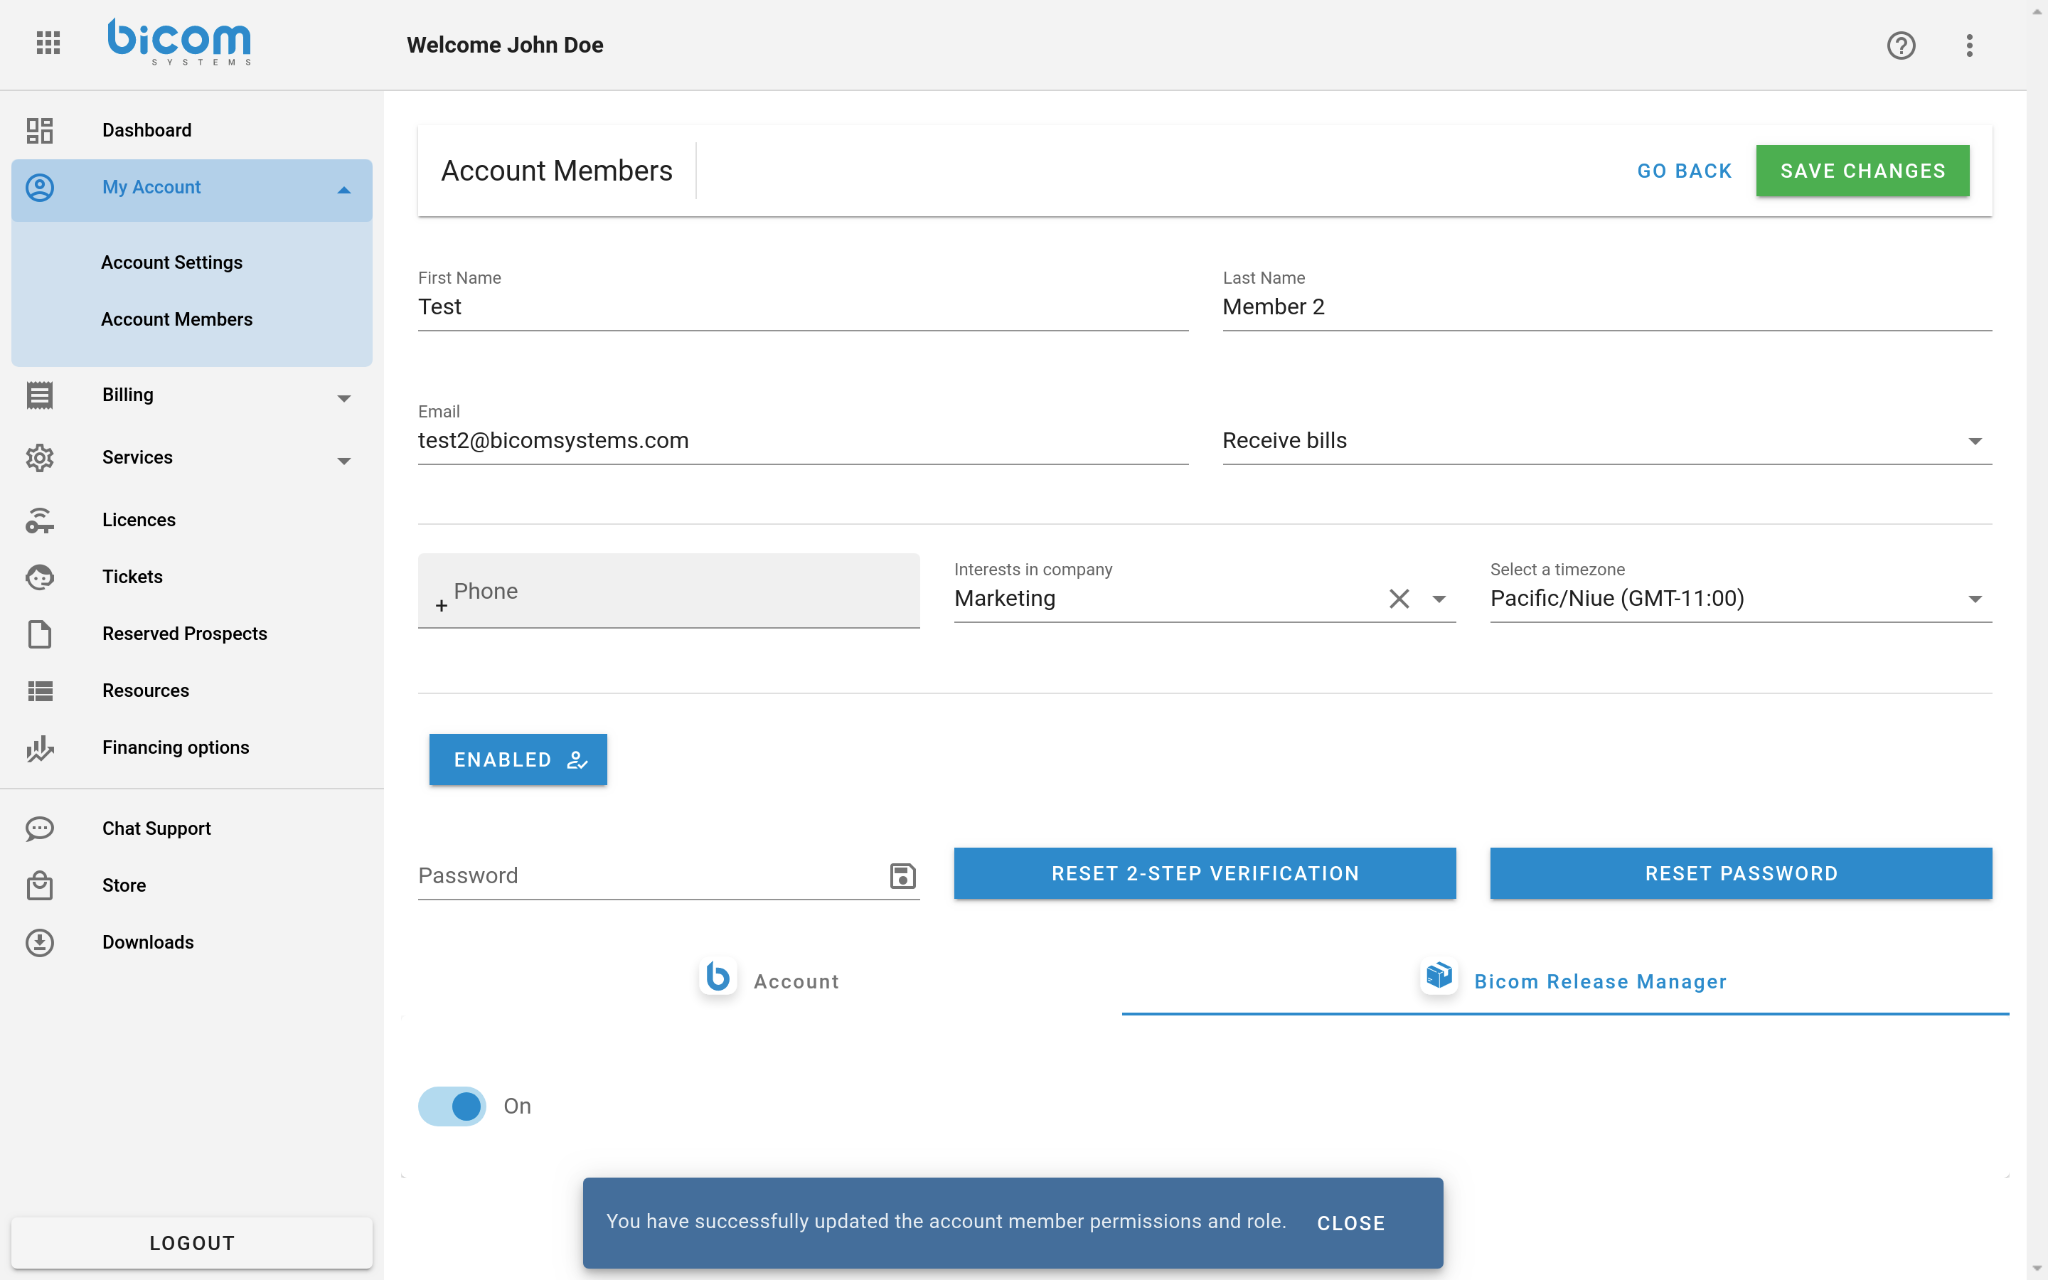
On the Bicom Release Manager tab, users can turn on/off access for the account member.
¶ Action menu
From the action menu located below the application menu, you can navigate to:
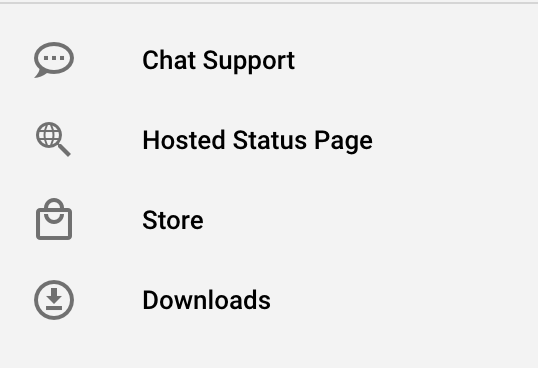
- Chat Support
- Hosted Status Page - https://status.bicomsystems.com/
- Store (Shopping Cart) - https://www.bicomsystems.com/store/
- Downloads page - https://www.bicomsystems.com/download/
NOTE: To access the chat support page, please make sure your support contract didn't expire.
¶ Help menu
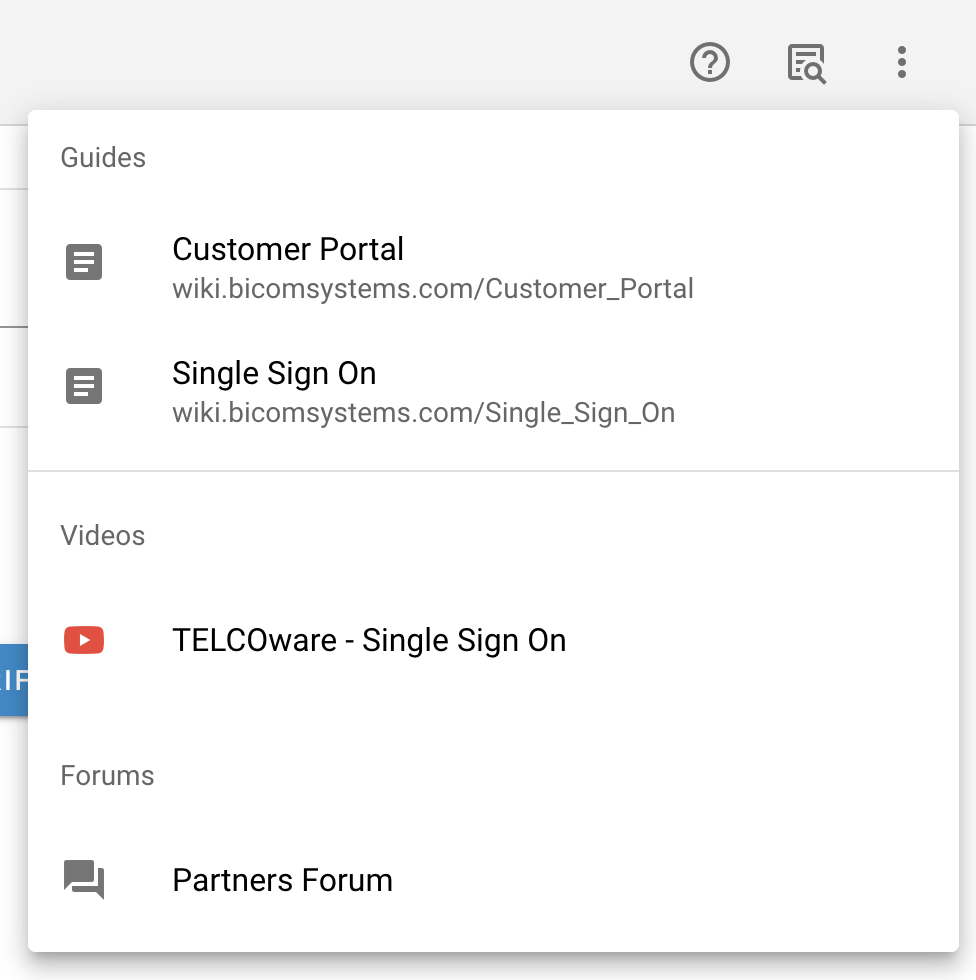
Clicking on the Help menu, you can get access to our company guides, video tutorials and Partners Forum.
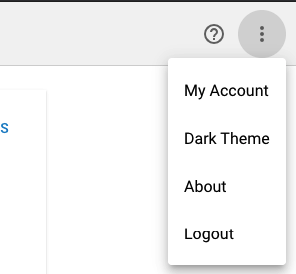
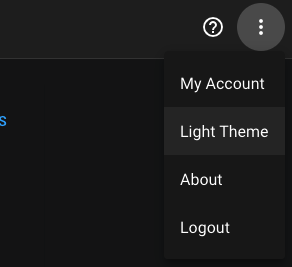
¶ Dark/Light Theme
From the menu located in the top bar, you change your theme to match your PC preferences to Light Theme (which is set as default) and to the Dark Theme. Once selected, the preferred theme will be automatically loaded (information store in your local storage).

¶ Billing
¶ Invoices
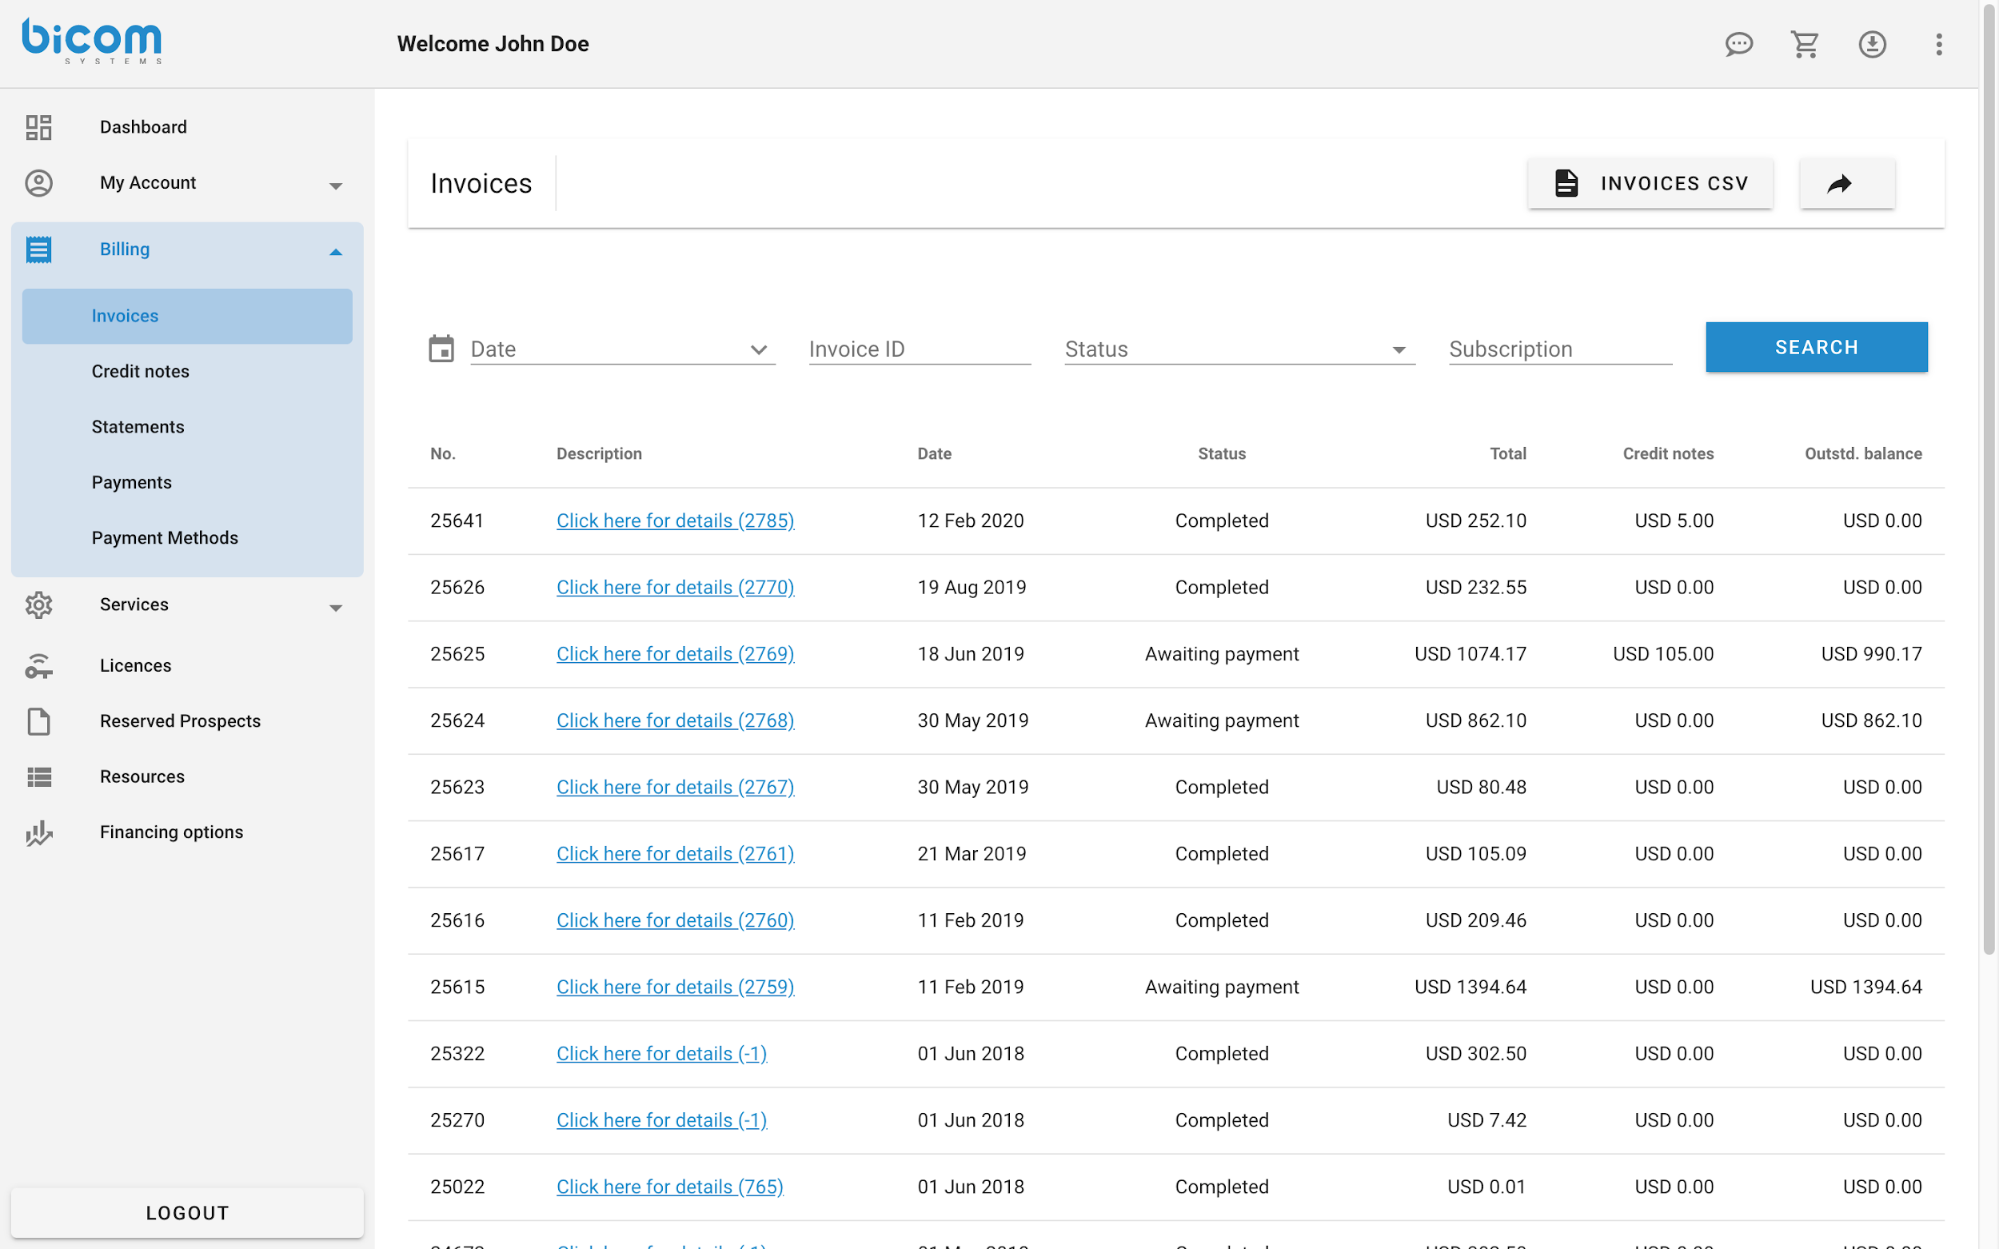
The invoices section is directly linked to all of the orders placed. Each invoice corresponds to the order by its number. Possible filters:
- From date
- To date
- Invoice ID
- Status
- Subscription
It is possible to download invoices in the form of CSV with the “INVOICES CSV” button.
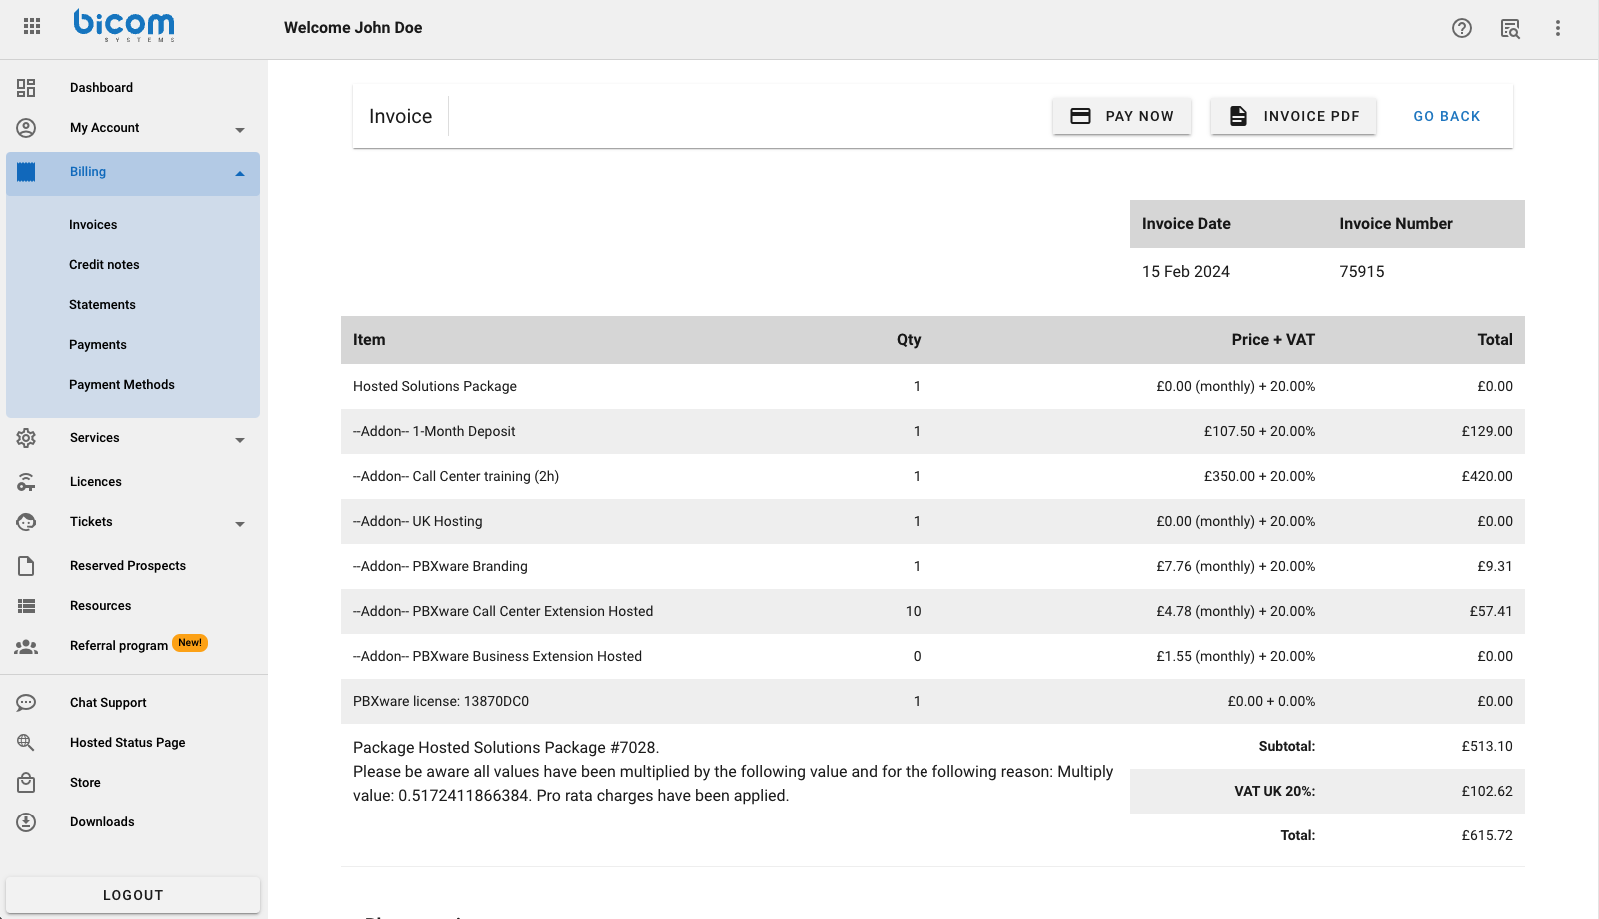
Clicking on the link in the column “Description” opens the invoice detailed view.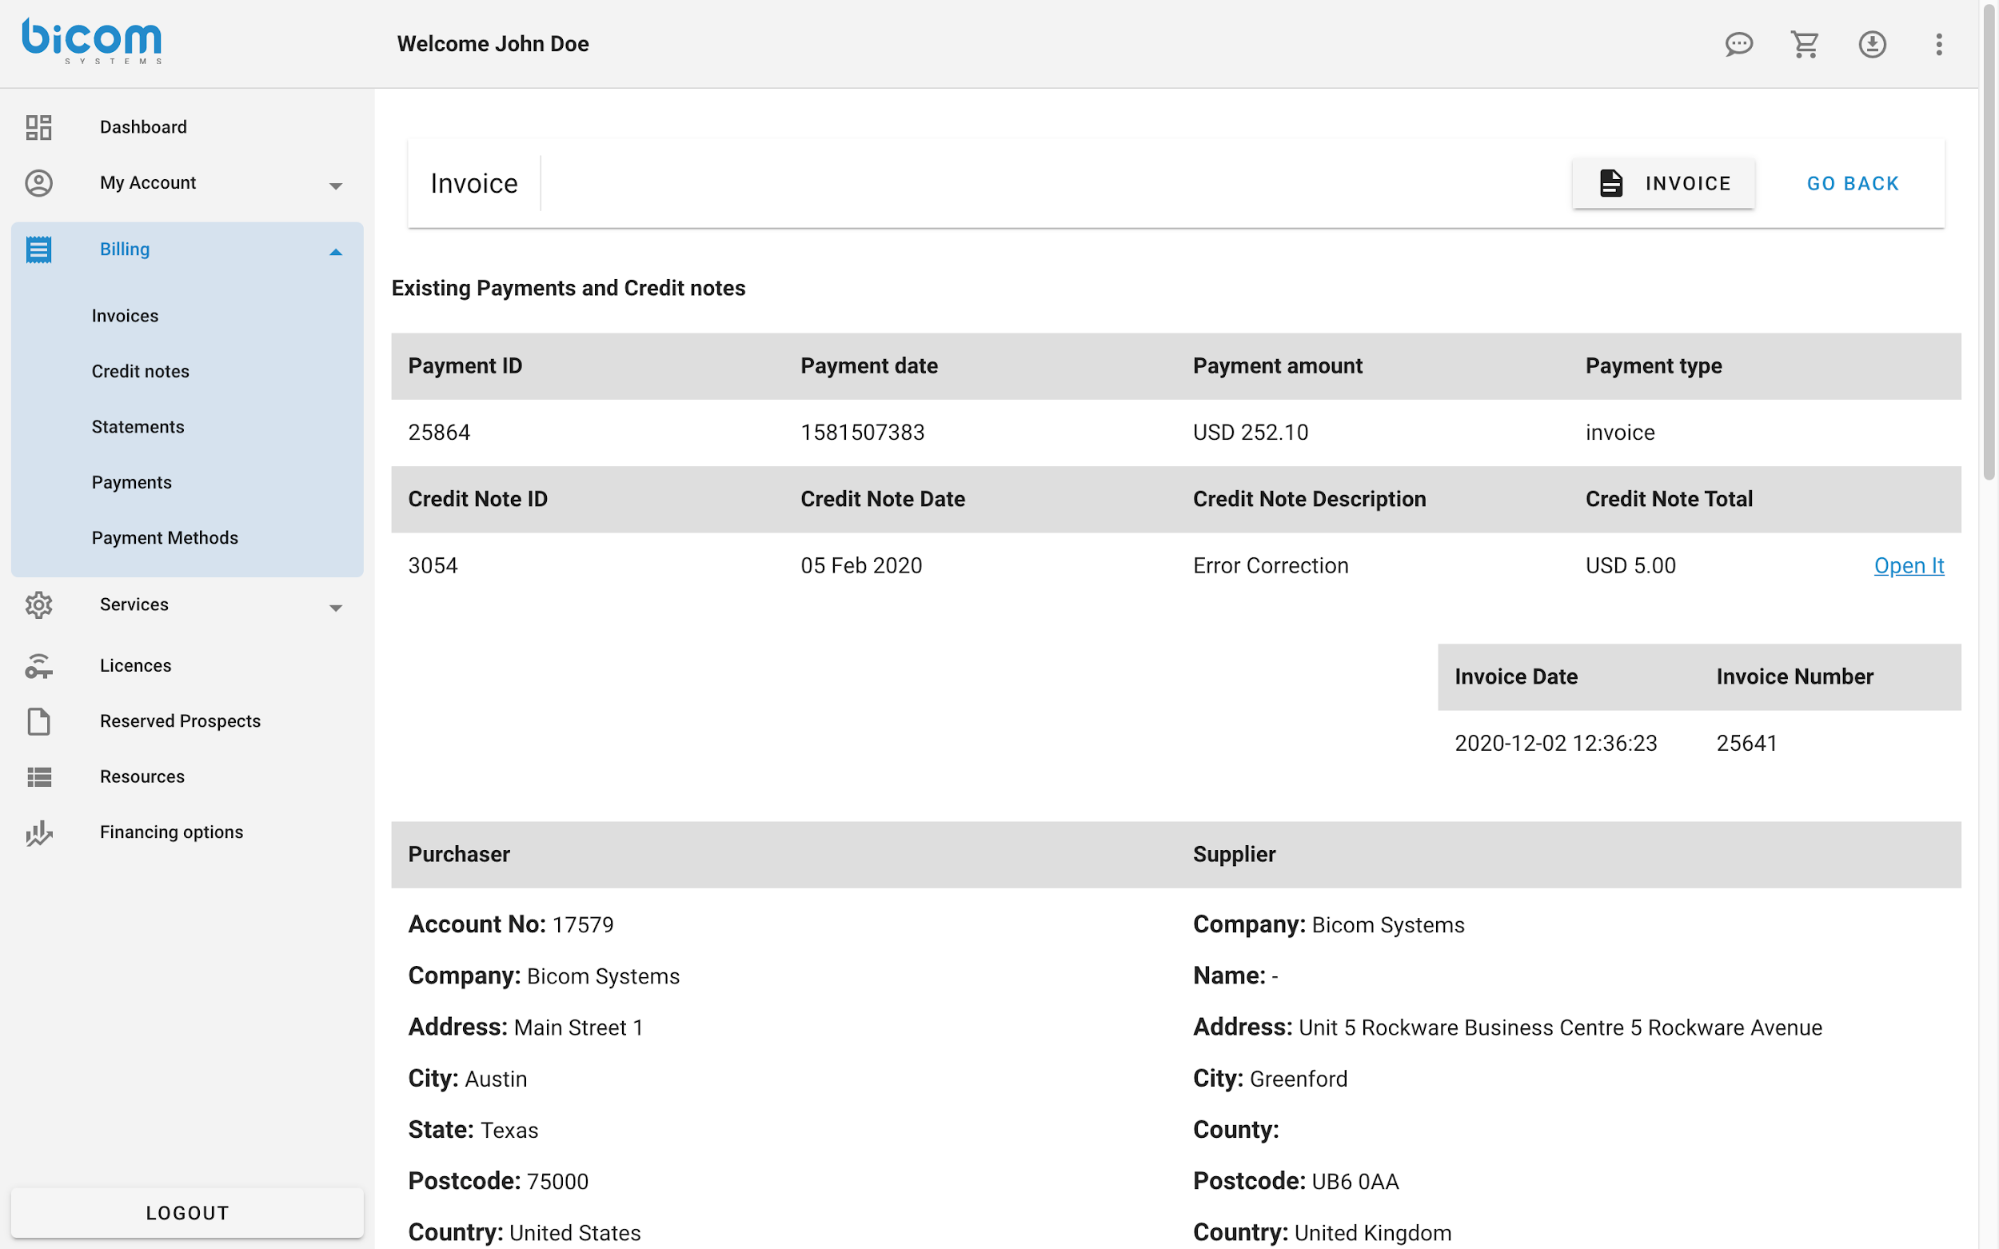
On the top, there are options available to pay the invoice if necessary and to download the invoice in .pdf format.
Clicking on the “PAY NOW” button will open a new page, where you will be given to choosing how you will pay the invoice. Possible payment methods:
- Credit or Debit Card
- Cheque
- Bank Payment
- PayPal
- Account balance
- Paypal Recurrent with billing agreement
- Authorize.net
NOTE: Some payment methods might be hidden based on your country or currency.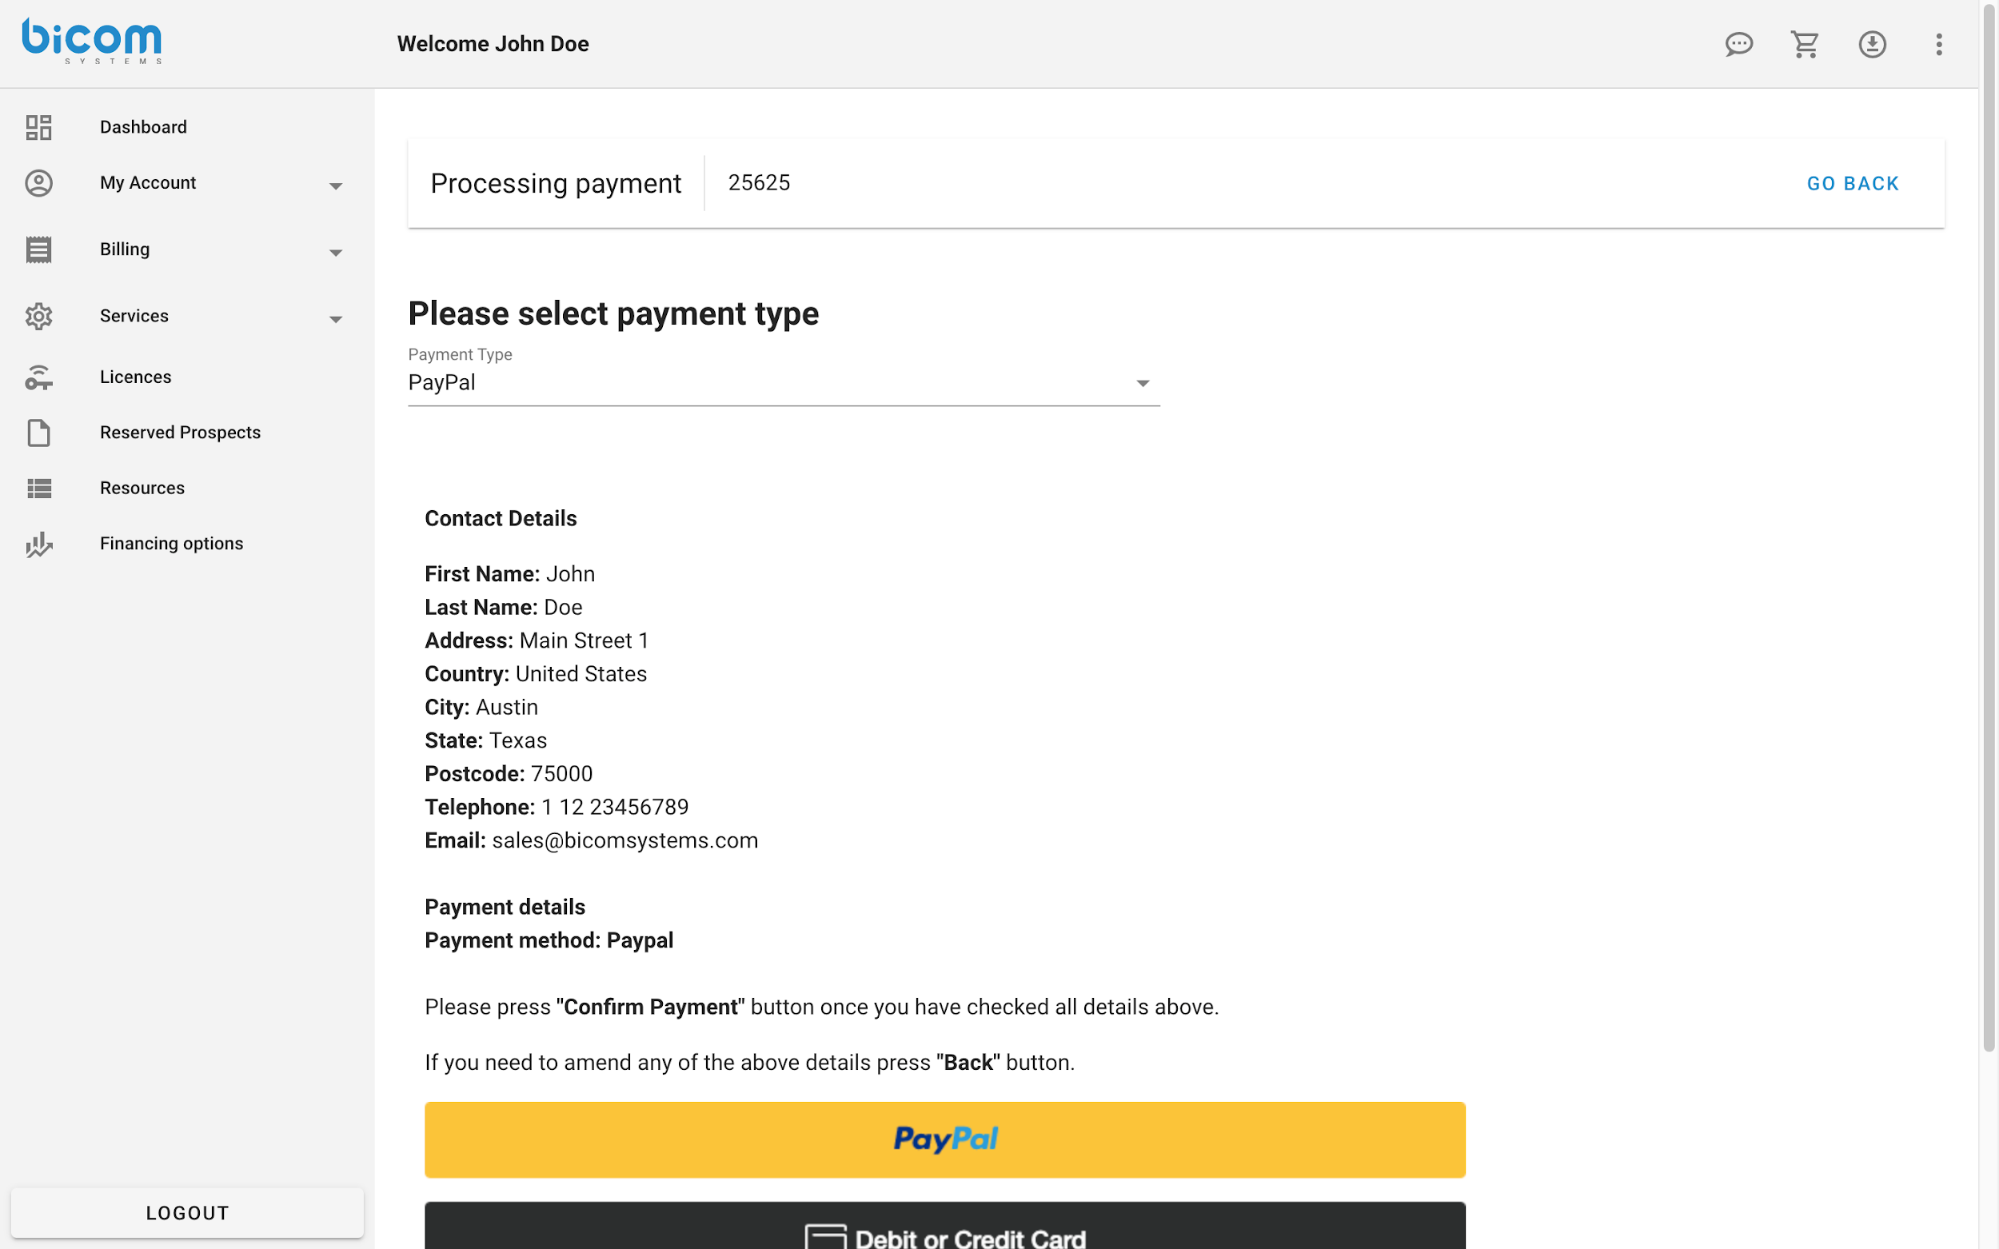
¶ Credit notes
This section provides details of Credit notes related to the account. 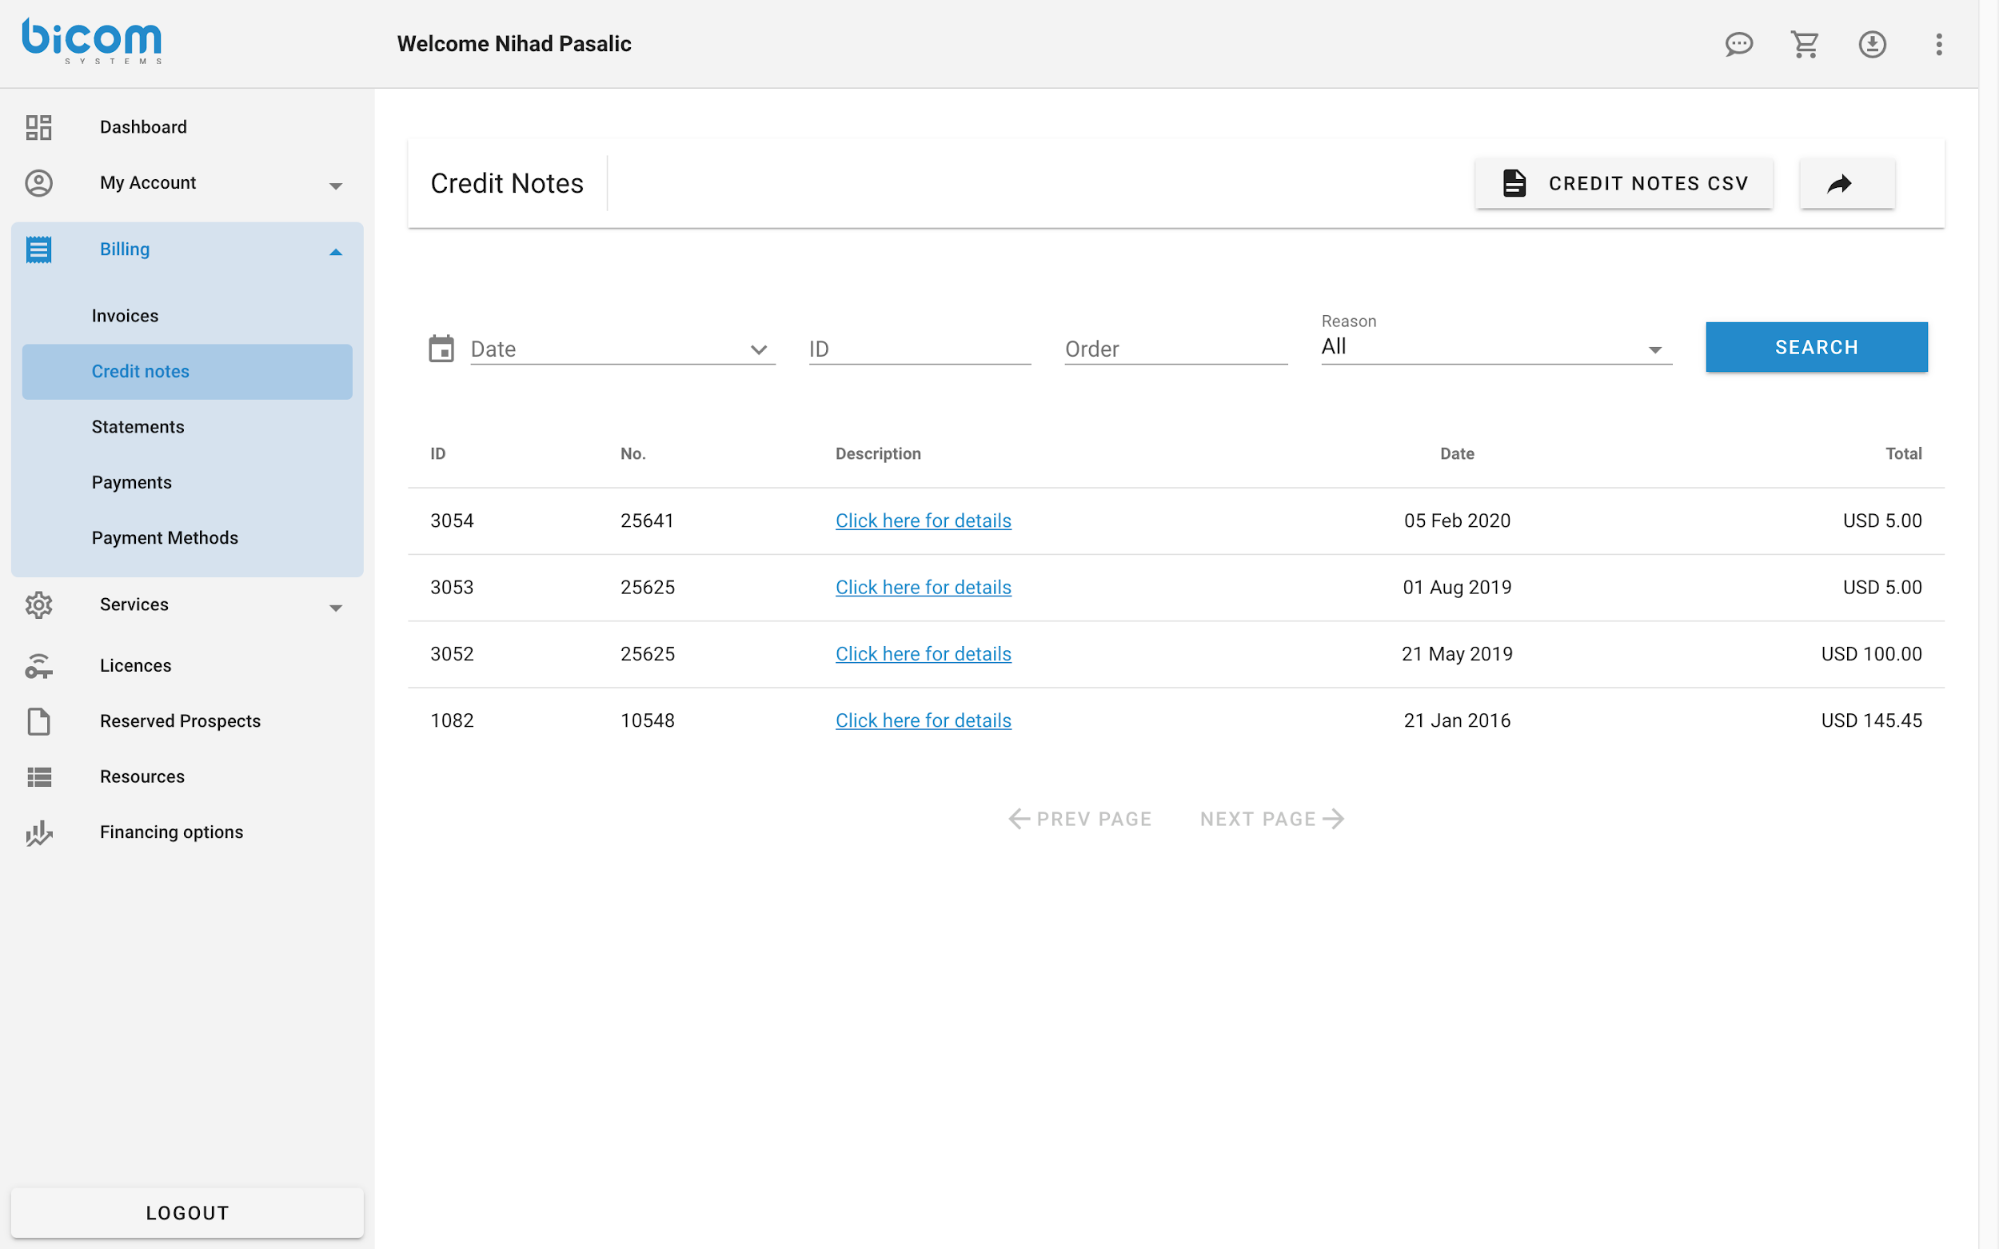
Possible filters:
- From date
- To date
- ID
- Order
- Reason
It is possible to download search results in the form of CSV with the “CREDIT NOTES CSV” button. 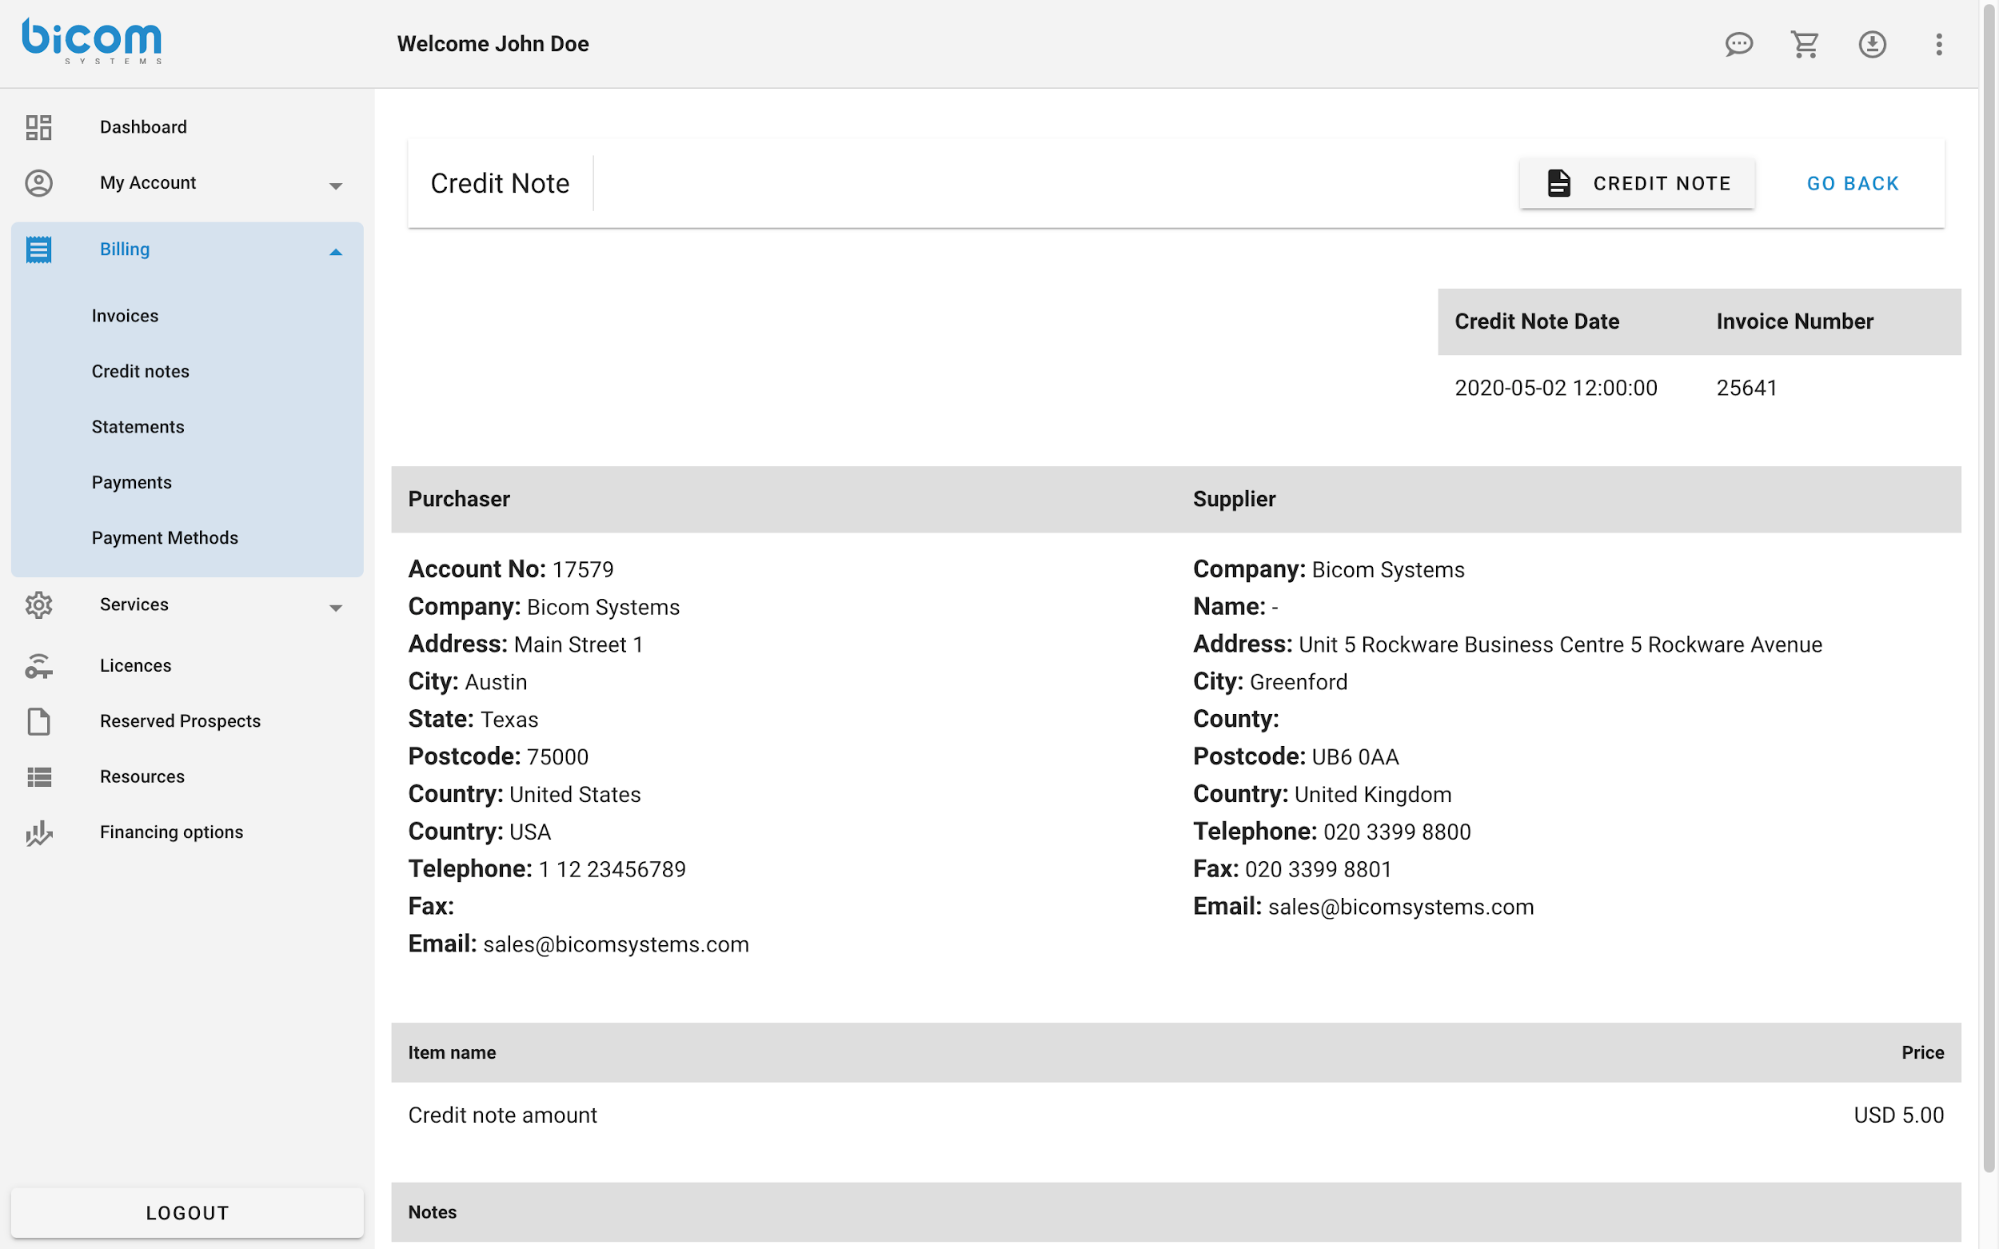
Clicking on the link in the description column opens credit notes detailed view. It is possible to download the Credit note in .pdf format by clicking on the “CREDIT NOTE” button on the top.
¶ Statements
The statements are a list of written records of happenings on each account in TELCOware. 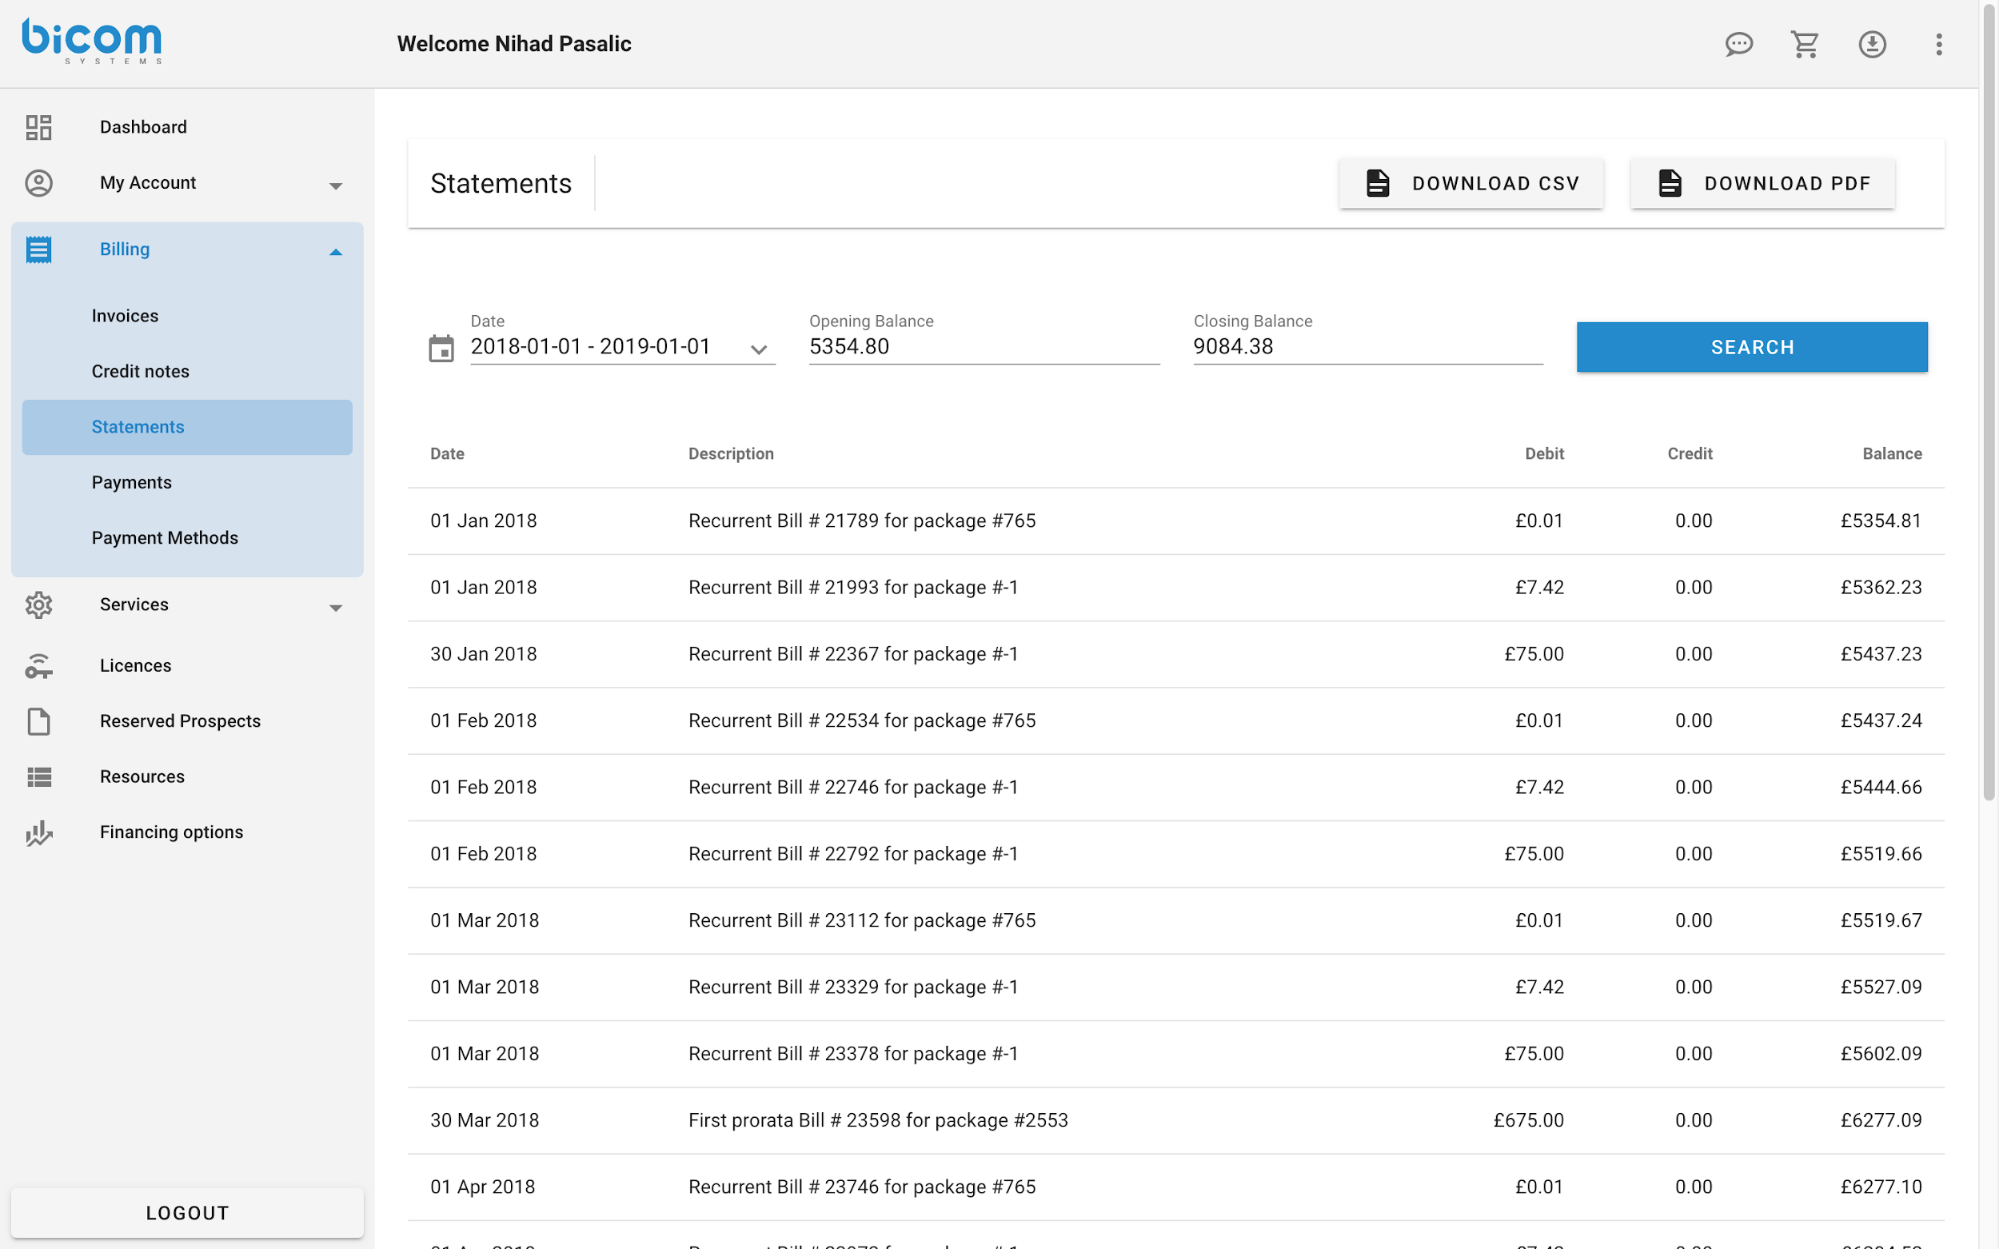
Possible filters:
- Date from
- Date to
It is possible to download all statements in the form of CSV with the “DOWNLOAD CSV”, and to download .pdf of all statements.
¶ Payments
The payments section lists all of the payments made by account users. Payments can be sorted by date, amount, and method. 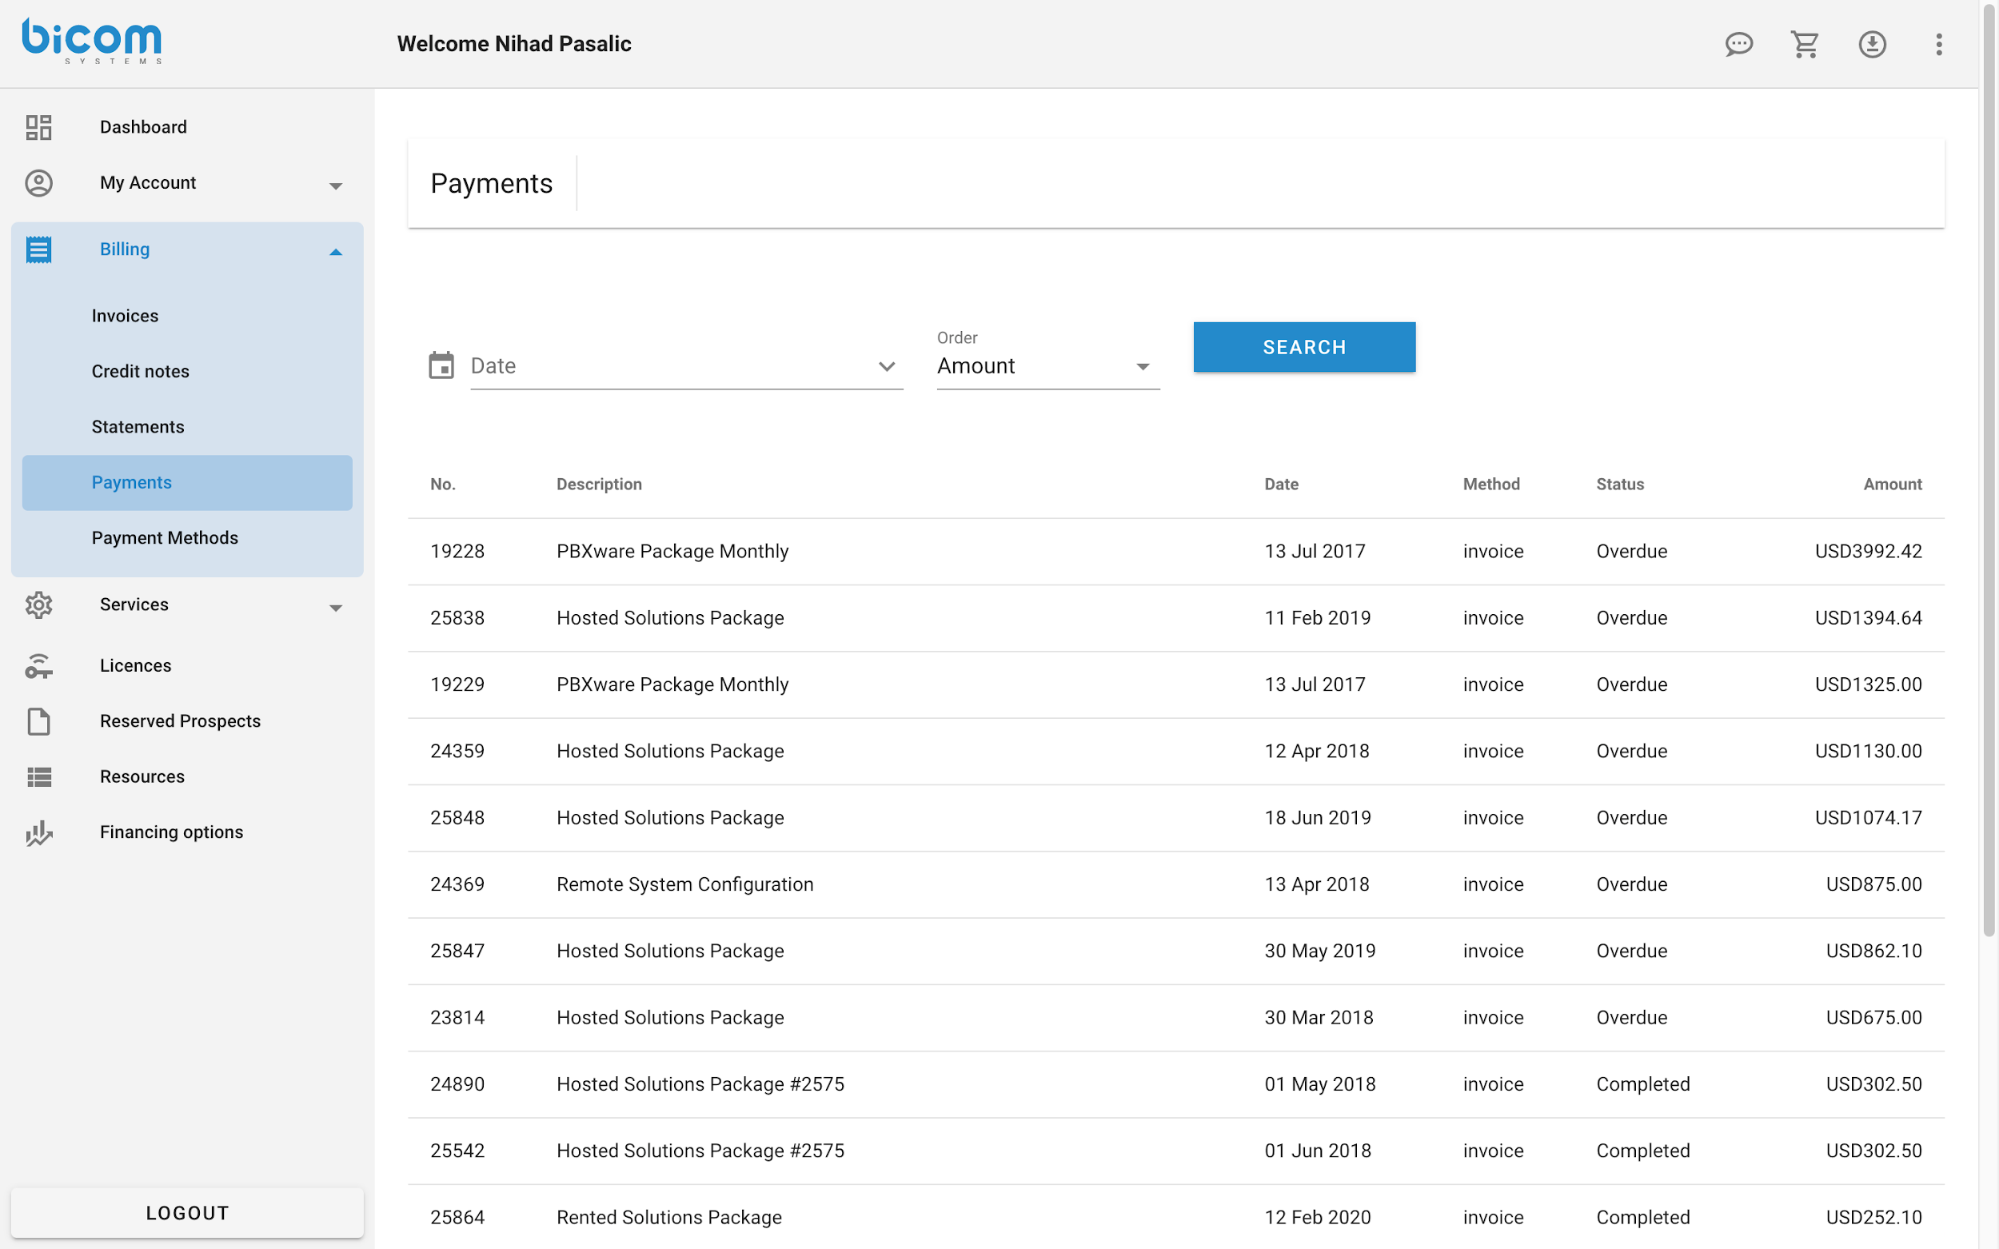
Possible filters:
- Date from
- Date to
¶ Payment Methods
¶ Authorize.net payment
Various automatic payment methods are supported to be offered to end-users to purchase goods and services. 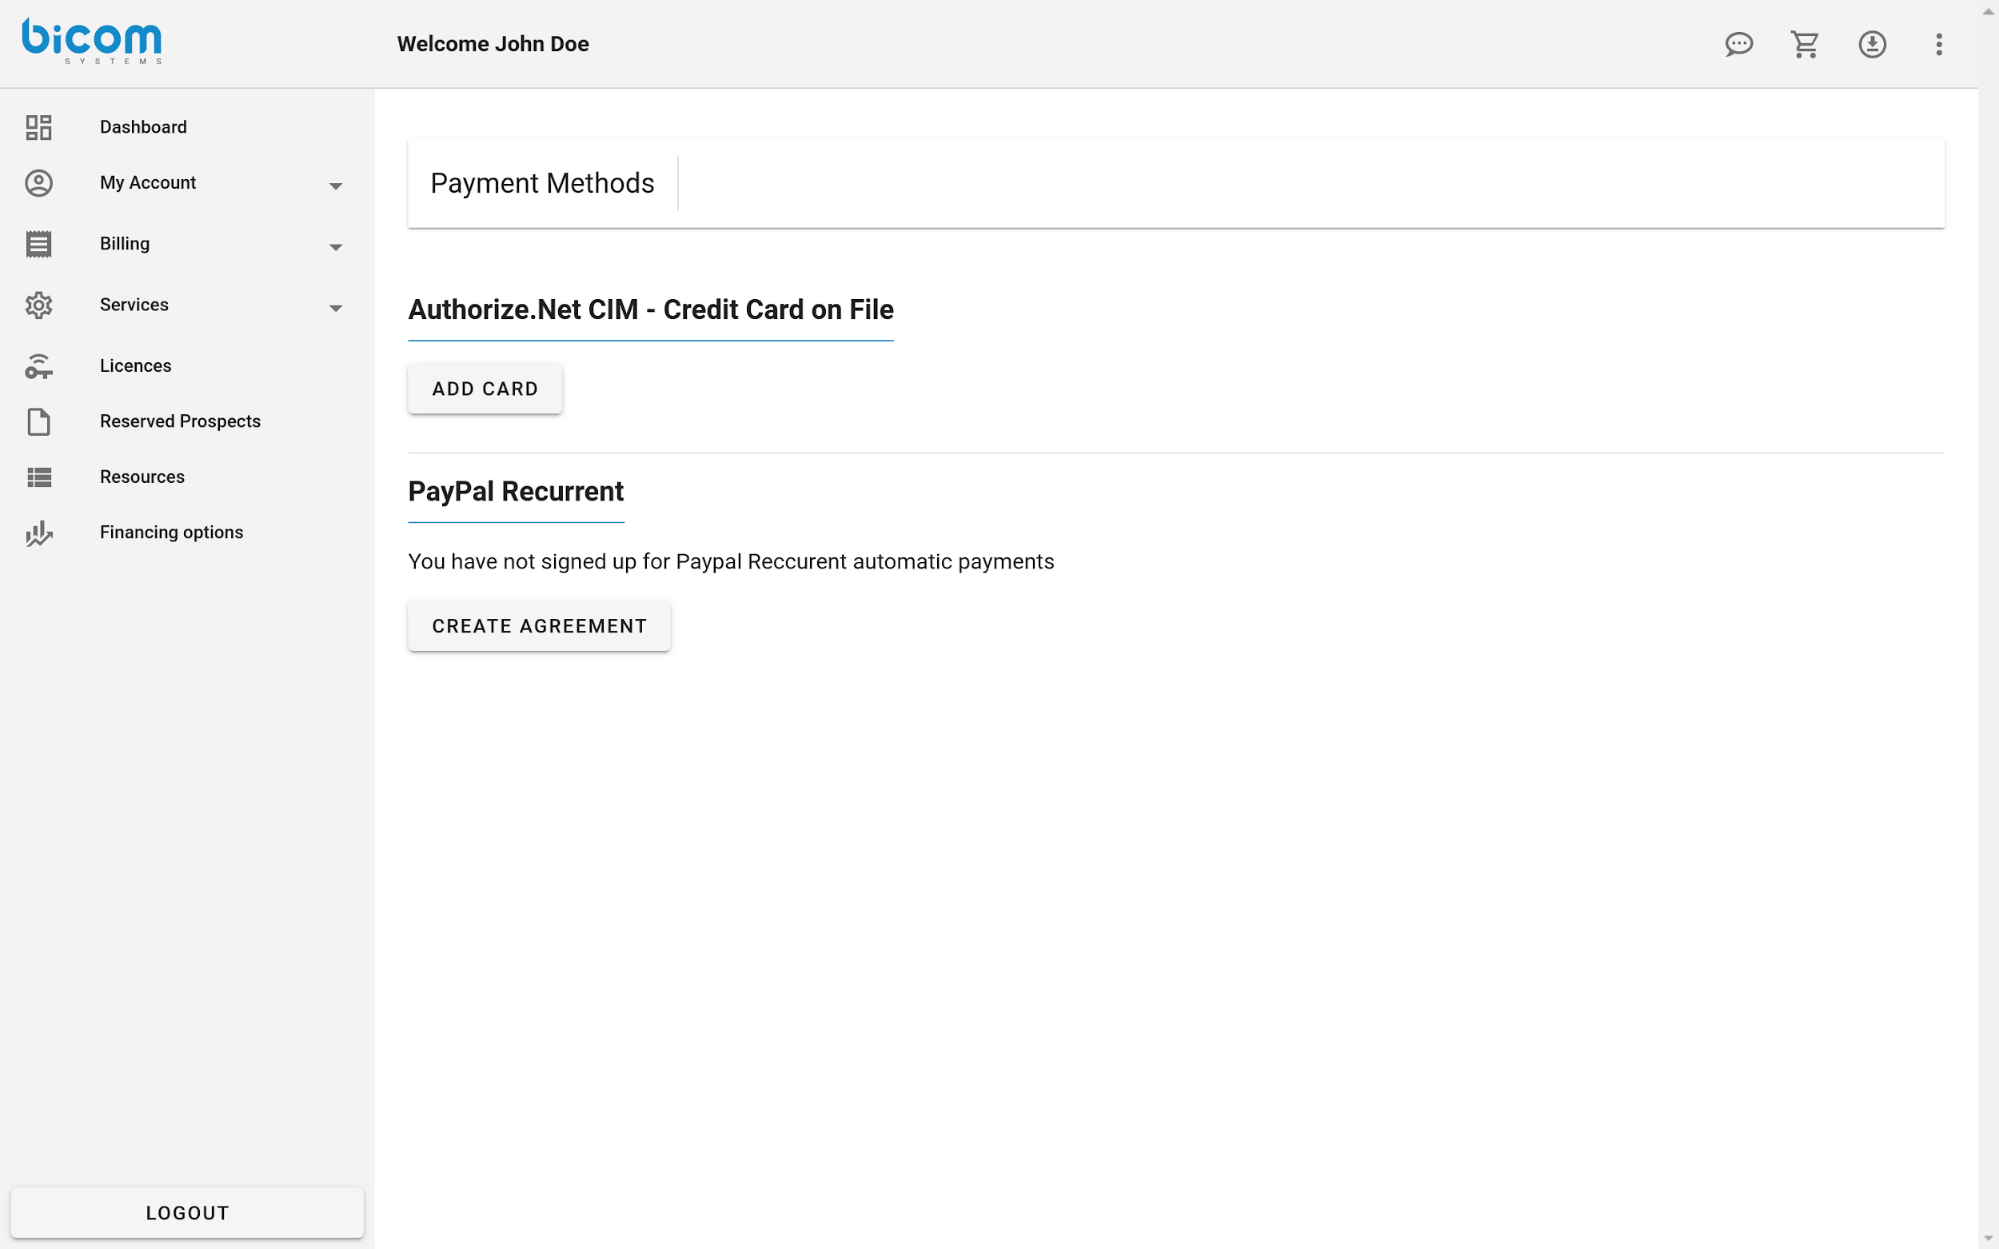
By clicking on the “ADD CARD” button you open a window where you can add your Credit card information, which creates the Authorize.net CIM payment profile.
¶ Paypal payment
You can create PayPal Billing Agreement by clicking on the “CREATE AGREEMENT” button, which allows us to automatically charge your PayPal account for invoices that are due and new orders, saving you the hassle of making sure your invoices are paid on time and easing your mind to let us take care of the billing for you. 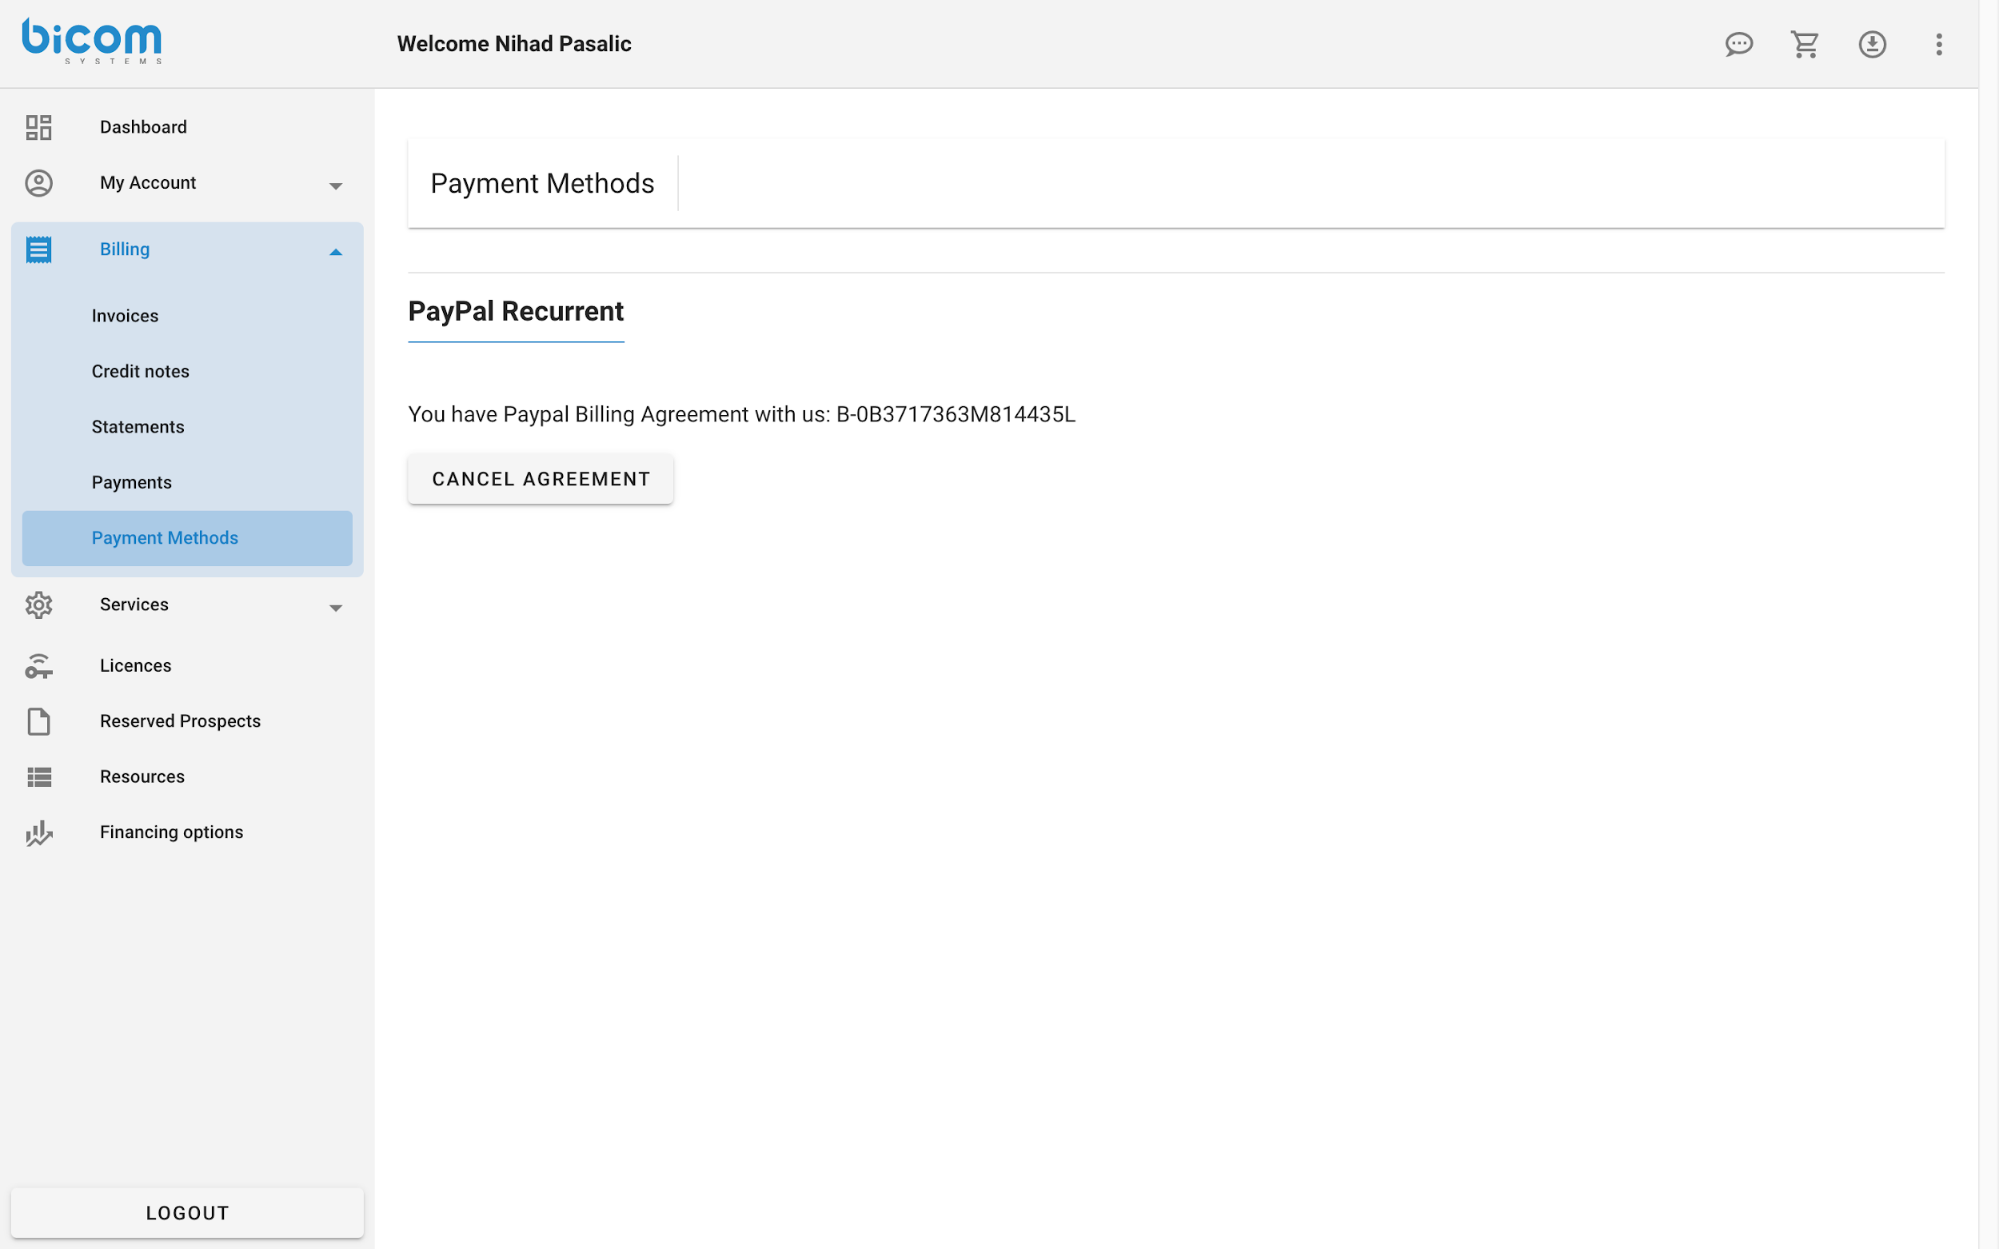
¶ Stripe Bacs Direct Debit payment
¶ Introduction video
Watch the video below to gain a better understanding of how to setup and pay using Bacs Direct Debit:
¶ Adding Bacs Direct Debit Payment Method
The Bacs Direct Debit payment method is exclusively available for UK accounts denominated in British Sterling. To utilize this payment method, you must initiate the process by creating a Stripe Customer profile and associating it with your Bacs Debit Bank Account. Follow these steps to set up your Bacs Direct Debit payment method:
- Visit the Payment Methods section
- Click on the "Add BACS Direct Debit" option
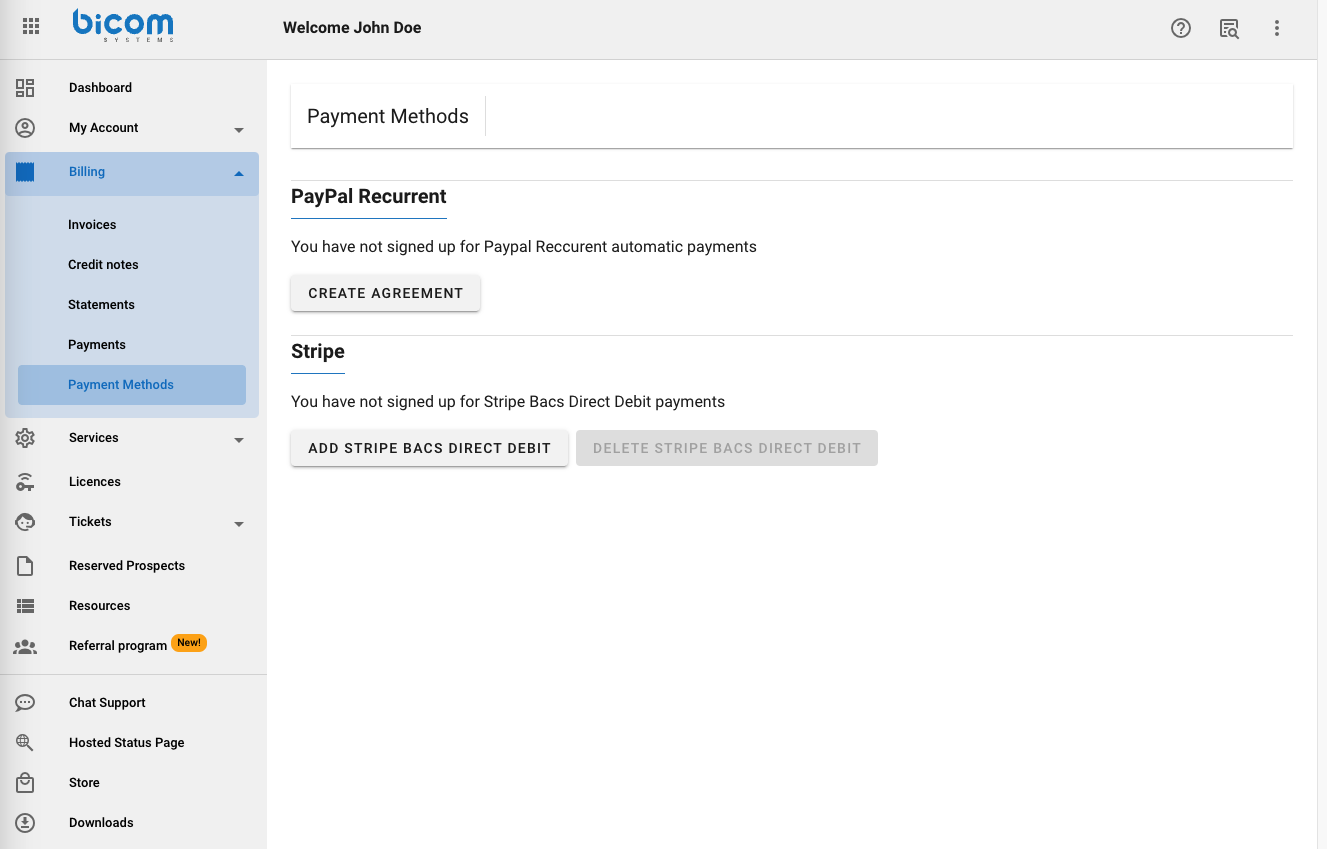
Upon selecting "ADD BACS DIRECT DEBIT," you will be redirected to the Stripe wizard. In the wizard, you'll need to provide your account information to create the Customer profile: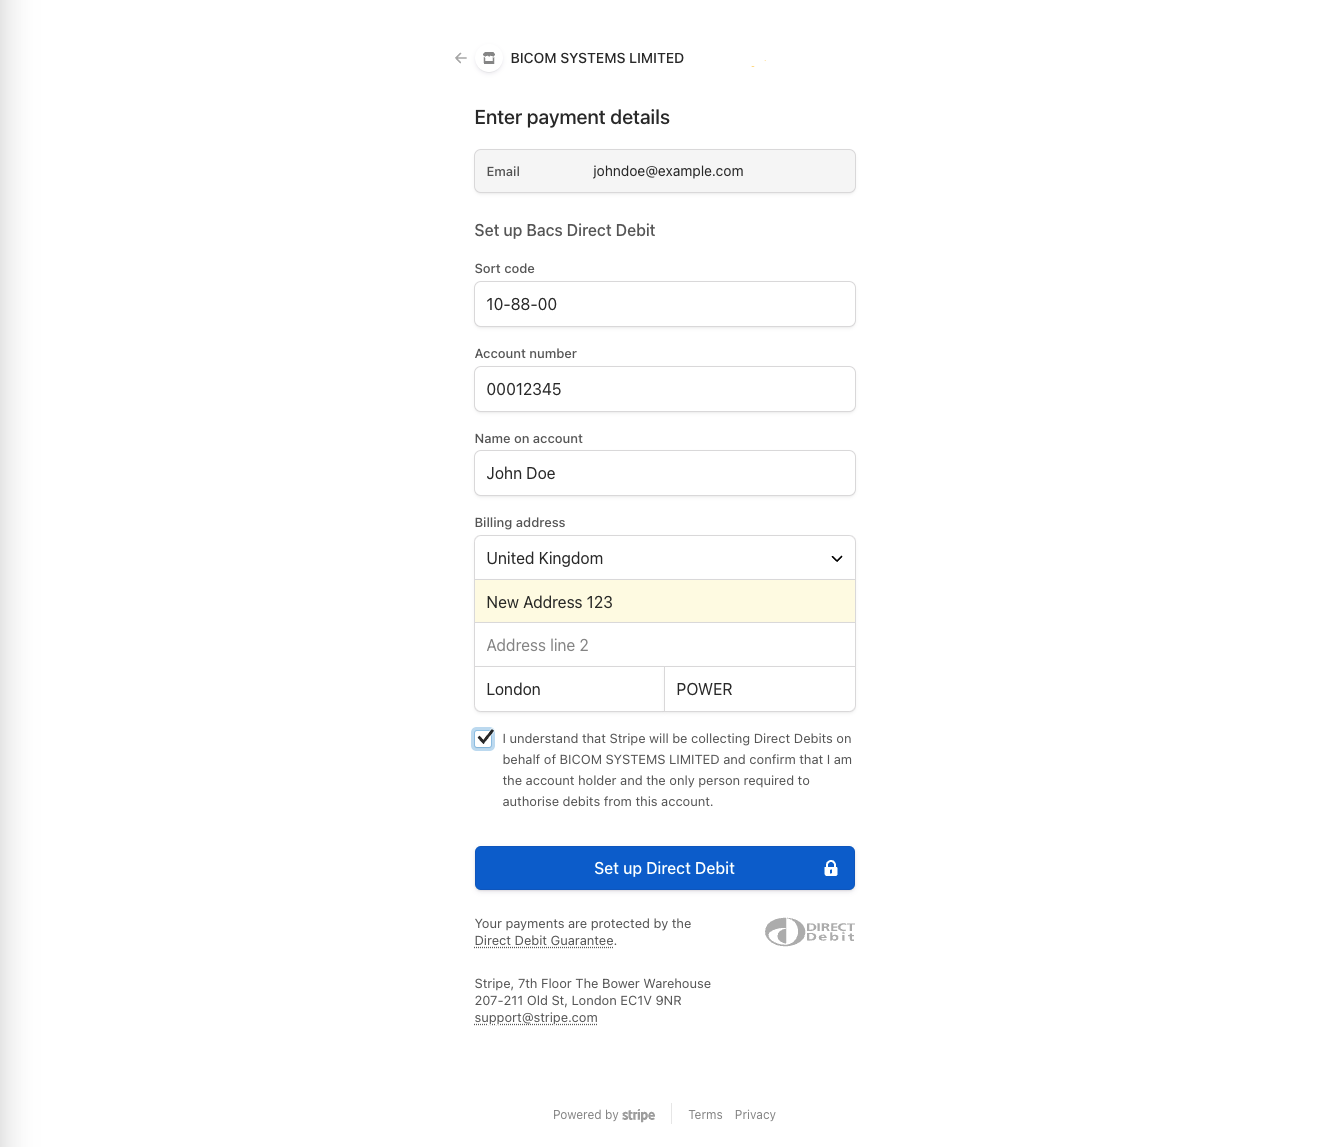
Once you have entered all the necessary data, the "Set up Direct Debit" button will become enabled. Click on this button to proceed with the creation of your Stripe Customer profile.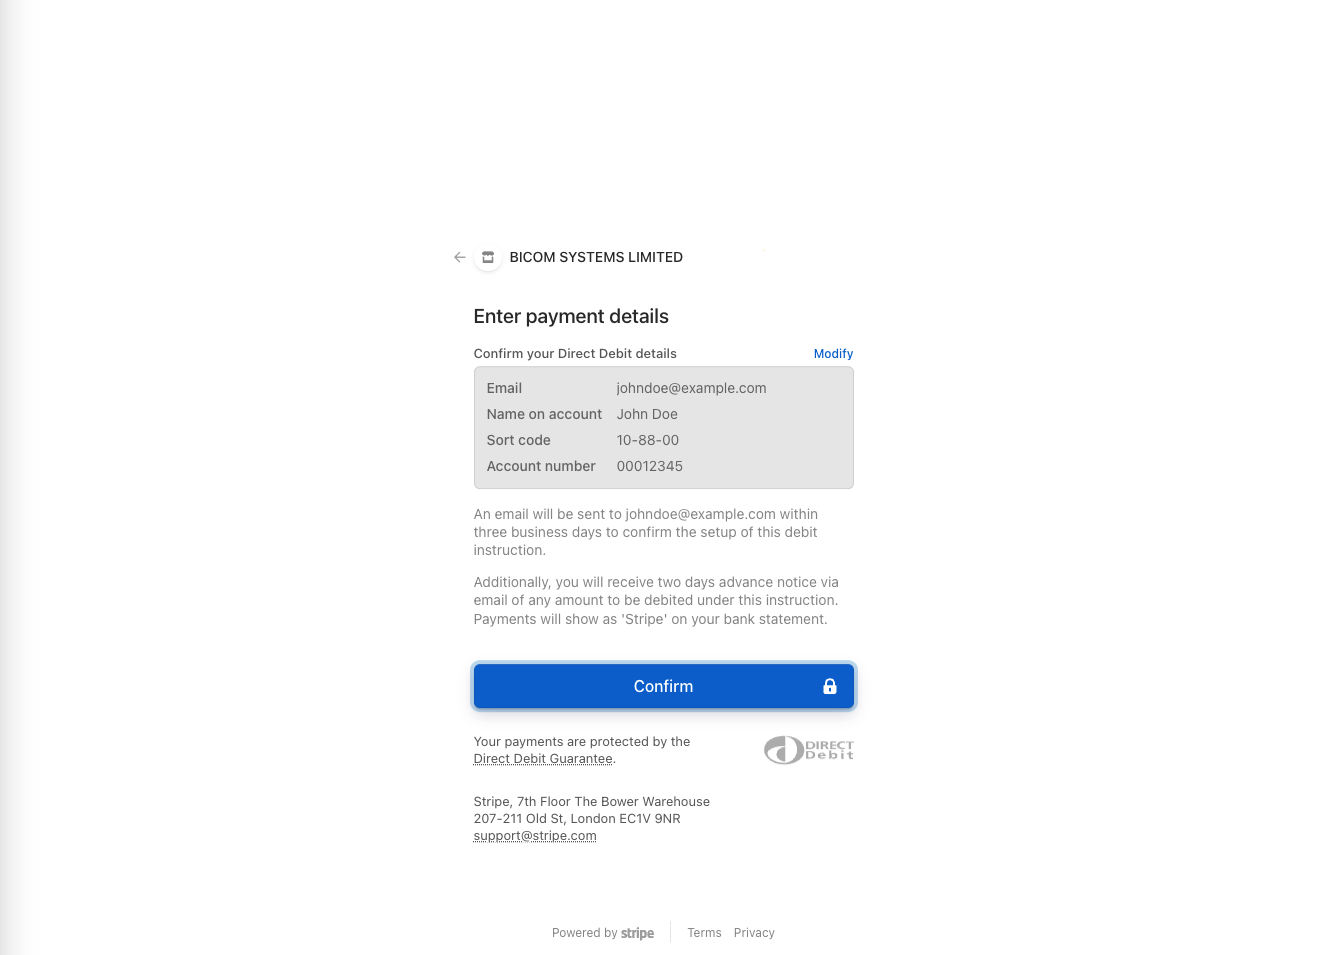
If, at any point, you wish to cancel the Stripe Customer creation process, you can simply click on the "Back" button.
Upon clicking the "OK" button on the confirmation page, you will be redirected to the Payment Methods section, where you can review your Stripe Account Status: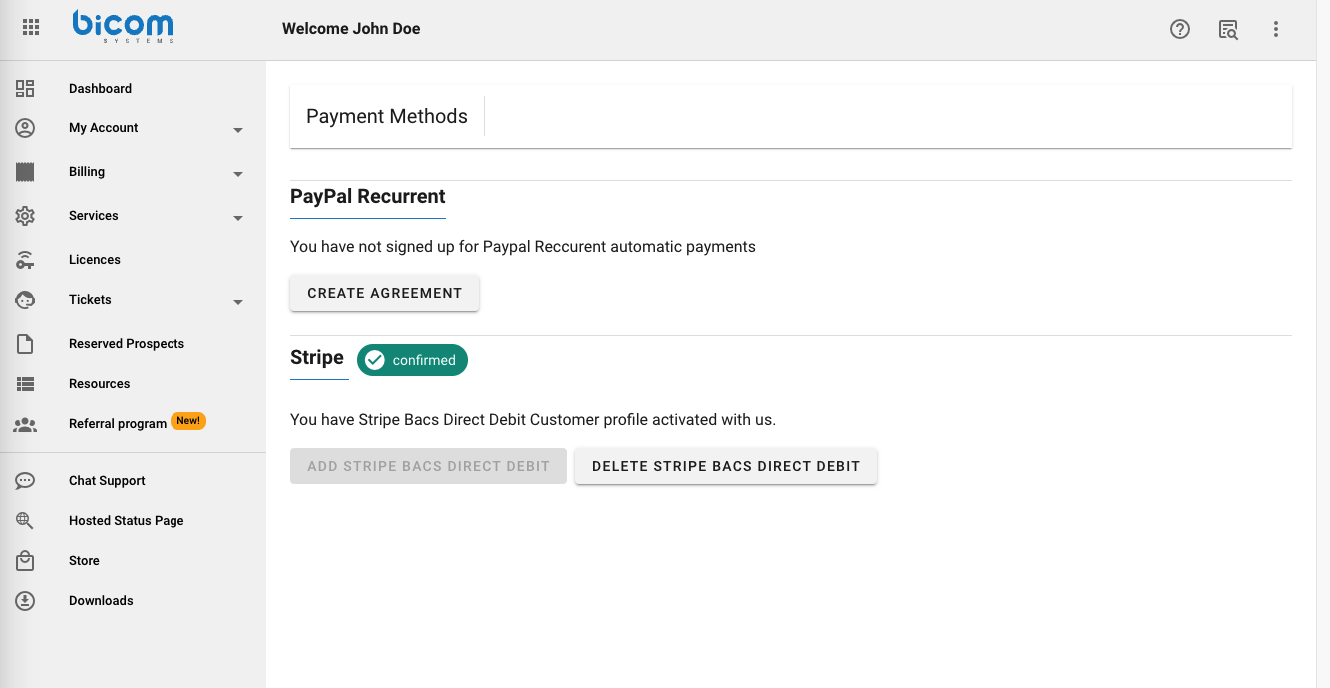
It's important to note that the Stripe confirmation process for the Customer profile typically takes 3-7 days. During this period, your account status will be listed as "pending." If the process takes longer than 7 days, it is advisable to contact your Account Manager for assistance.
¶ Making Payments with Stripe BACS Direct Debit
In the payment process, you'll have the option to select "Stripe BACS Debit" as your preferred payment method. Follow the steps below to complete your payment:
- Access the Payment section
- Choose "Stripe BACS Debit" from the payment option. This selection will lead you to the next screen:
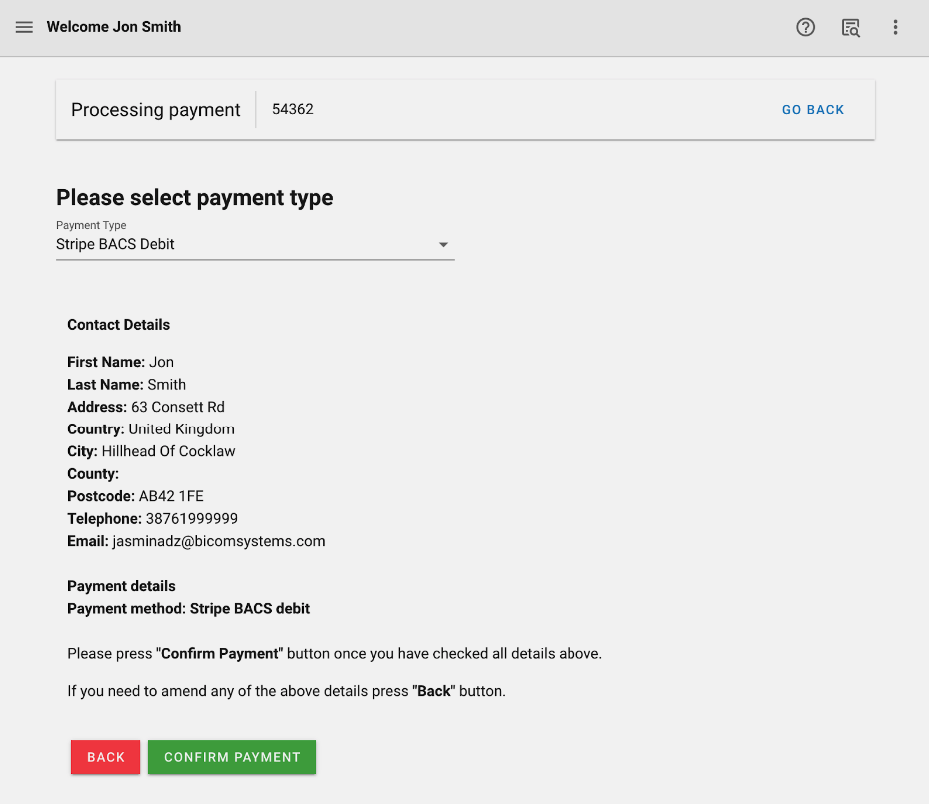
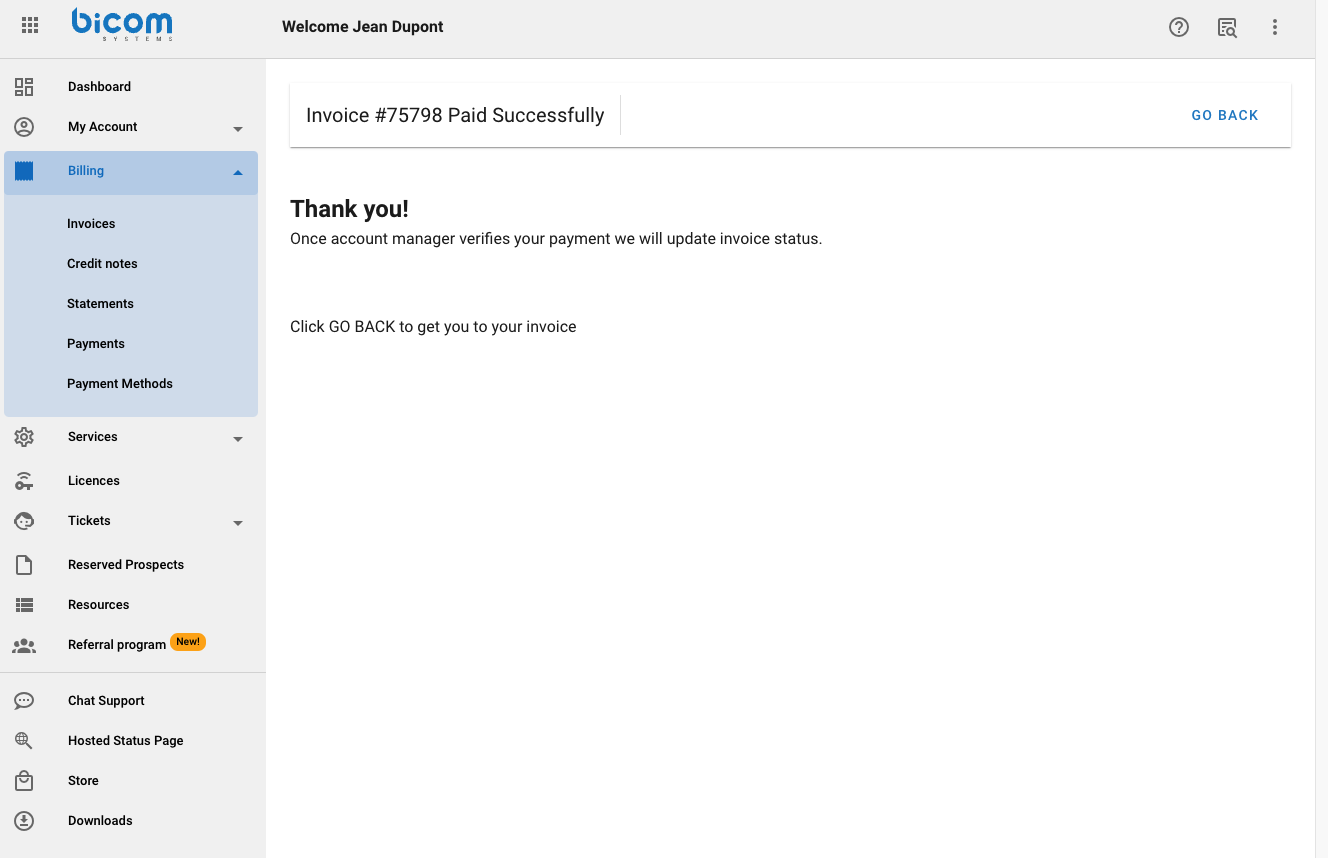
- To proceed with the payment, click on the "Confirm Payment" button. Upon successfully completing the payment, you will be redirected to a confirmation page. This page will confirm the successful processing of your payment:
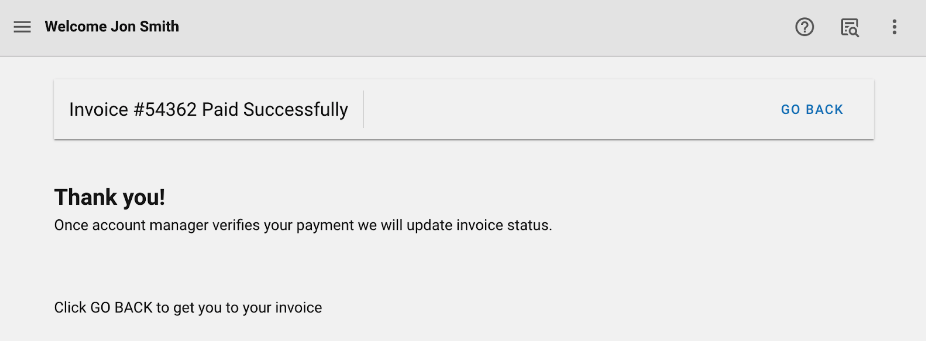
In the event that you wish to return to a previous stage or review your invoice, you can click on the "GO BACK" button. However, please note that during the verification process by your account manager, the "PAY NOW" button on your invoice will be disabled.
Once the account manager verifies your payment, your invoice status will be updated accordingly.
By following these steps, you can efficiently complete your payment using the Stripe BACS Debit method, ensuring a secure and straightforward transaction process.
¶ Stripe SEPA Direct Debit payment
¶ Introduction video
Watch the video below to gain a better understanding of how to setup and pay with SEPA Direct Debit:
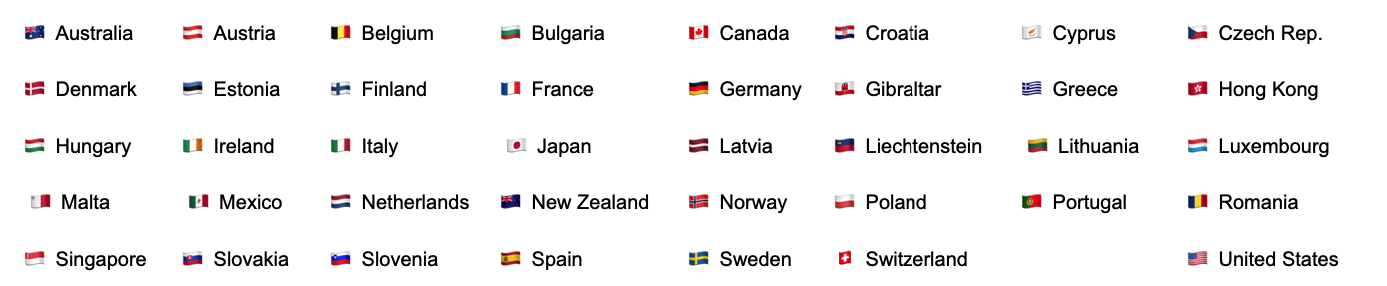
Countries eligible for Stripe SEPA Direct Debit:
Stripe SEPA Direct Debit is a convenient and secure payment method that allows eligible users to make transactions seamlessly. To enable this feature, you need to create a customer profile with Stripe. Follow the step-by-step guide below to get started:
- Ensure you are eligible for Stripe SEPA Direct Debit
- Visit the Payment Methods section
- Click on Add SEPA Direct Debit

You will be redirected to Stripe's checkout form, where you need to provide your account information to create the customer profile:
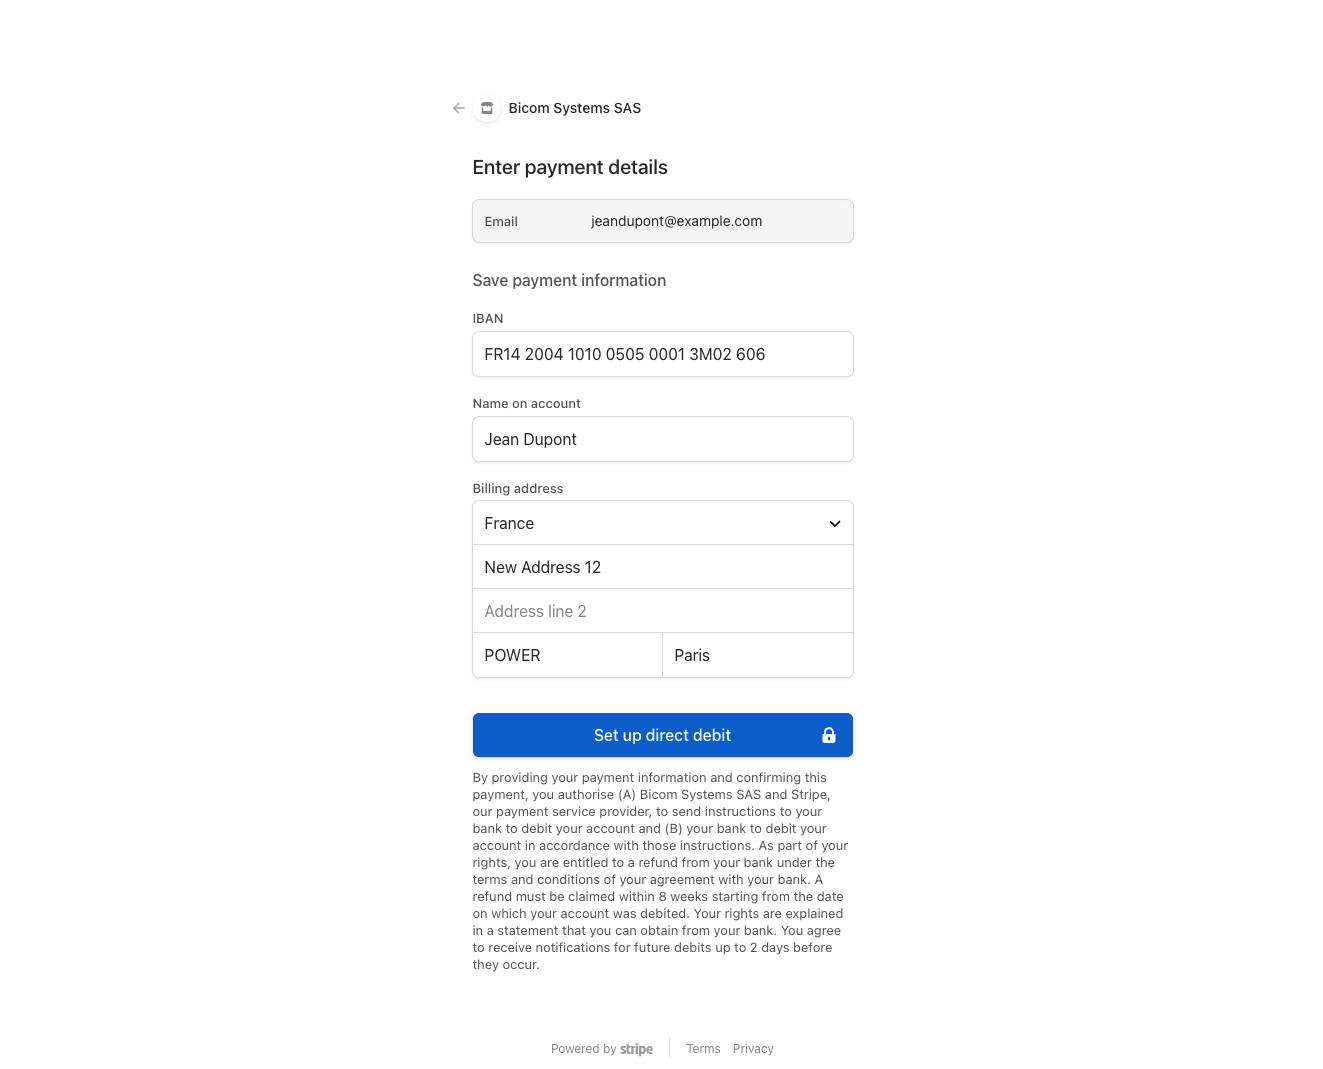
Once you have entered all the necessary data, the "Set up direct debit" button will become enabled. Click on it to create your Stripe Customer profile.
If your Stripe registration is successful, you will be redirected back to your account with a confirmation message:
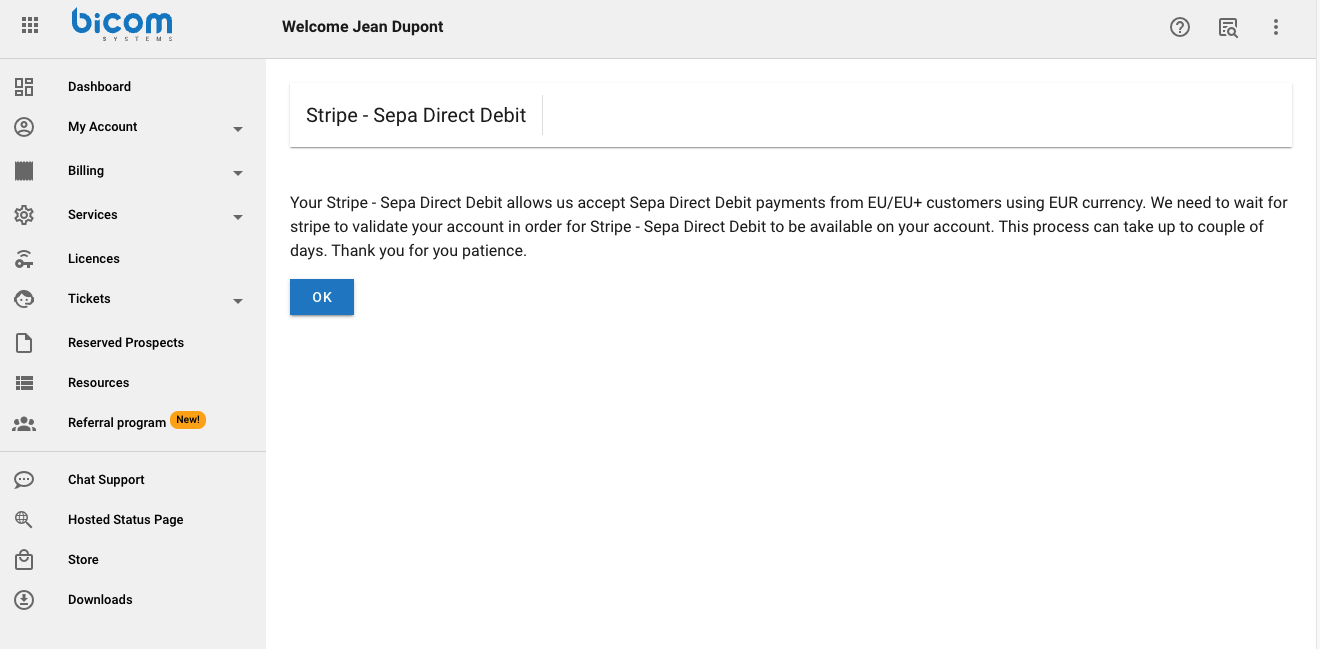
Clicking on the "OK" button will take you back to the "Payment Methods" page, where you can check your Stripe Account Status:
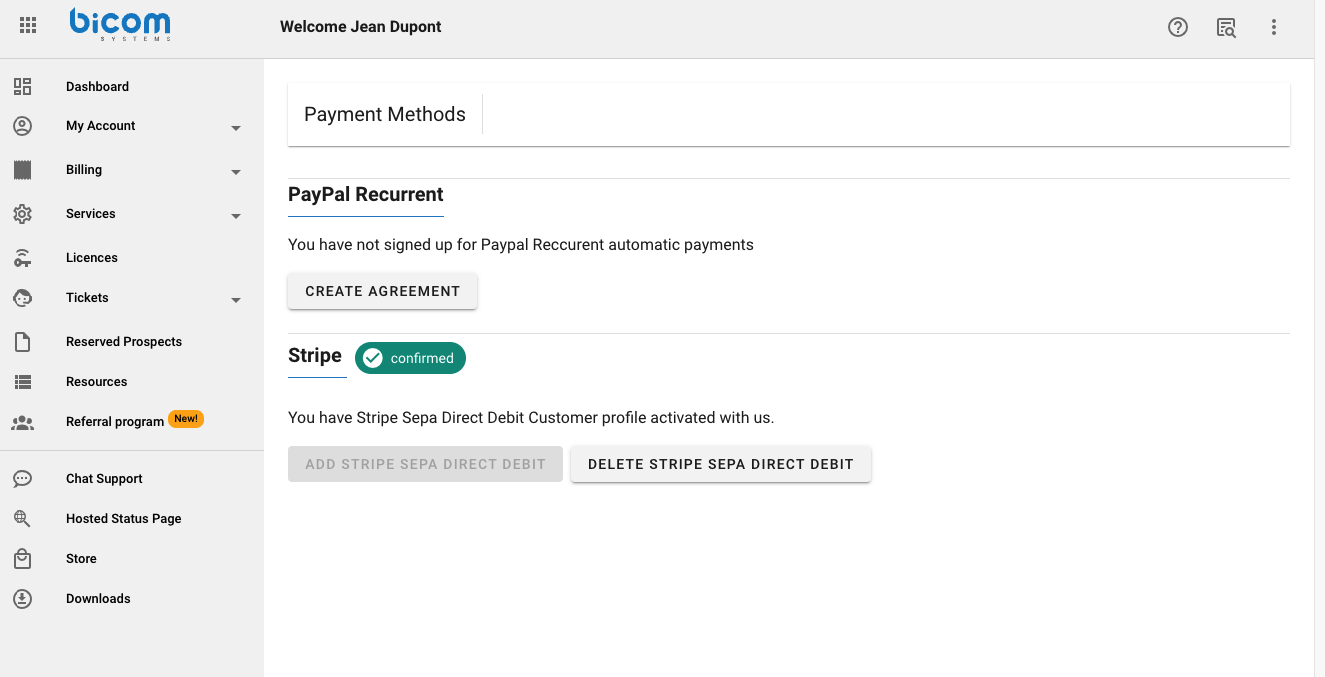
It's important to note that the Stripe confirmation process for the Customer profile typically takes 3-7 days. During this period, your account status will be listed as "pending." If the process takes longer than 7 days, it is advisable to contact your Account Manager for assistance.
¶ Making Payments with Stripe SEPA Direct Debit
Once you have successfully created your Stripe Customer profile, you can take advantage of Stripe SEPA Direct Debit to conveniently pay your invoices. Here's a step-by-step guide on how to use this payment method:
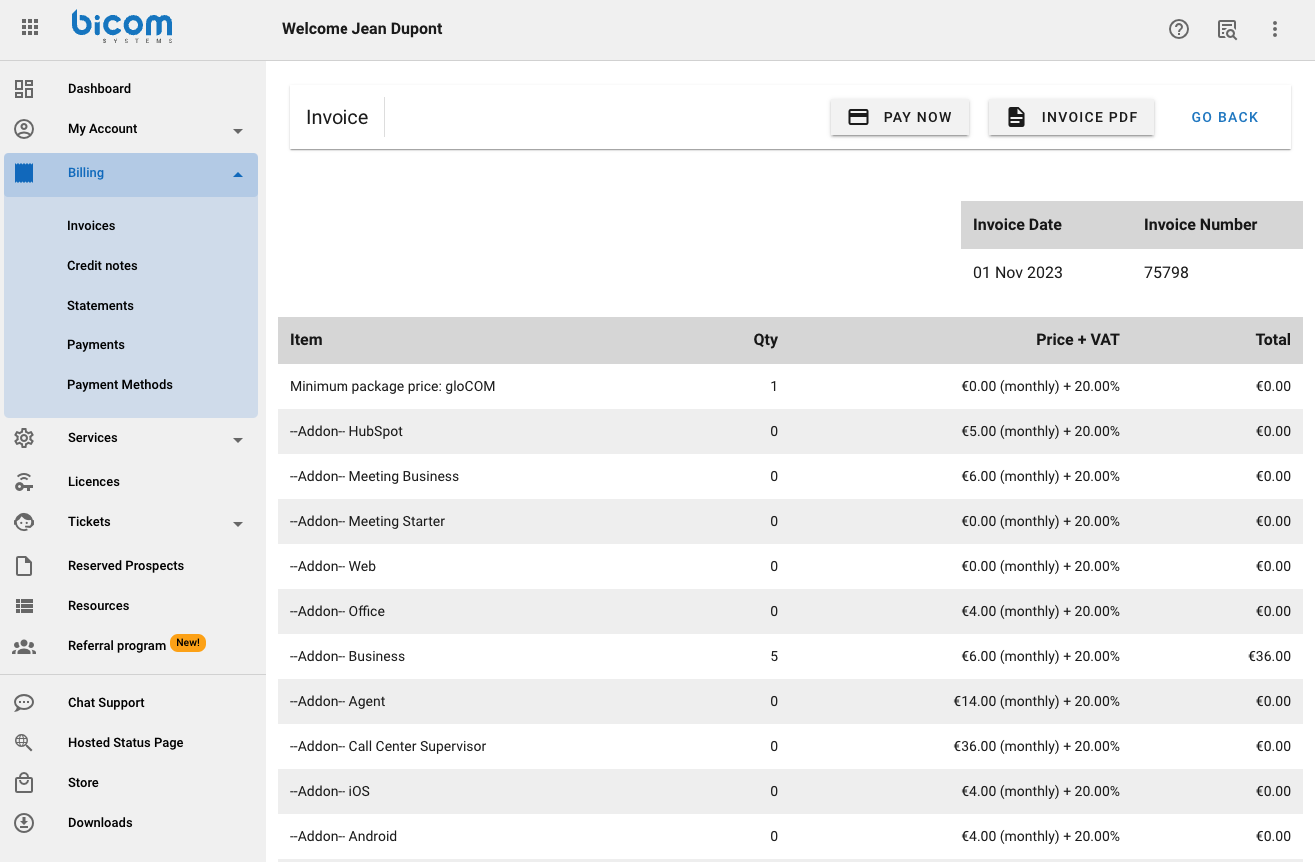
- Navigate to the invoice you wish to pay using the Stripe SEPA Direct Debit option.
- Click on the "PAY NOW" button to initiate the payment process.
- On the next page, you will be presented with various payment options. From the "Payment Types" dropdown menu, select "Stripe SEPA Debit."
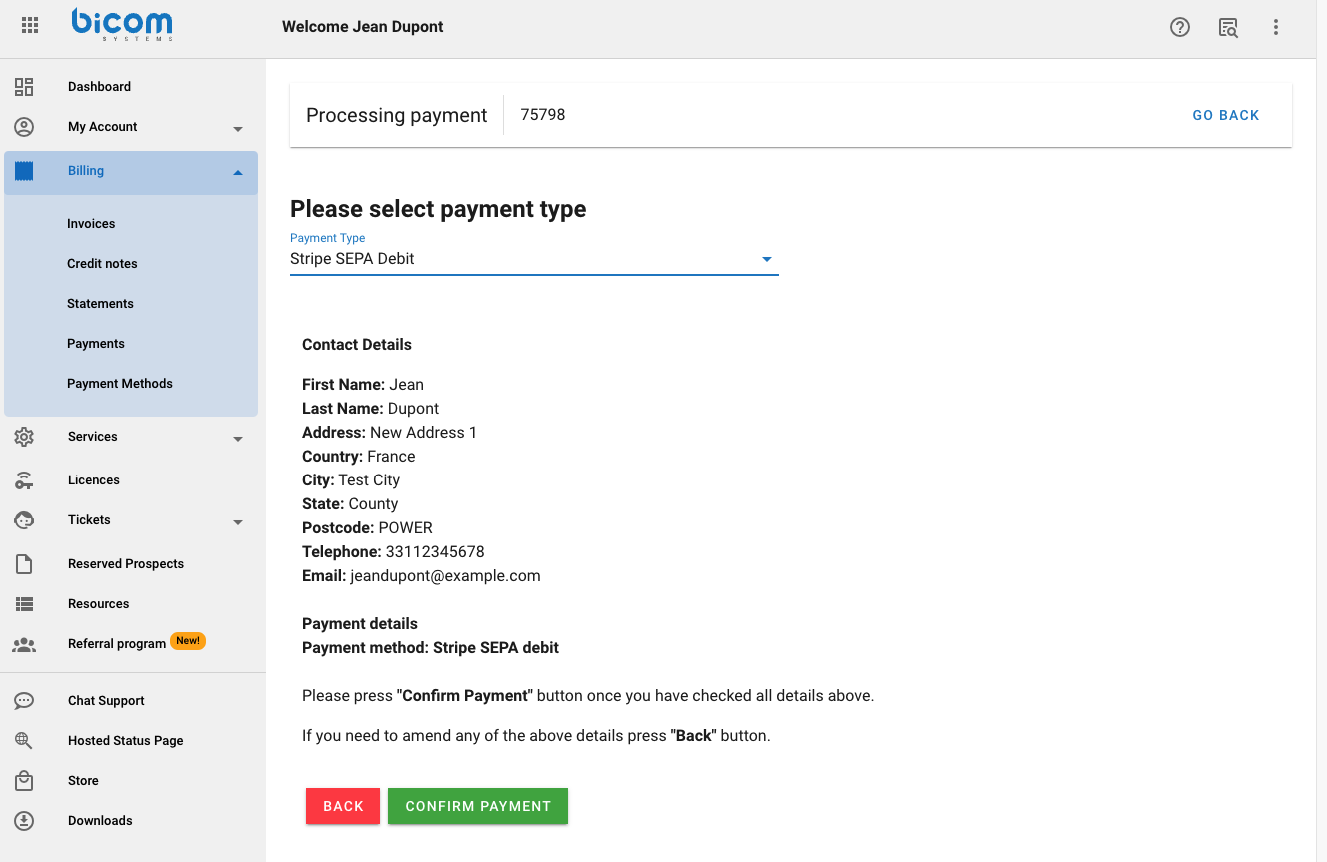
- Confirm the payment to proceed.
- Upon successful payment, you will be redirected to a page displaying a confirmation message:
- Should you decide to return to the previous page or review your invoice by clicking on the "GO BACK" button.
- You may notice that the "PAY NOW" button is temporarily disabled. This is because the invoice payment is undergoing verification by the Account Manager.Once the Account Manager completes the verification process, your invoice status will be updated accordingly.
By following these steps, you can seamlessly and securely make payments using Stripe SEPA Direct Debit for your invoices. This process ensures an efficient and transparent payment experience for both businesses and individuals.
¶ Stripe Credit Card payment
The integration of Stripe Credit Card as a payment method offers users a secure and efficient way to process credit card payments on our platform. This section outlines the step-by-step process for users to add a credit card using the Stripe payment gateway.
¶ Introduction video
Watch the video below to gain a better understanding of how to setup and pay with Stripe Credit Card:
¶ Adding Stripe Credit Card Payment method
- Ensure you are eligible for Stripe Credit Card
- Visit the Payment Methods section
- Click on Add Credit card

- Within the payment methods section, locate and click on the "Add Credit Card" option.
- Upon selecting "Add Credit Card," users are seamlessly redirected to Stripe's secure form where they are prompted to enter their credit card information.
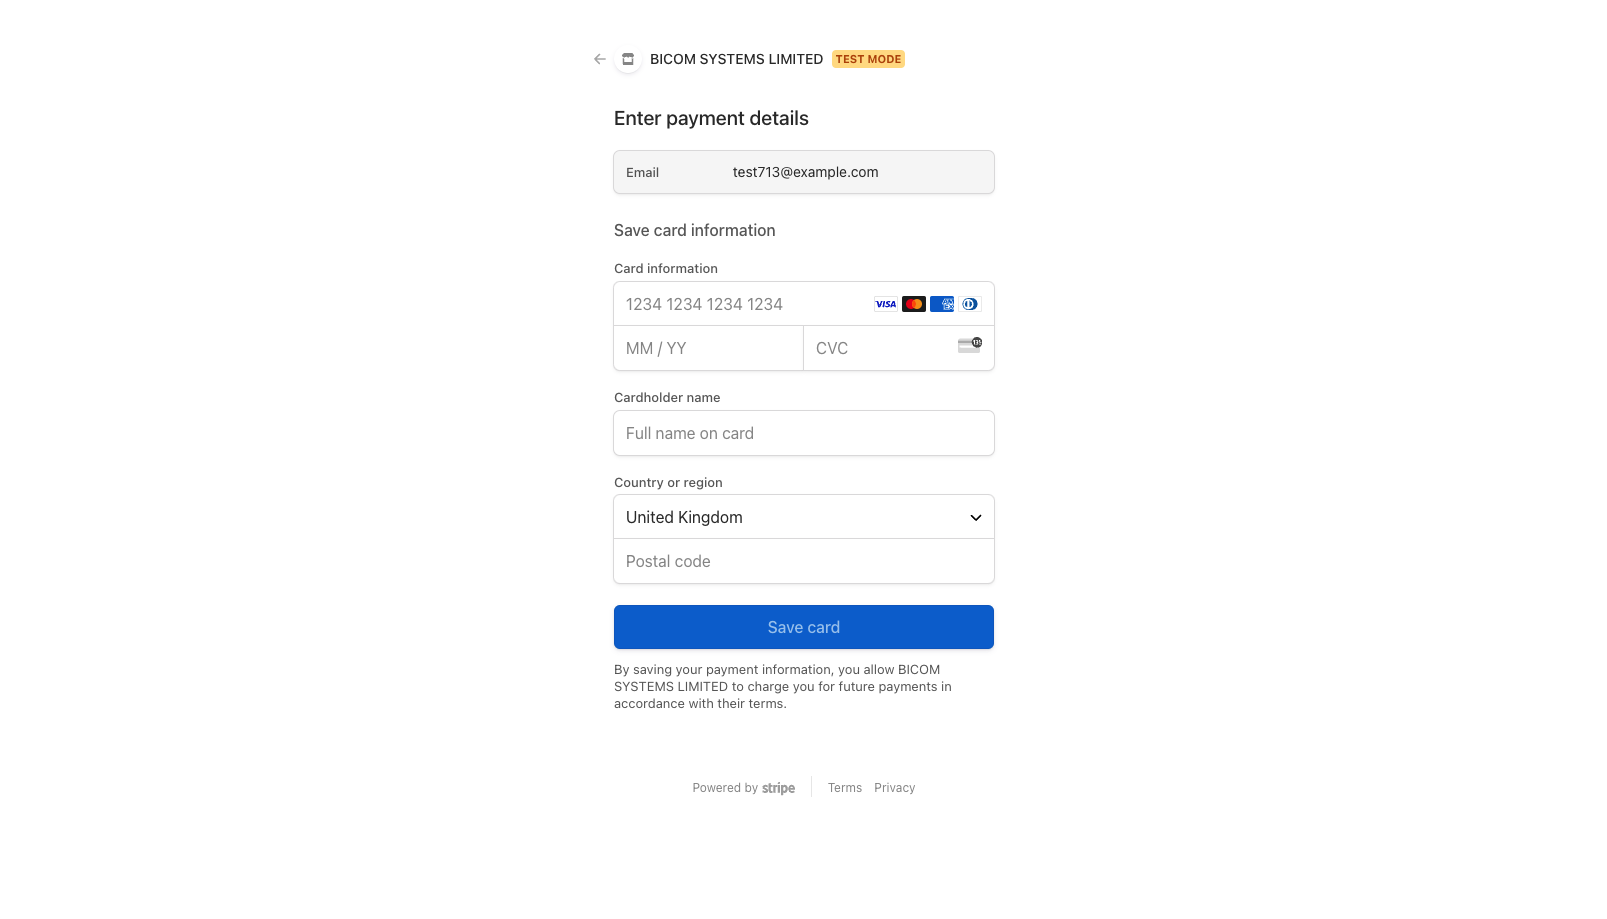
- Fill in the required credit card details on Stripe's checkout page. Once the data is entered accurately, click on the "Save Card" button to proceed with the registration.
- Upon successful registration, customers are automatically redirected back to our application. A confirmation message is displayed to acknowledge the completion of the credit card addition.
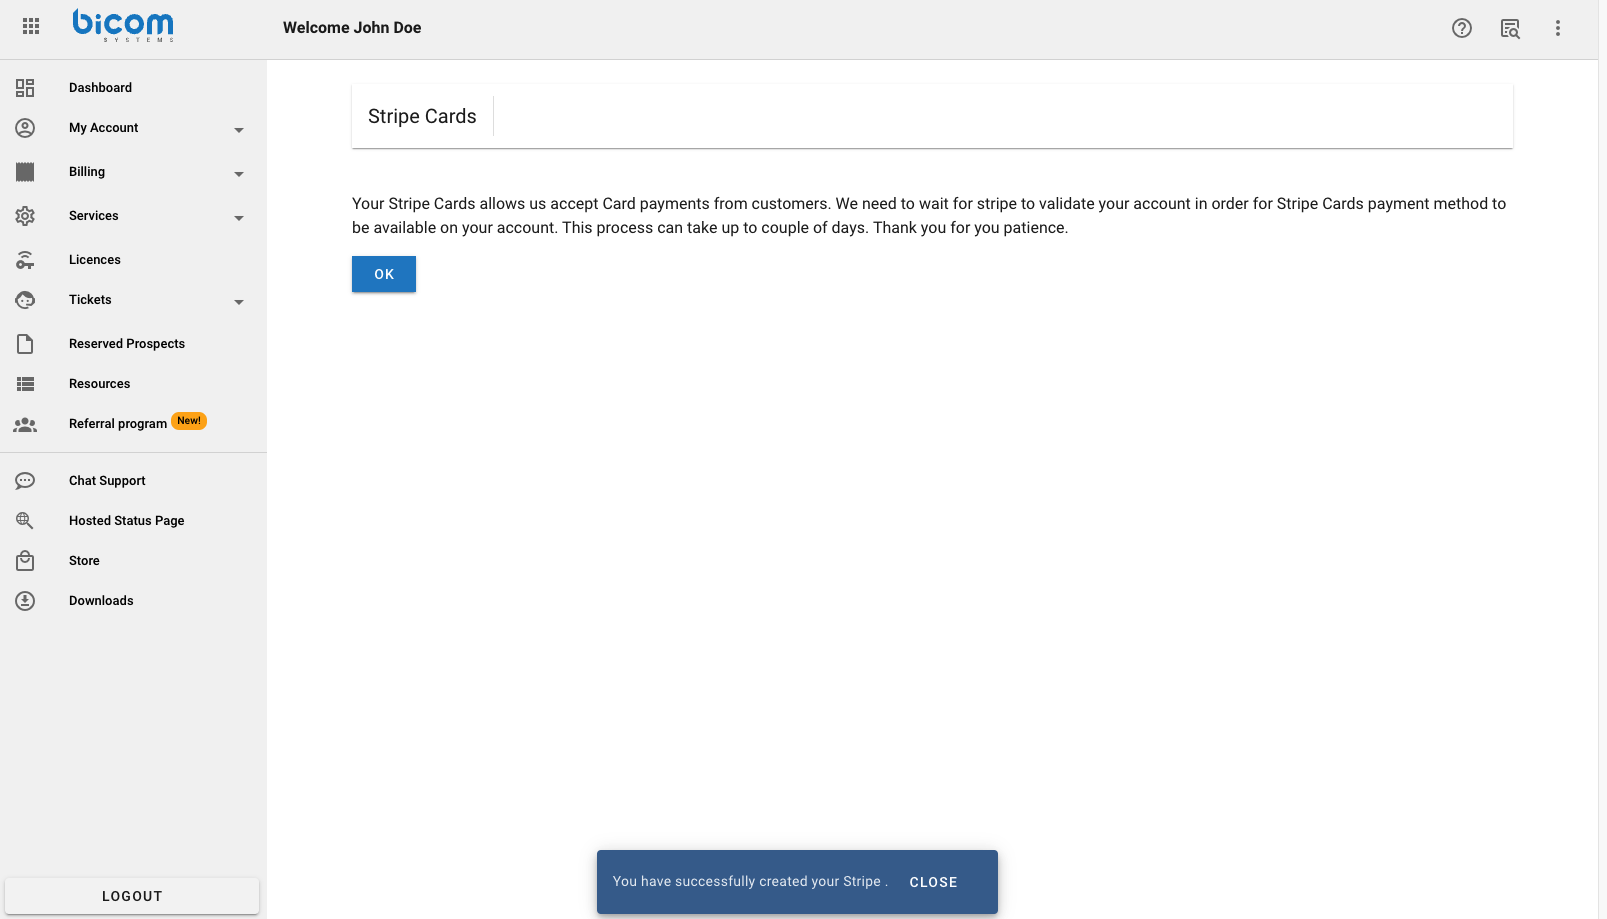
- Users can verify the status of their Stripe integration by navigating back to the payment methods page. Clicking the "Okay" button on the confirmation message also directs users back to the payment methods section.
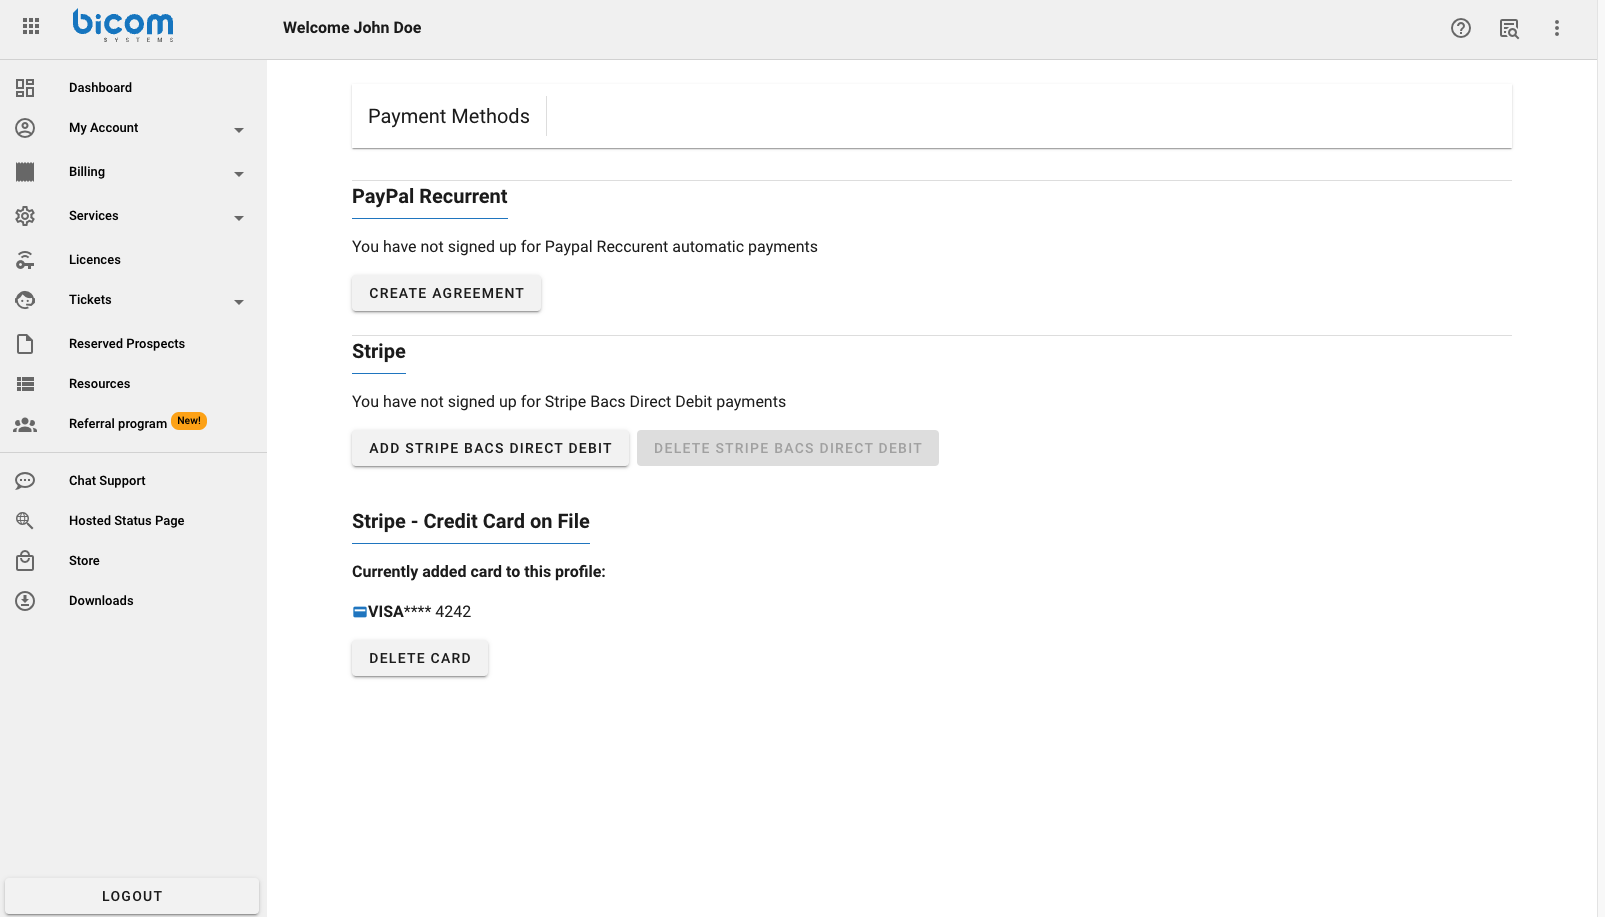
In certain instances, users may not find the Stripe Credit Card section within the payment methods interface. This could be due to eligibility criteria or other factors. If a customer does not see the option to use Stripe Credit Card for payments, it is recommended to consult our representatives for assistance and clarification.
¶ Making a Payment with Stripe Credit Card
- Begin by locating the specific invoice you intend to pay through the Stripe Credit Card method.
- Within the invoice interface click the "Pay Now" button to initiate the payment process.
- On the subsequent page, when prompted with various payment types, choose "Stripe Credit Card" from the dropdown menu.
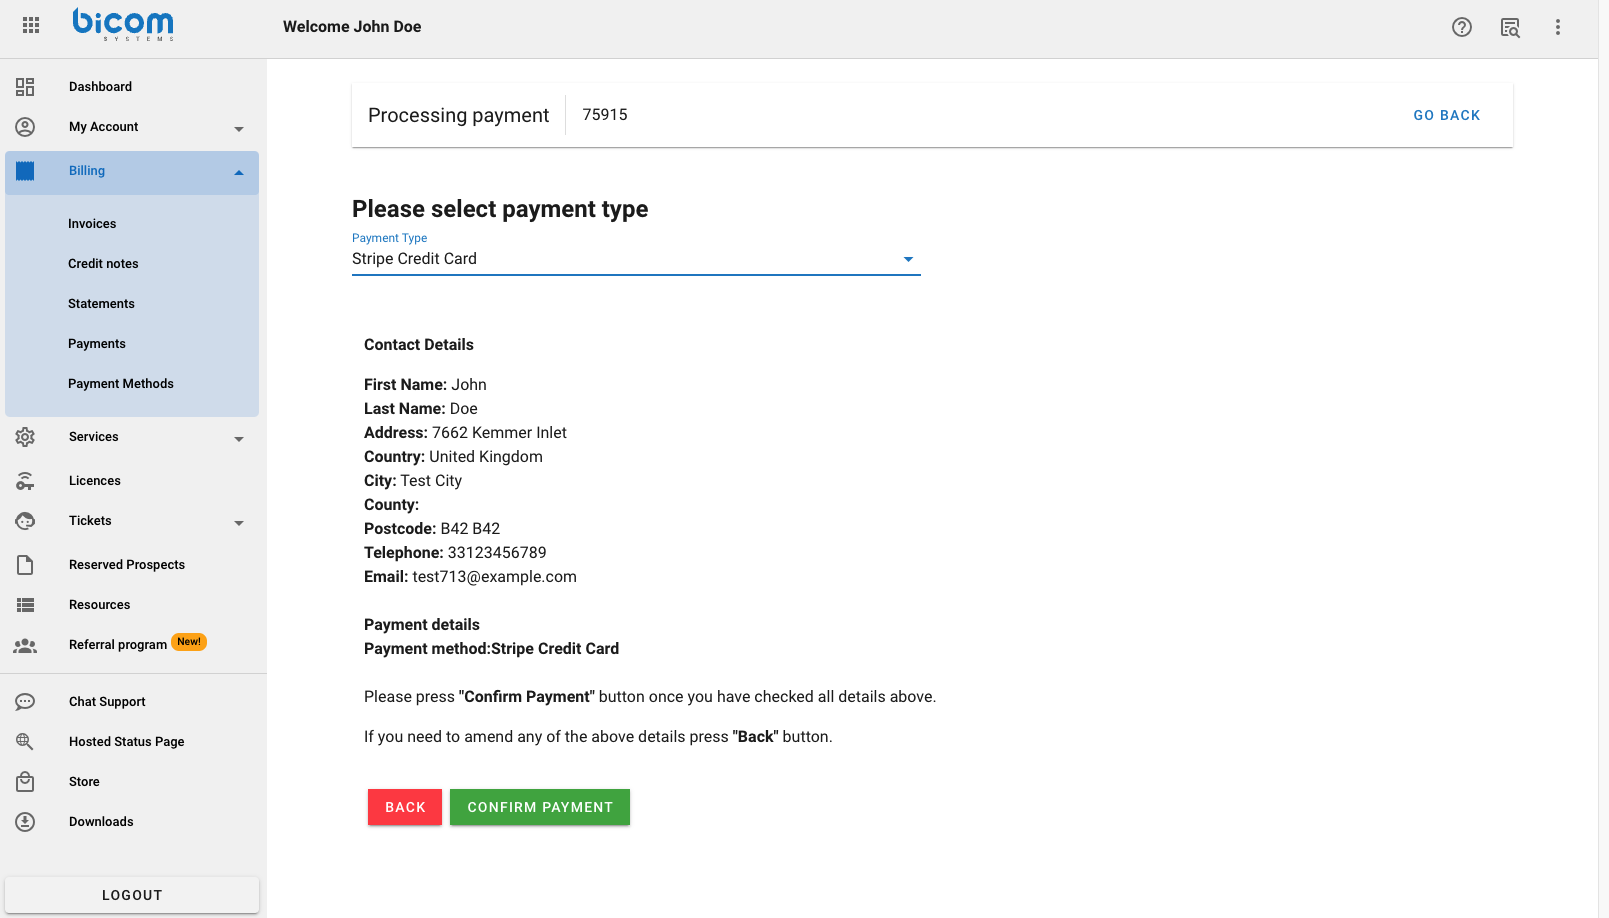
- After selecting Stripe Credit Card as the payment method, proceed by clicking the "Confirm Payment" button to initiate the transaction.
- Upon successful payment, users are redirected to a confirmation message, confirming the completion of the transaction.
- On the subsequent page, when prompted with various payment types, choose "Stripe Credit Card" from the dropdown menu.
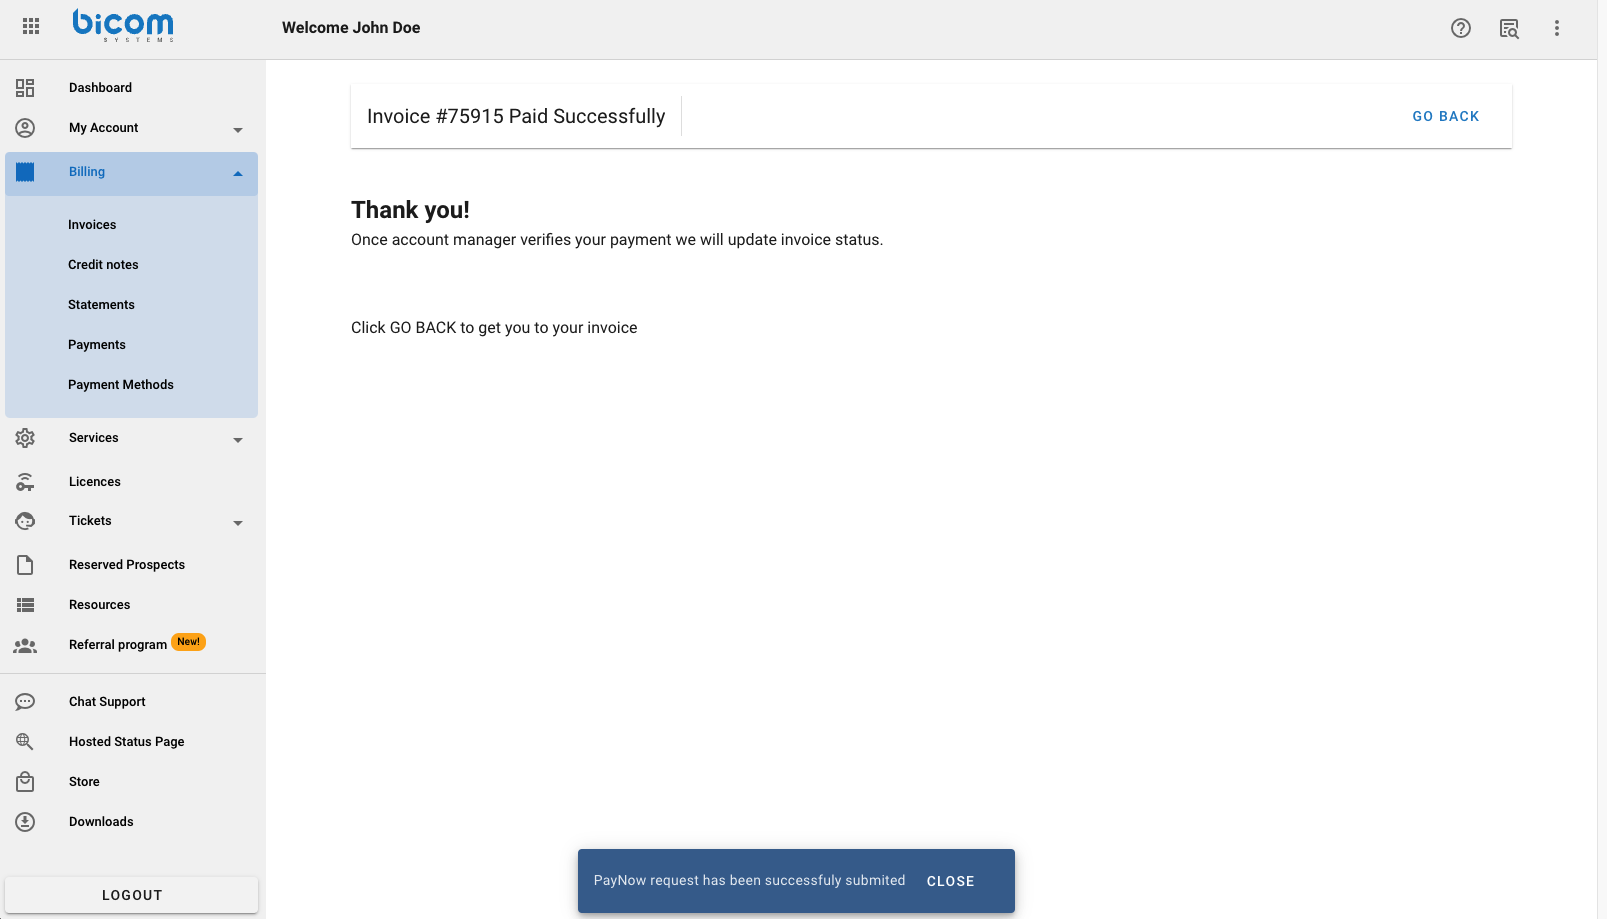
- If users wish to review the paid invoice, they can click the "Go Back" button, redirecting them to the invoice details.
During the processing of the payment, the "Pay Now" button on the invoice interface is temporarily disabled to prevent unintended interactions.
The integration of Stripe Credit Card for payments enhances the user experience by providing a straightforward and secure payment process. By following these steps, users can efficiently make payments, receive confirmation, and review their transaction details as needed.
¶ Services
¶ Subscriptions service
Services that users are subscribed to are displayed here. 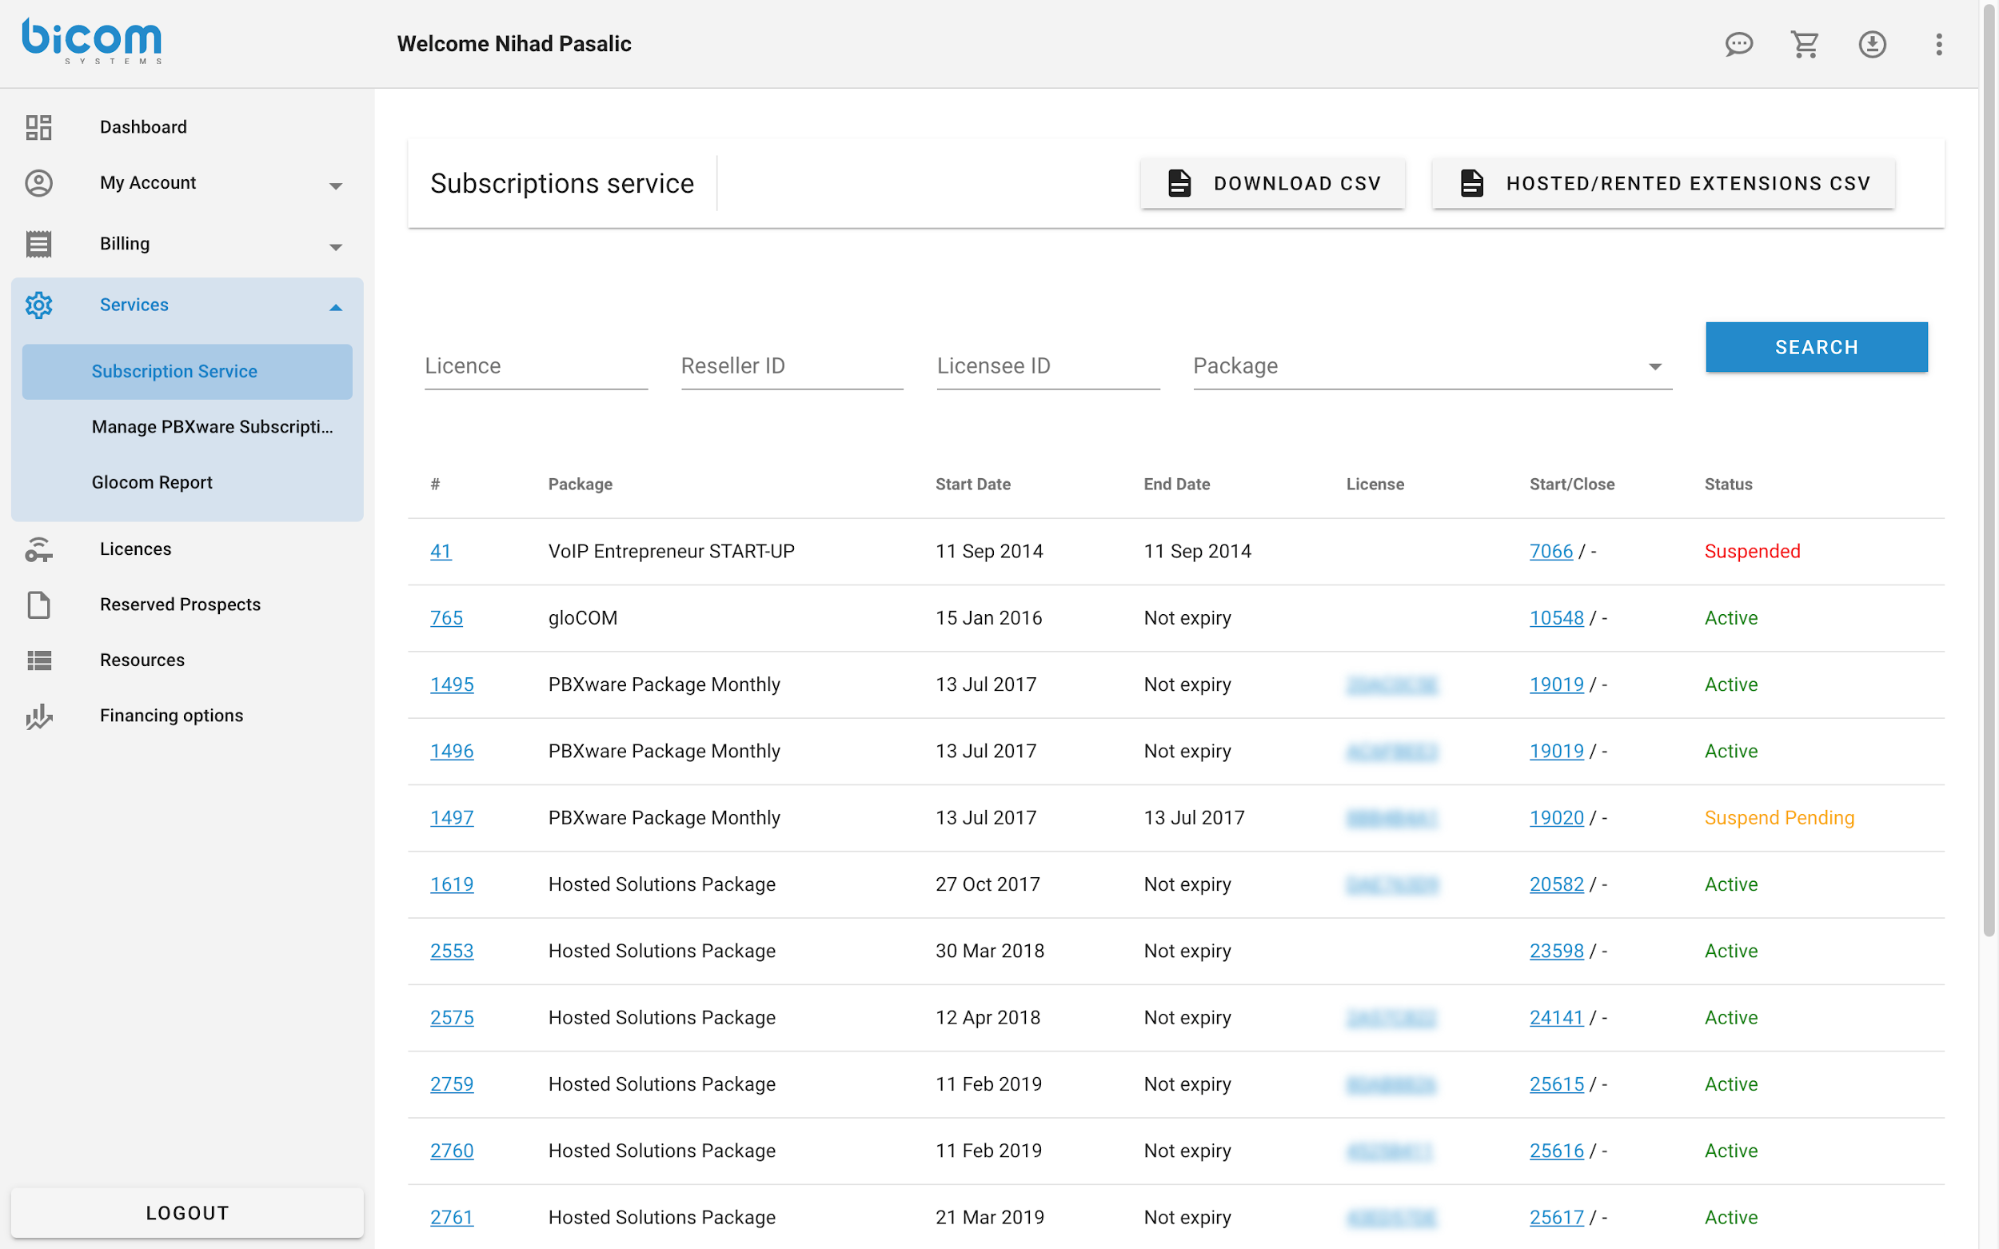
Possible filters:
- Licence
- Reseller Id
- Licensee
- Package
It is possible to download search results in the form of CSV with the “DOWNLOAD CSV” button, and download Hosted/Rented extensions in form of CSV with the “HOSTED/RENTED EXTENSIONS CSV” button.
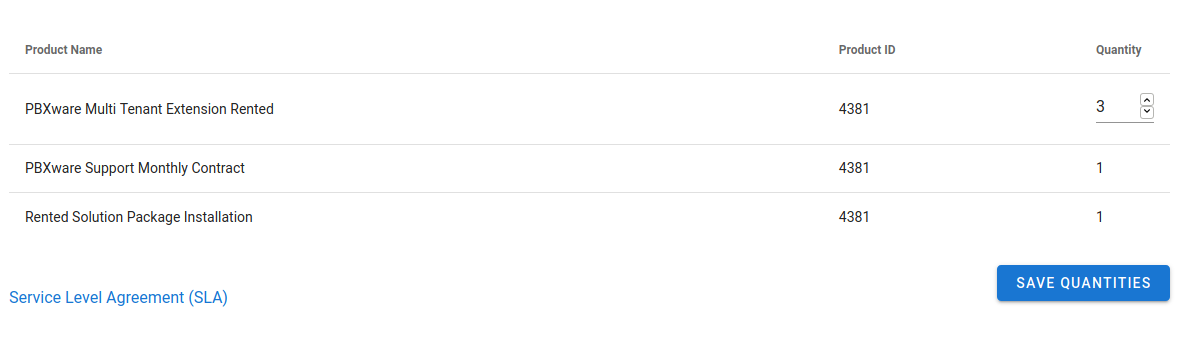
By clicking on links in the column “#”, you can see more detailed information about the selected package. Here you can update your Subscription reference by clicking on the “UPDATE REFERENCE” button.
You can change the quantity of the product by clicking the “SAVE QUANTITIES” button after changing the quantity on one or more products.
¶ Manage PBXware Subscriptions
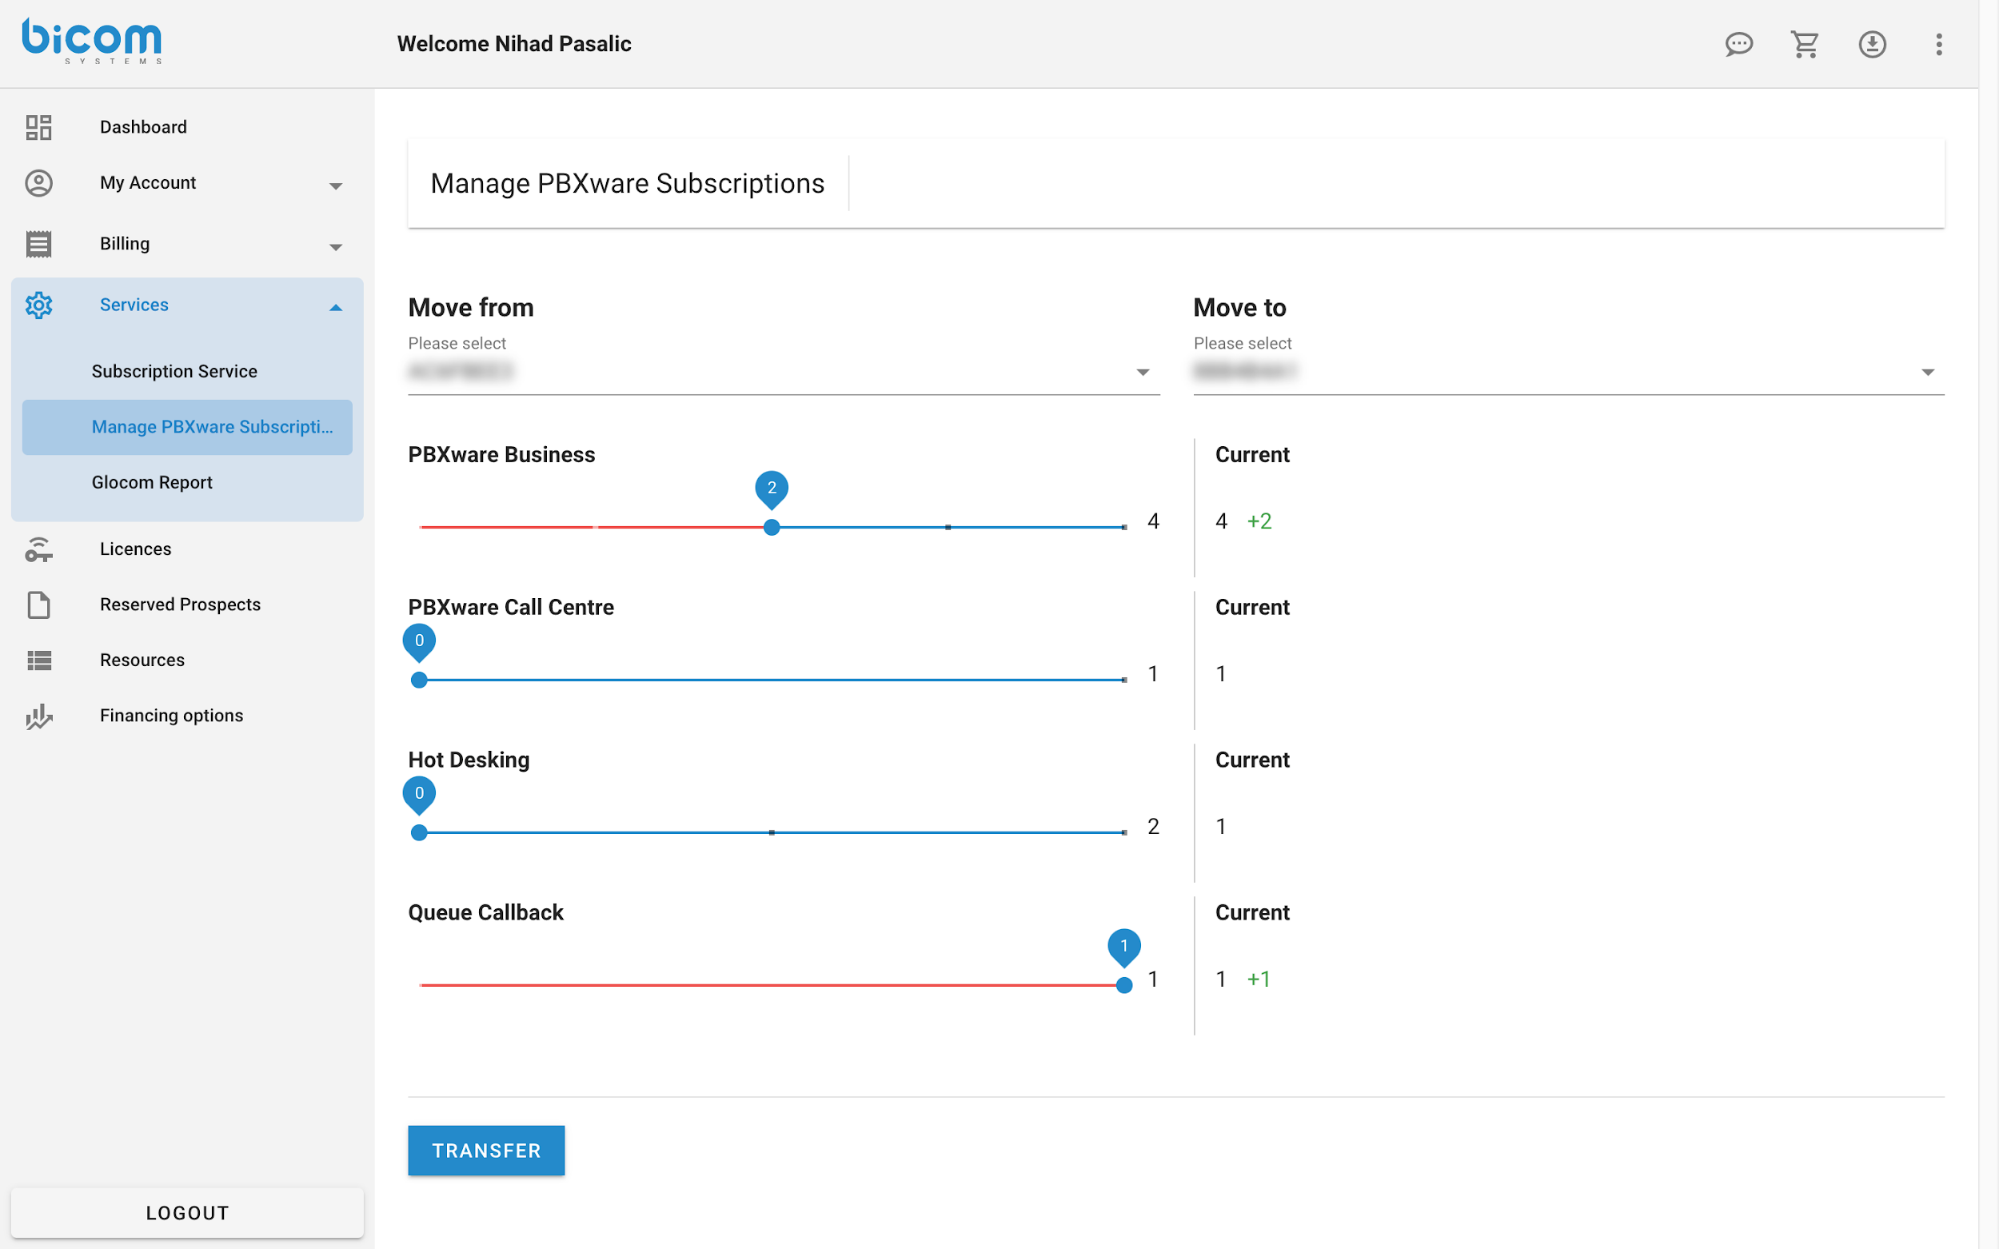
If the account has been granted the privilege to transfer PBXware subscription items you can manage your PBXware subscriptions on this section. First, you need to select from which licence you want to transfer items, then select to which licence you want them transferred. On the sliders, you define the number of items that need to be transferred. Clicking on the “TRANSFER” button you finish the process of transferring items, and if everything was successful, a confirmation message pops up.
¶ Glocom Report
This section provides a list of a history of change for gloCOM wizard.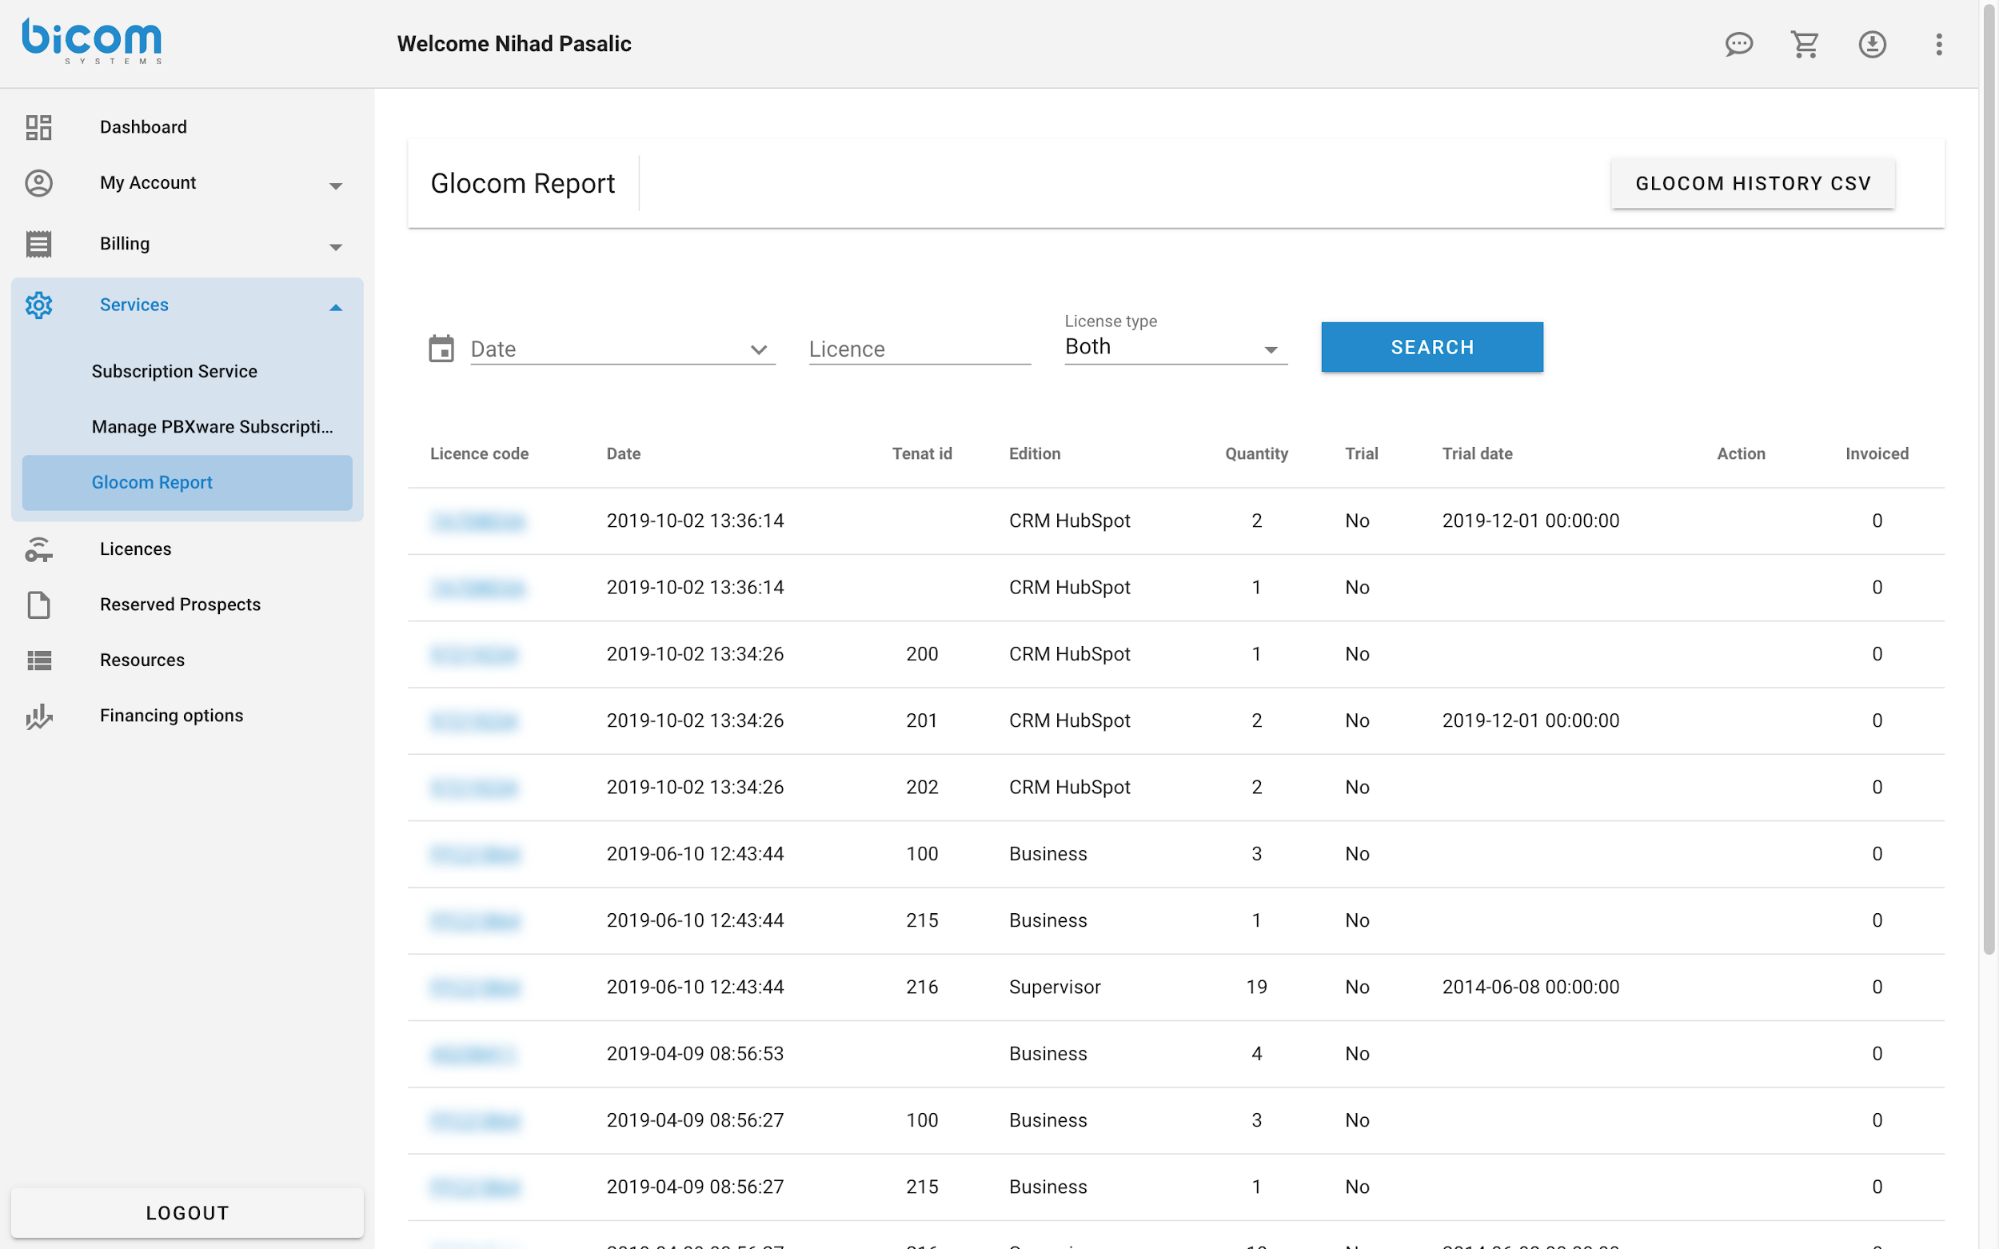
Possible filters:
- Date from
- Date to
- Licence
- Licence type
It is possible to download search results in the form of CSV with the “GLOCOM HISTORY CSV” button.
¶ Licences
A detailed report of licences is displayed here.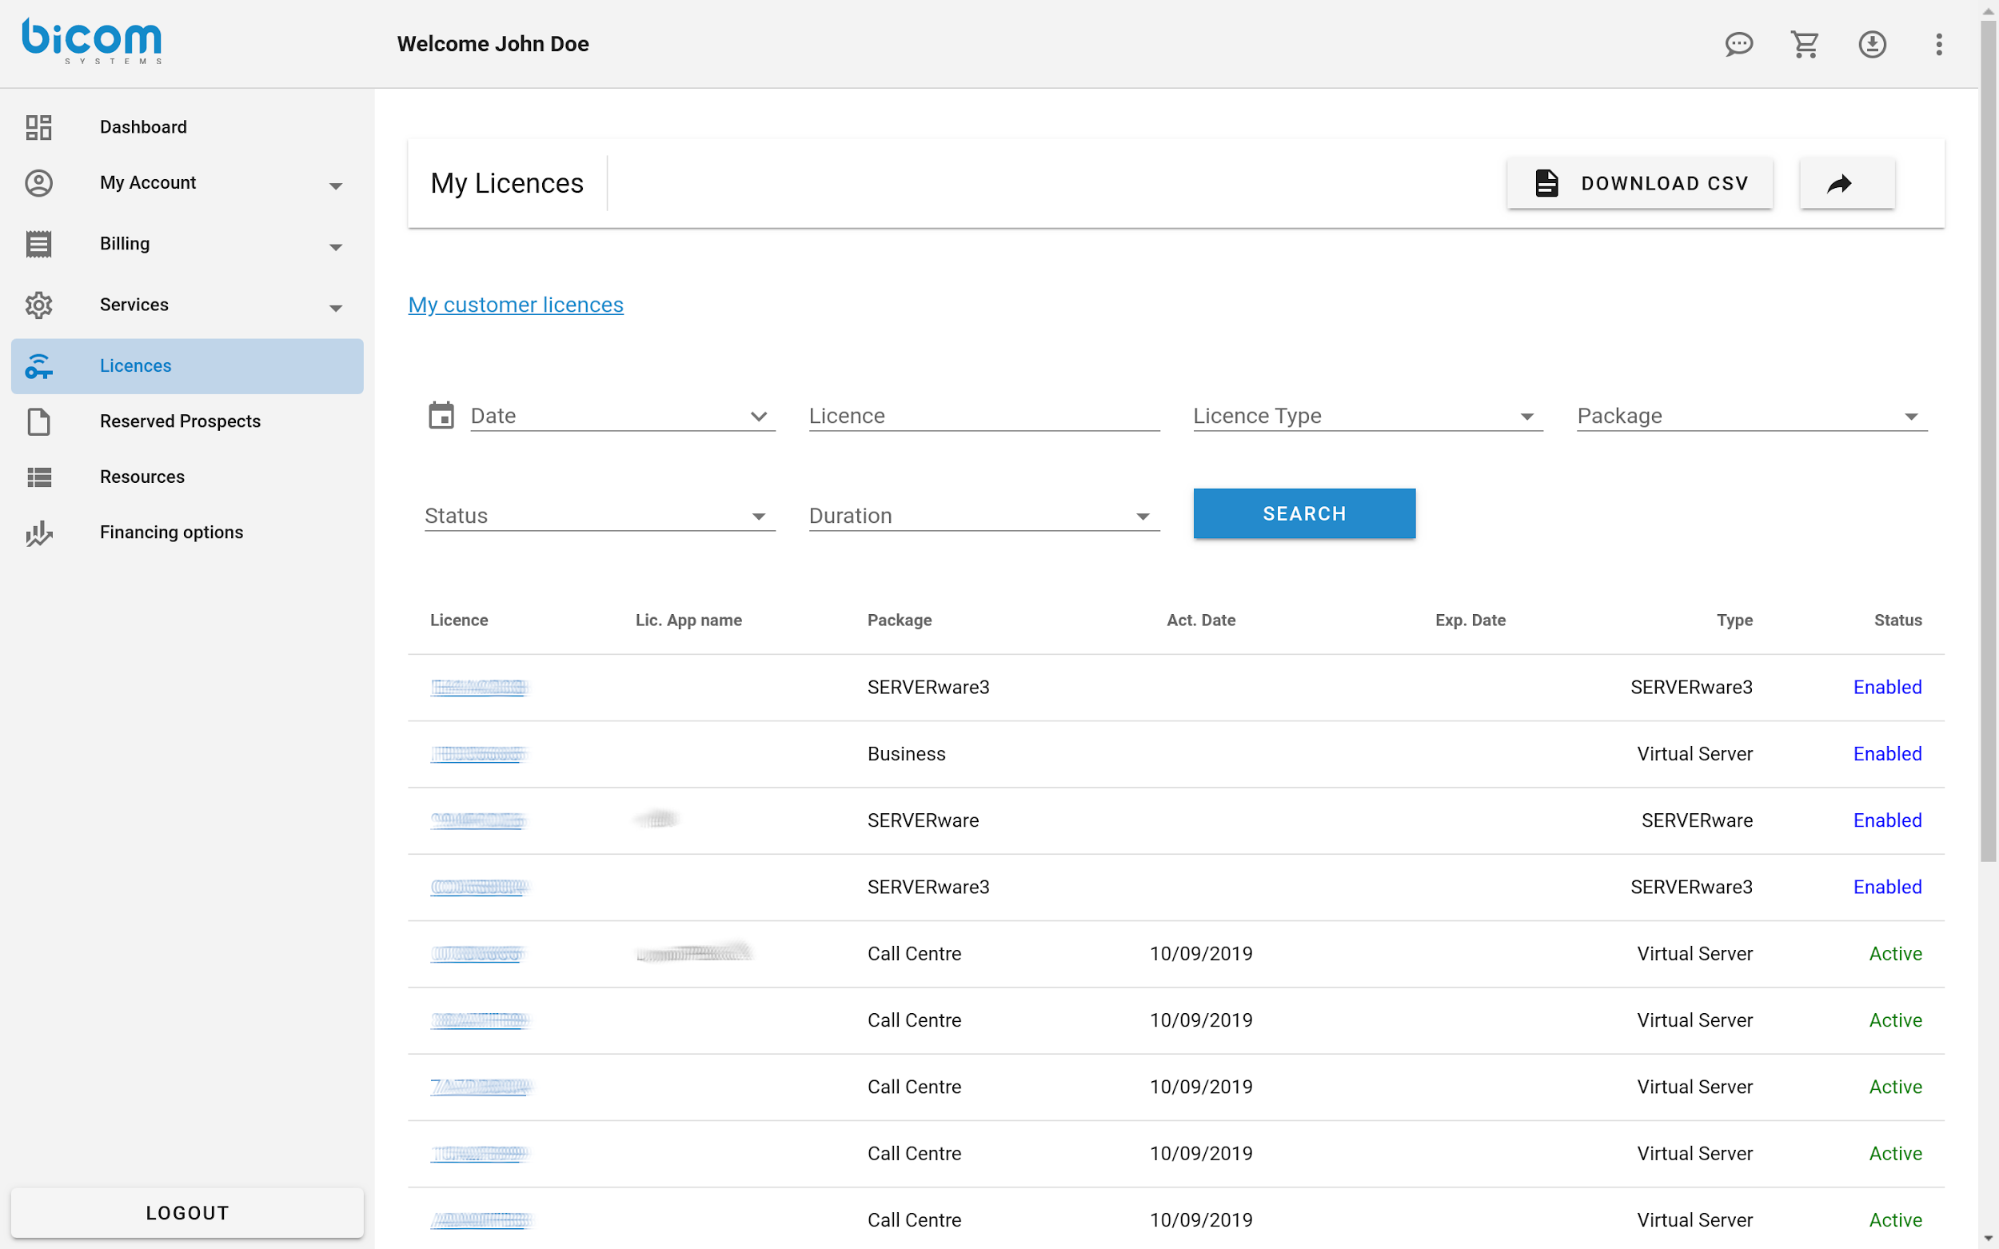
Possible filters:
- Date from
- Date to
- Licence
- Licence Type
- Package
- Status
- Duration
It is possible to download all licences in the form of CSV with the “DOWNLOAD CSV” button.
By clicking on the licence “code” link, you can see detailed information about the selected licence.
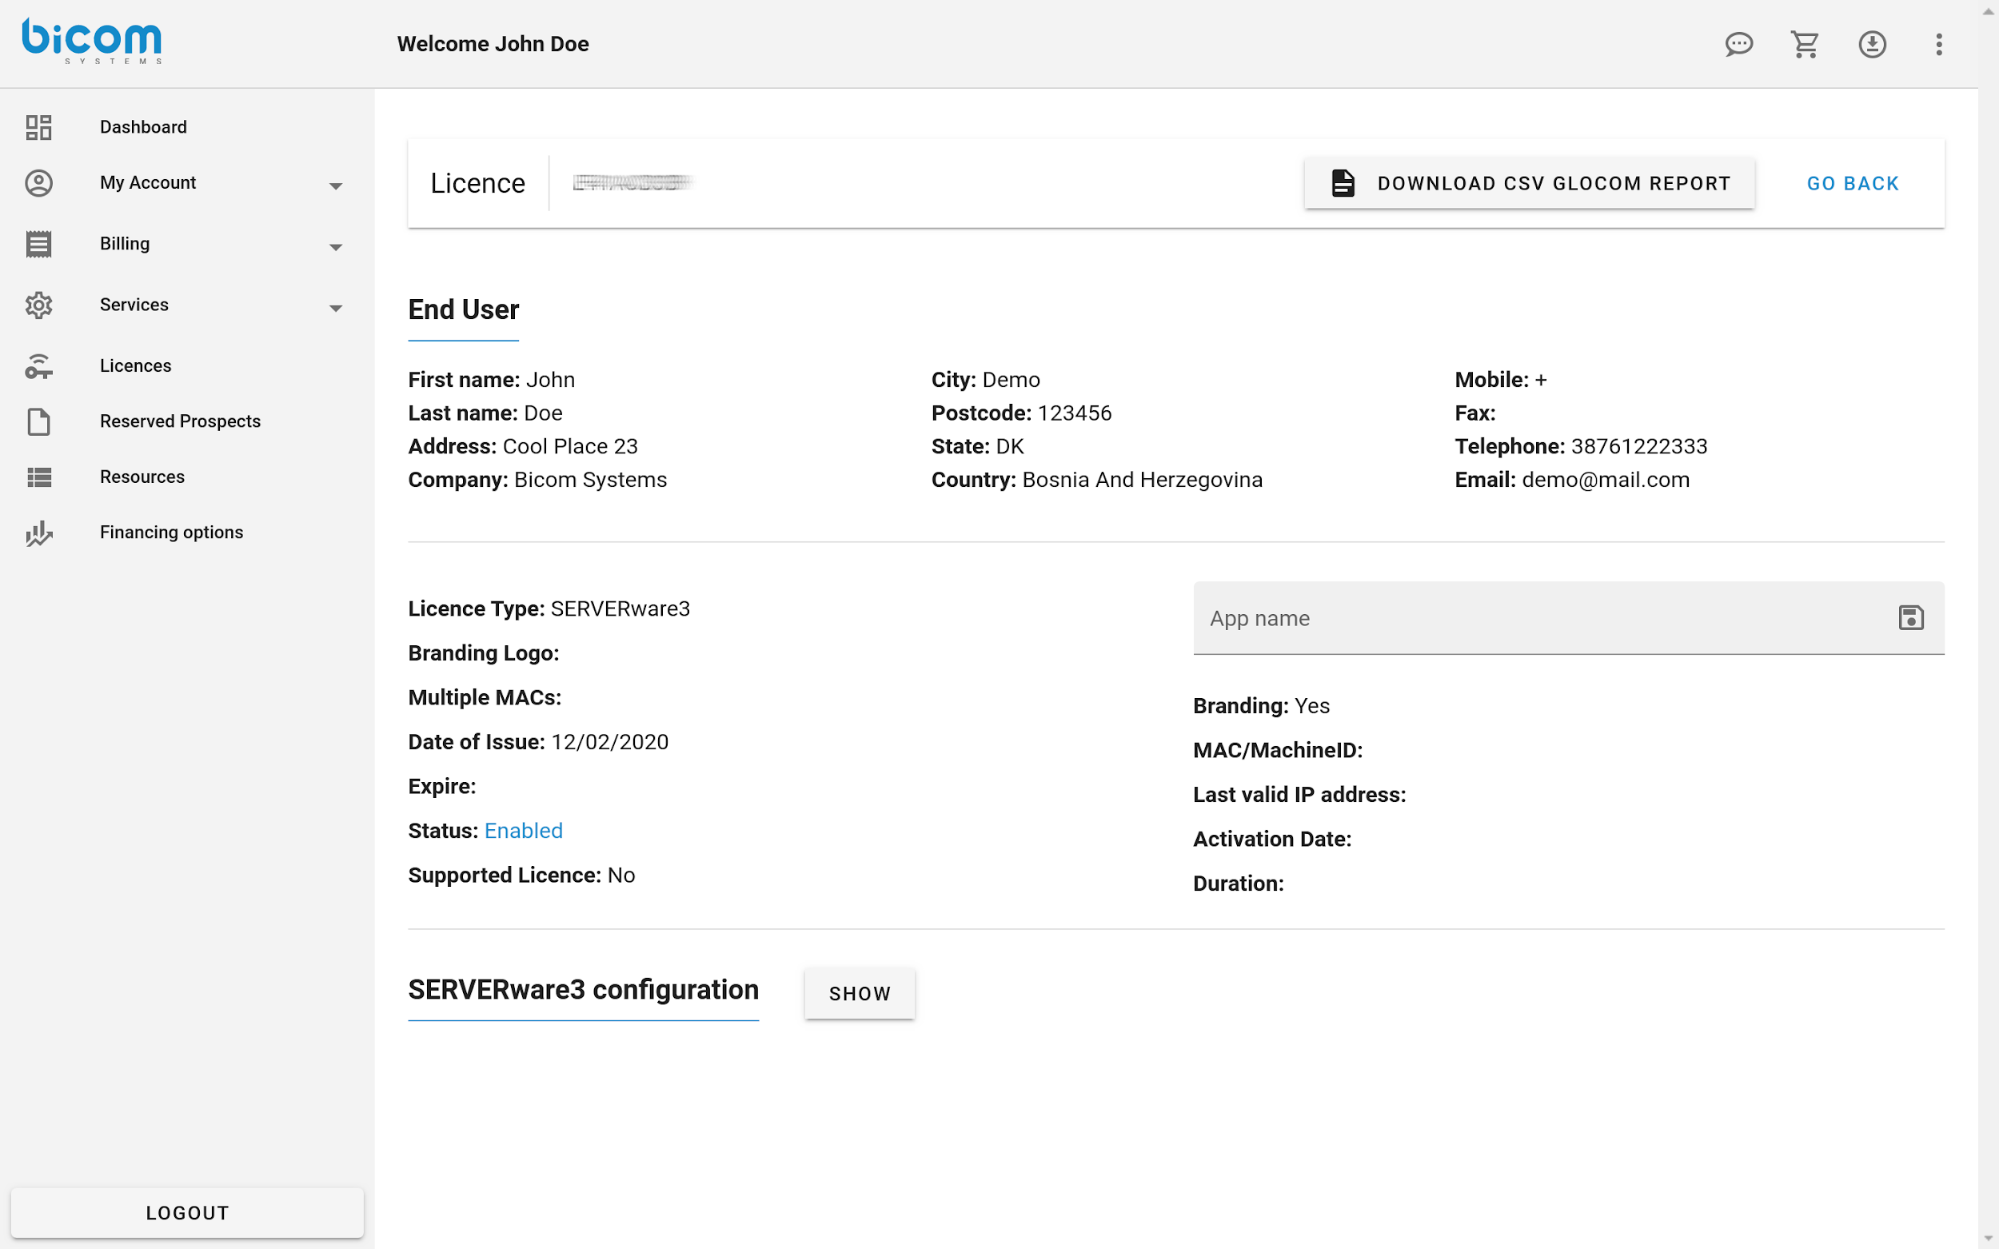
It is possible to download the Glocom report in the form of CSV with the “DOWNLOAD CSV GLOCOM REPORT” button.
If branding is enabled, here you can add or update your App name.

Also in the licence configuration, you can add or update Reference.

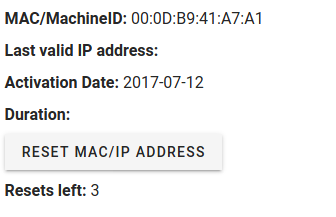
By clicking the “RESET MAC/IP ADDRESS” button and confirming it you reset the saved MAC address and last valid IP address. Be aware that the number of how many resets is left will be decremented by 1 on successful reset.
By clicking on the “My customer licences” link you can see your customer licences. In addition to the above filters, here you can also filter licences by Customer.
Here you can also open a single licence information by clicking on the licence “code” link.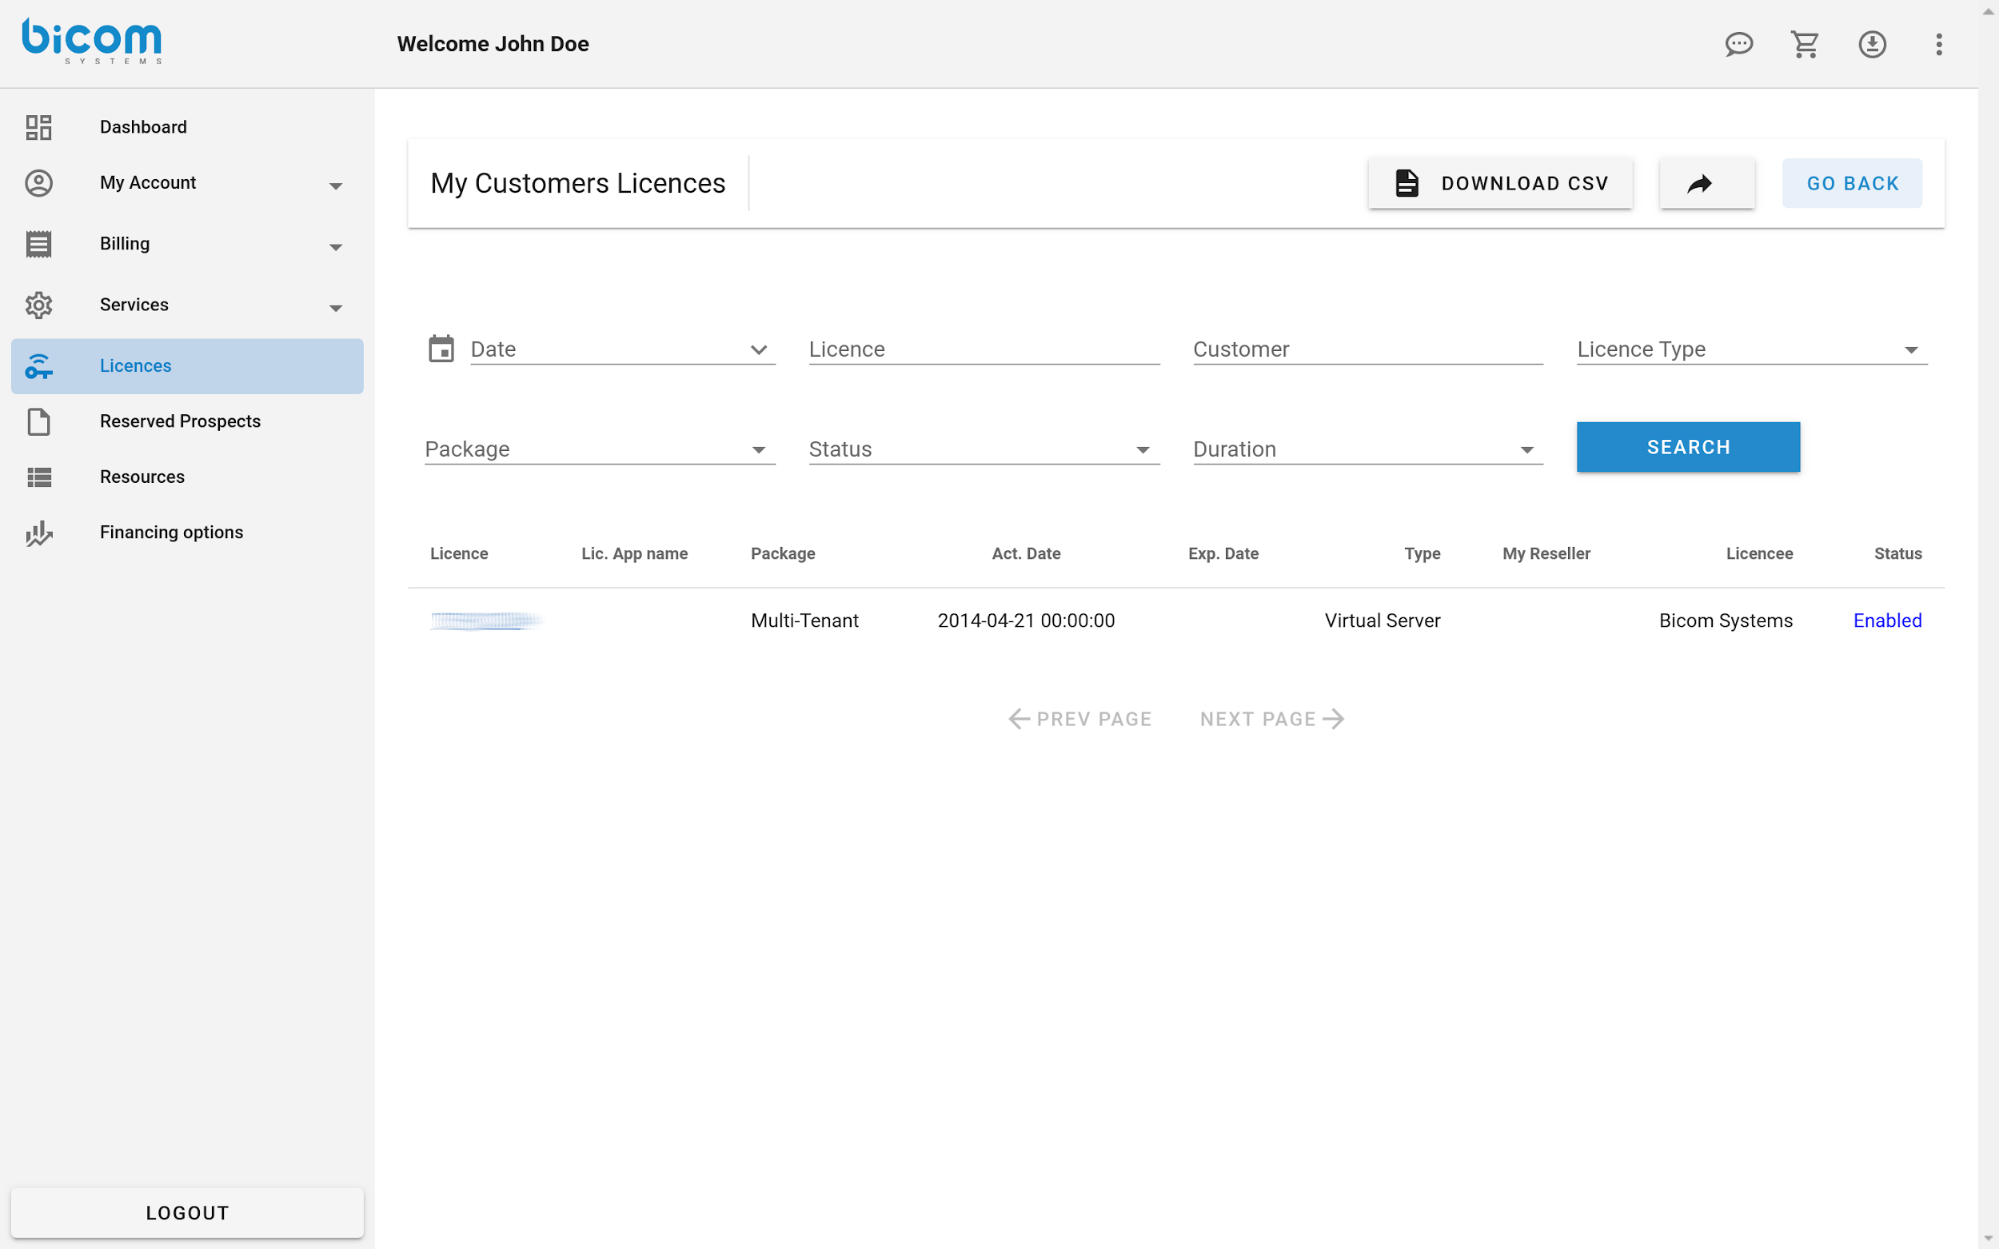
¶ Reserved Prospects
This section shows a list of reserved prospects. 
Possible filters:
- Date from
- Date to
- Country
You can add a new reserved prospect by clicking on the button “ADD RESERVED PROSPECT”
¶ Tickets
This section shows a list of all users' tickets. Possible filters: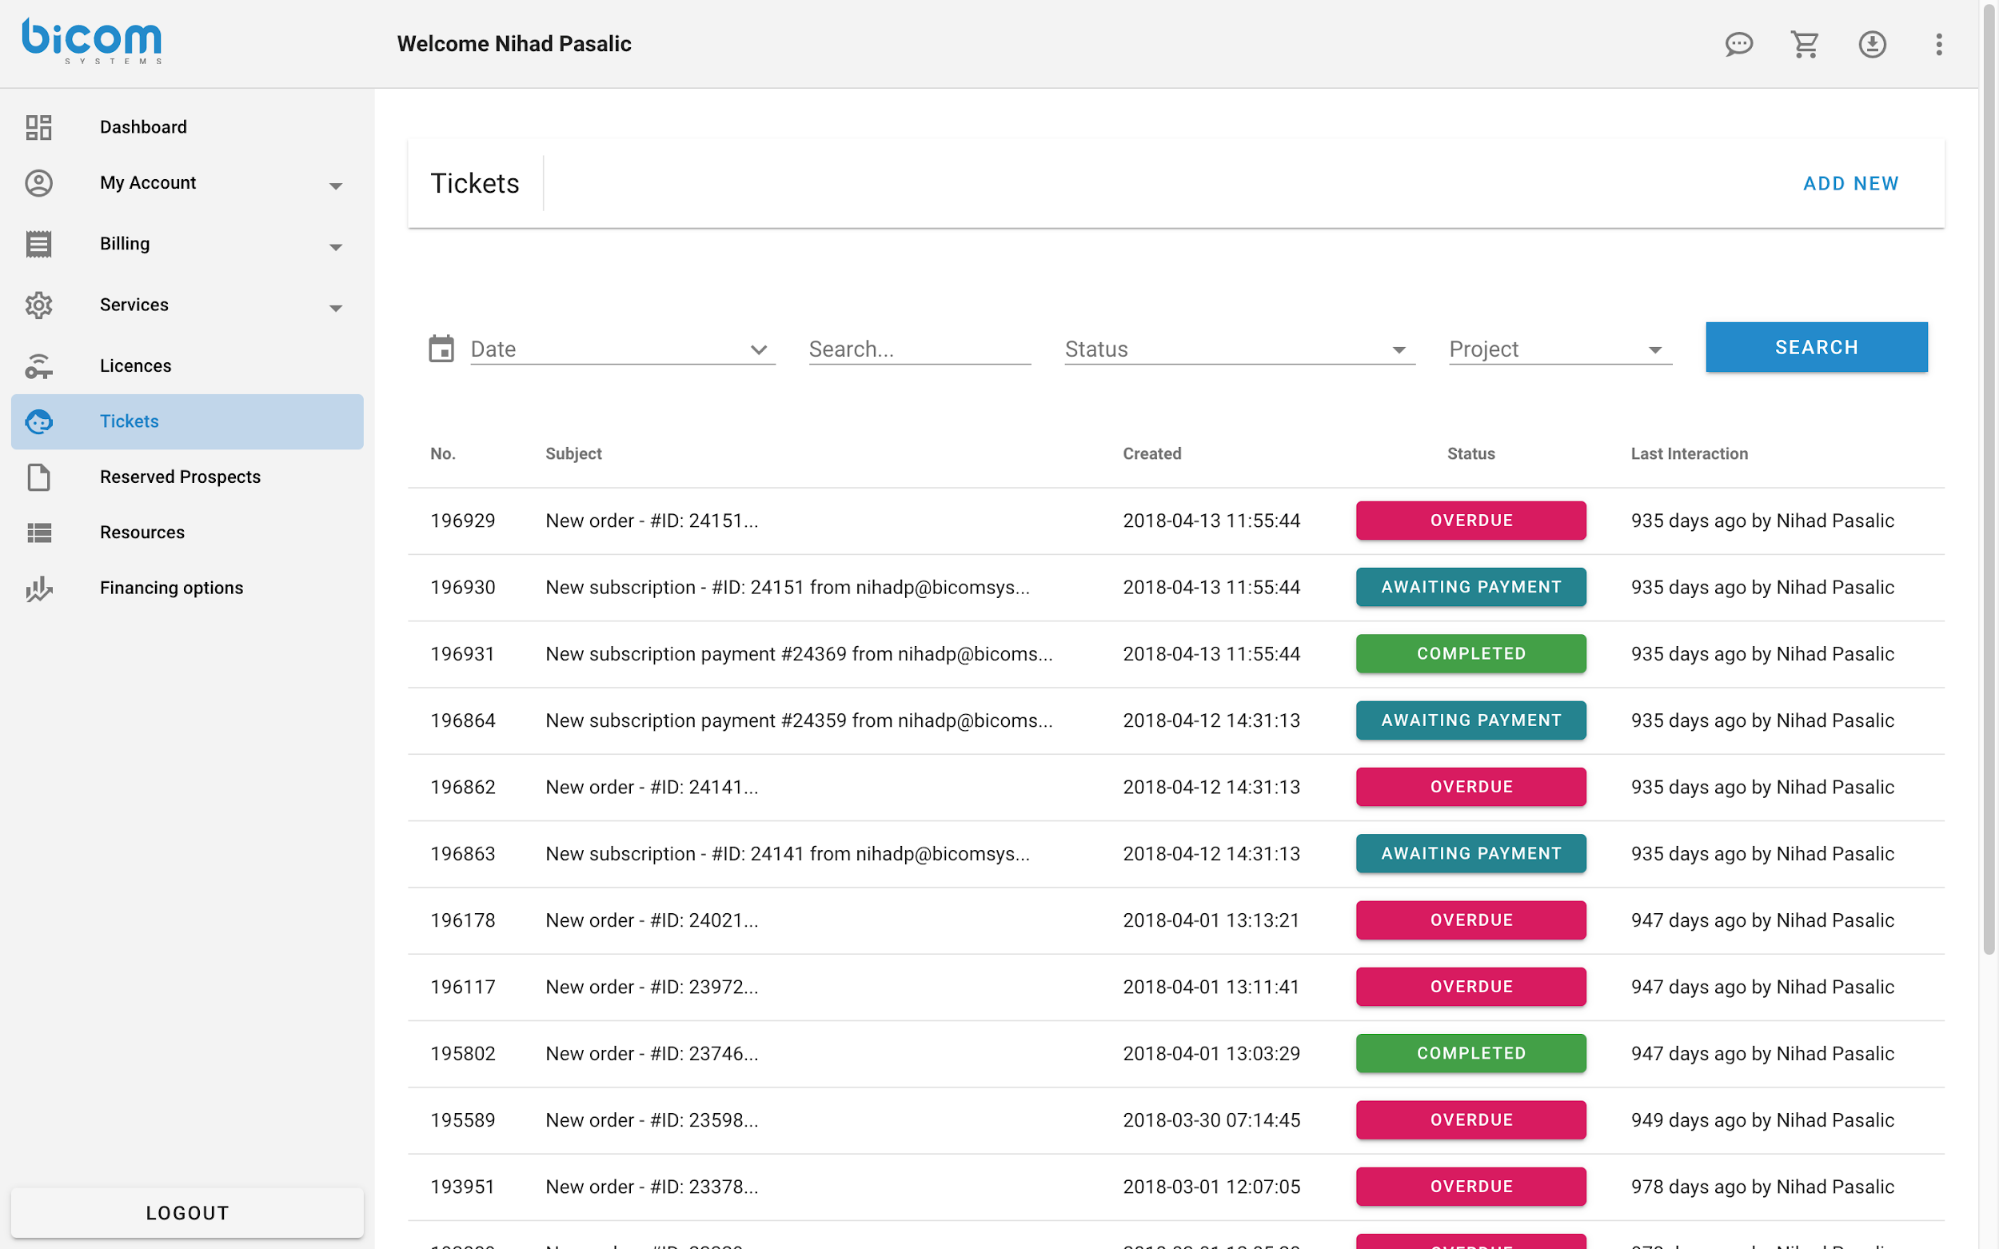
- Date
- Search by text
- Search by status
- Search by project
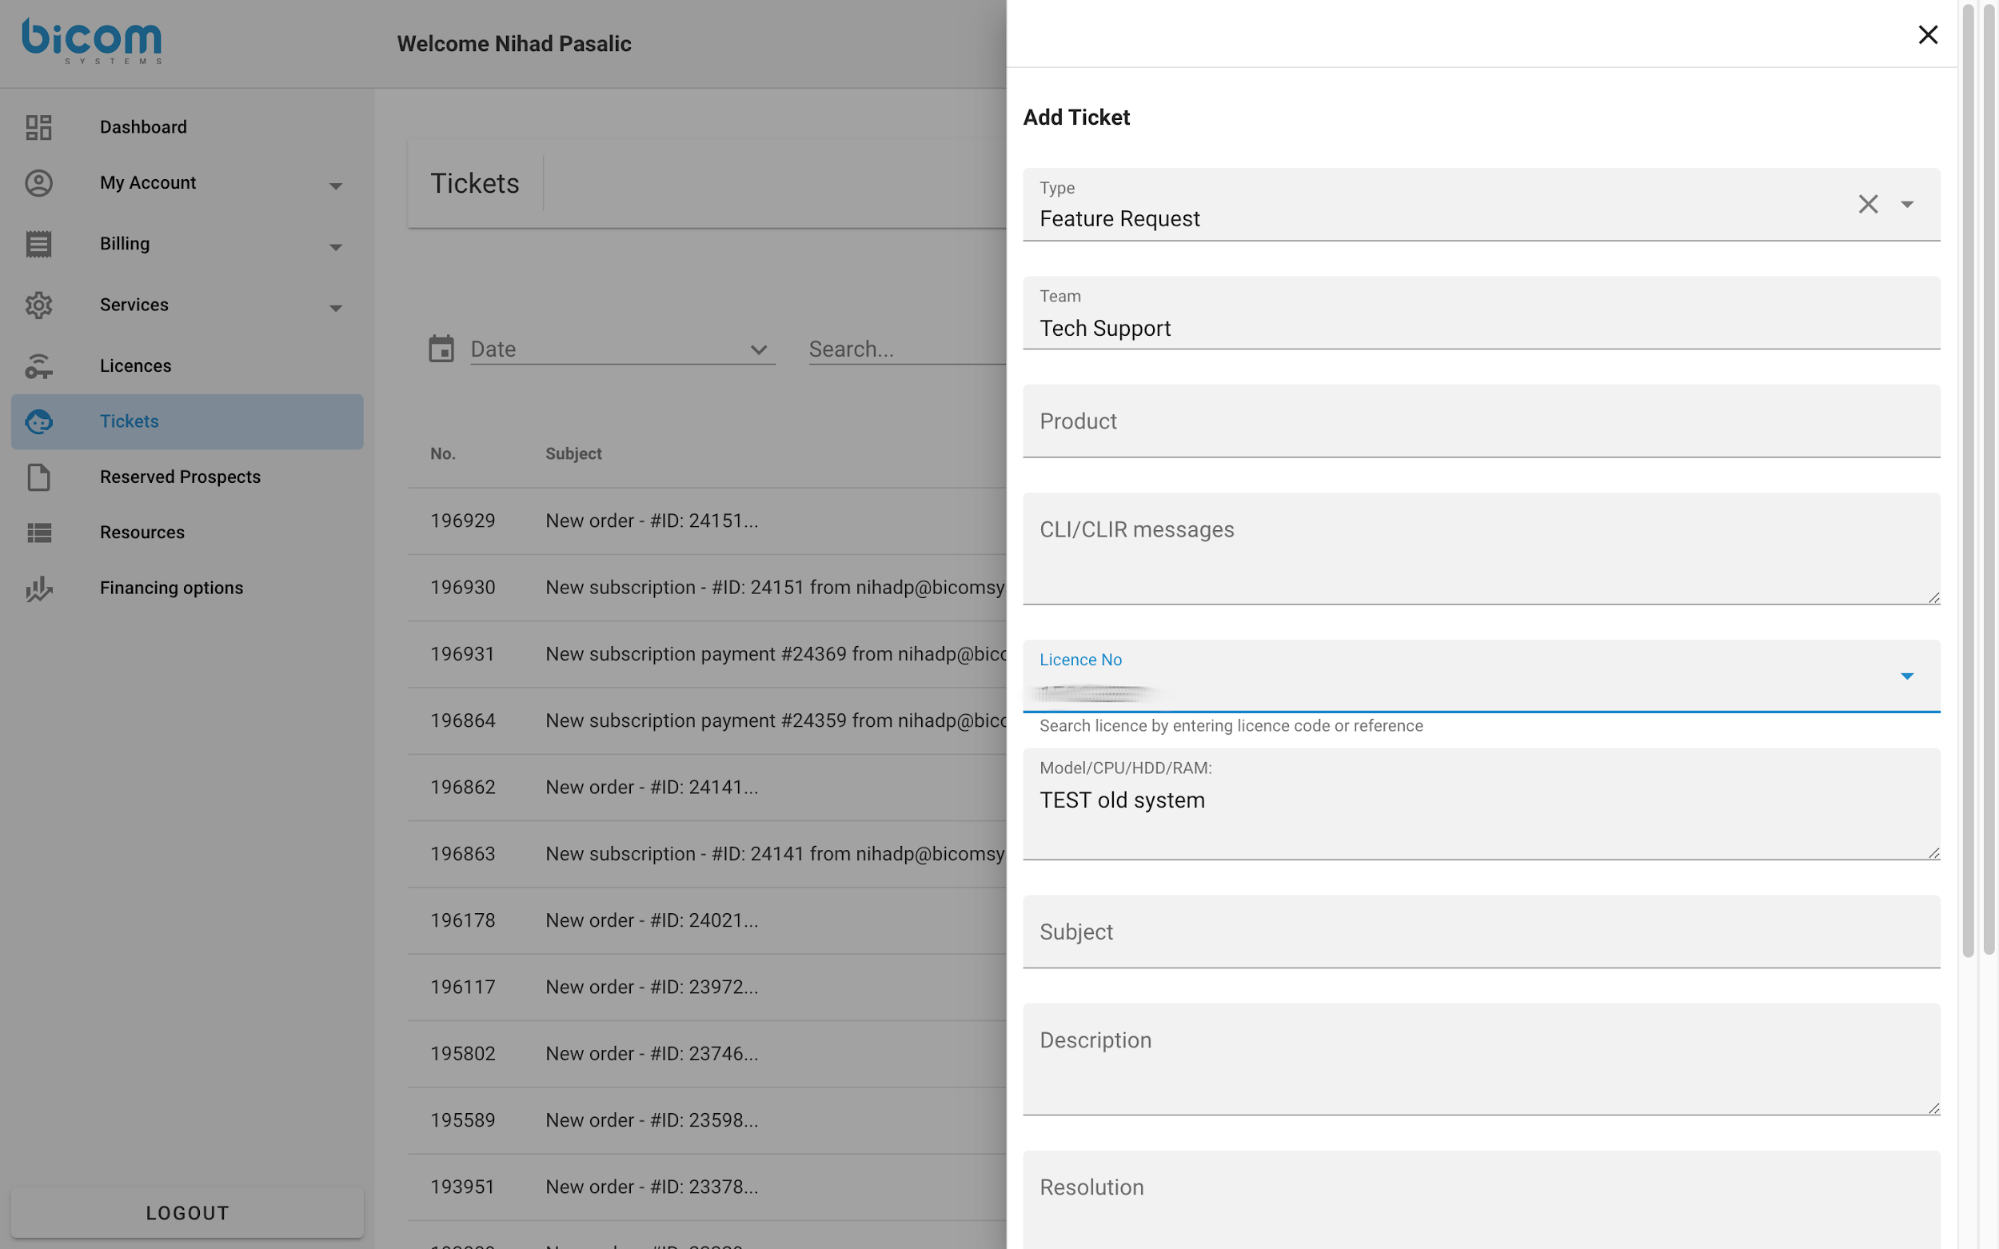
By clicking on the ‘Add New’ button, a modal window will appear with a form for creating a new ticket. You firstly need to select a ticket type and fill in the required fields. After filling in the all required fields and clicking on the Submit button the new ticket will be created.
¶ View Ticket
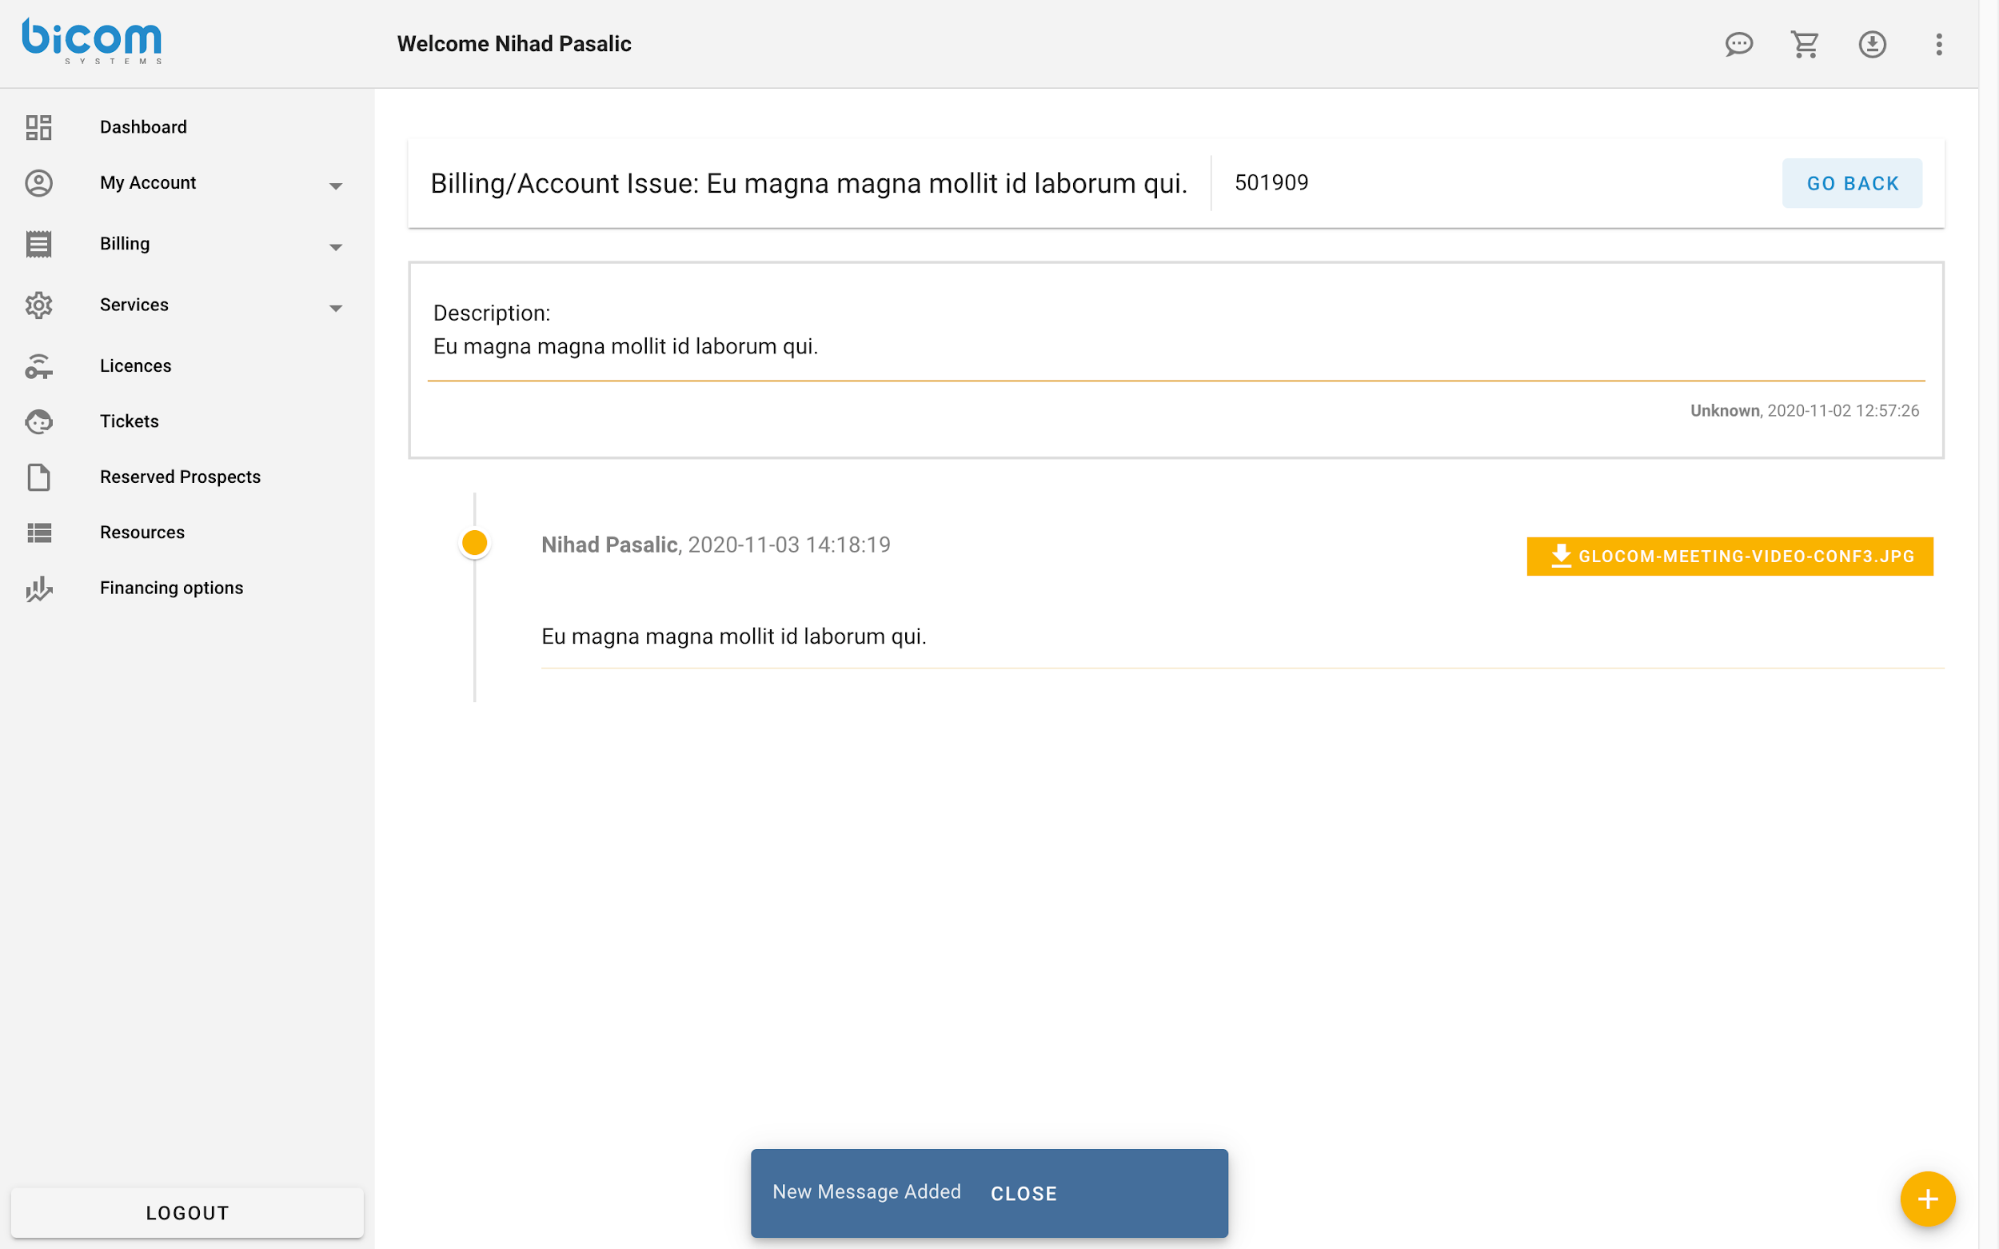
Clicking on a ticket will take you to the view ticket page. From there, you can check or create new discussions on the ticket. Click on the plus (+) button to create a new discussion. Clicking on the discussion will take you to the view discussion messages page.
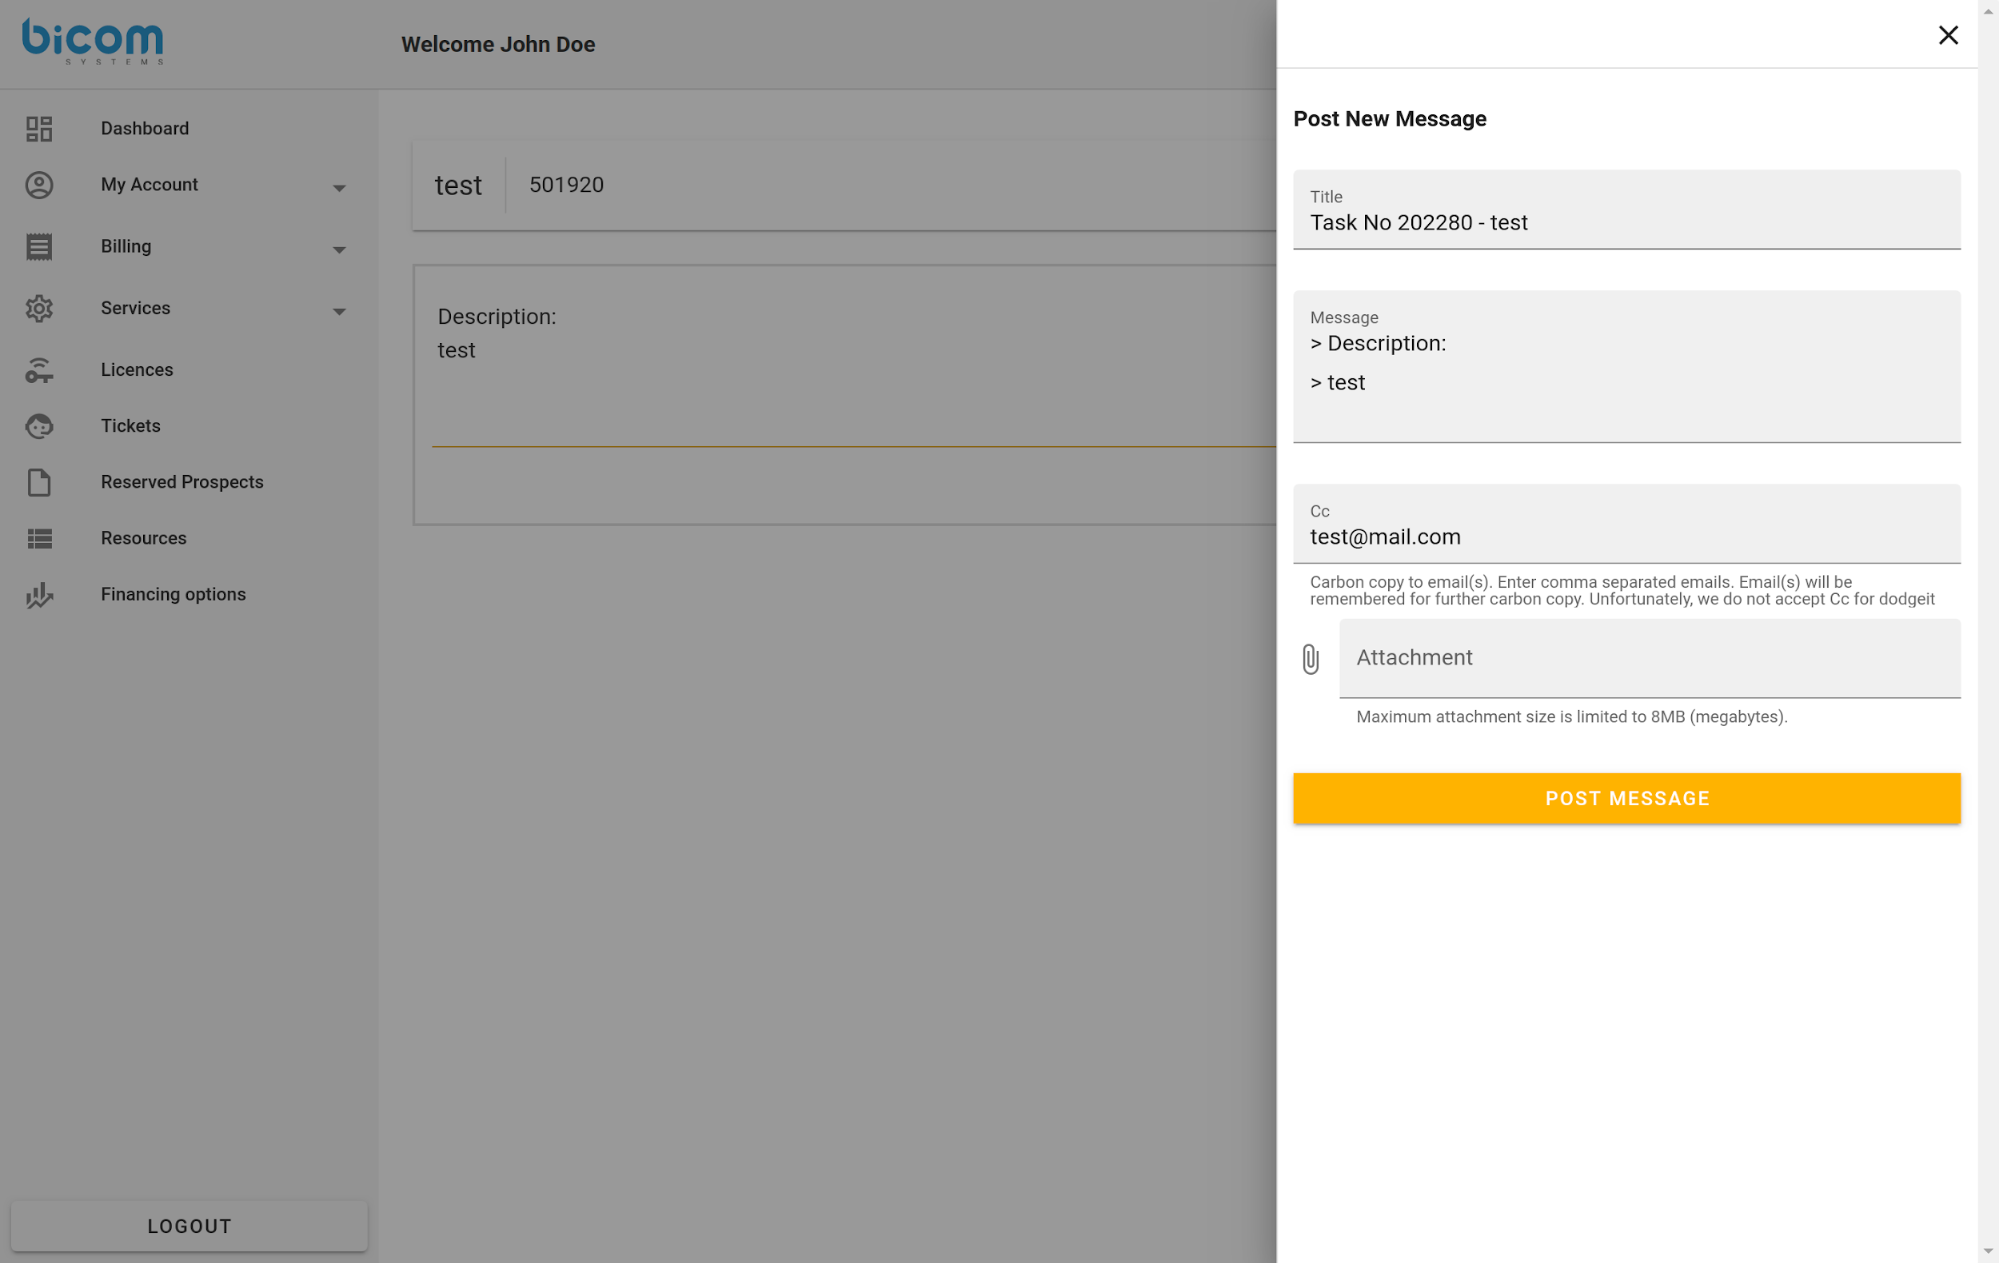
On the discussion view, by clicking on the plus (+) button you add a new message. Required fields are title and description and optionally you can CC someone to the conversation and add an attachment.
Upon each change, an email message will be sent to all participants of the ticket.
NOTE: If a fail payment occurs, a new ticket will be automatically created with information about the failed payment, and users will be notified.
¶ Resources
Access to the Bicom Systems resources center.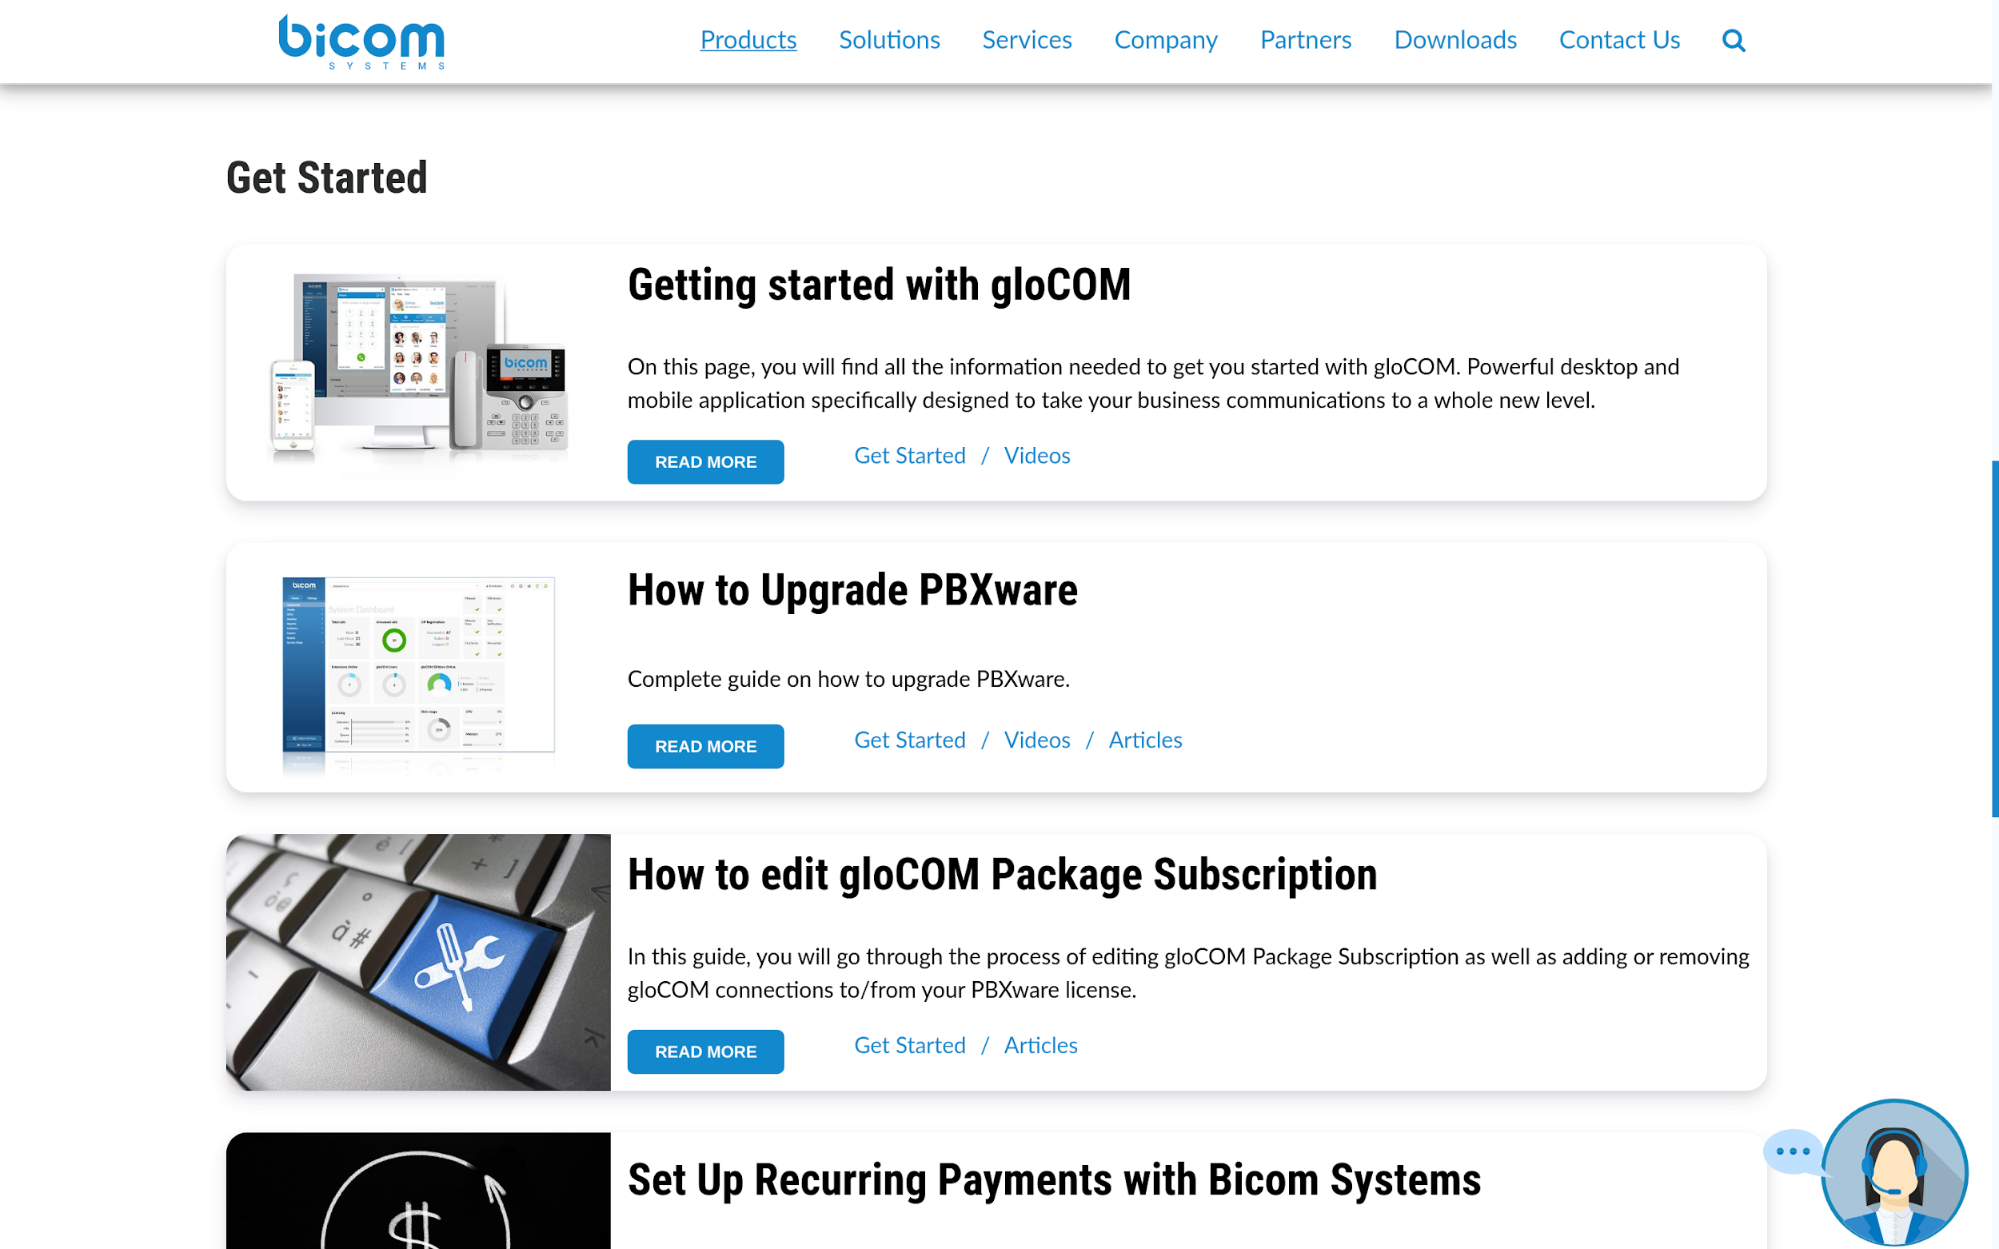
Bicom Systems resources is a place where you can read and learn about everything from customer success stories, product info, to viewpoints from the core team and our webinars and videos.
¶ Financing options
Access to Bicom Systems financing options.
Bicom Systems offers three financing options for the U.S. market. Browse through our Products or check out our popular PBXware in the Business PBX, Multi-Tenant PBX, and Call Center PBX editions.