¶ Backup Host Installation
Before starting the system installation, users must ensure that the physical machine or server is powered on, properly configured, and functioning as expected. The first step is to insert the installation media (DVD/USB), reboot the machine, and select the installation media as the boot device. The following welcome screen appears.
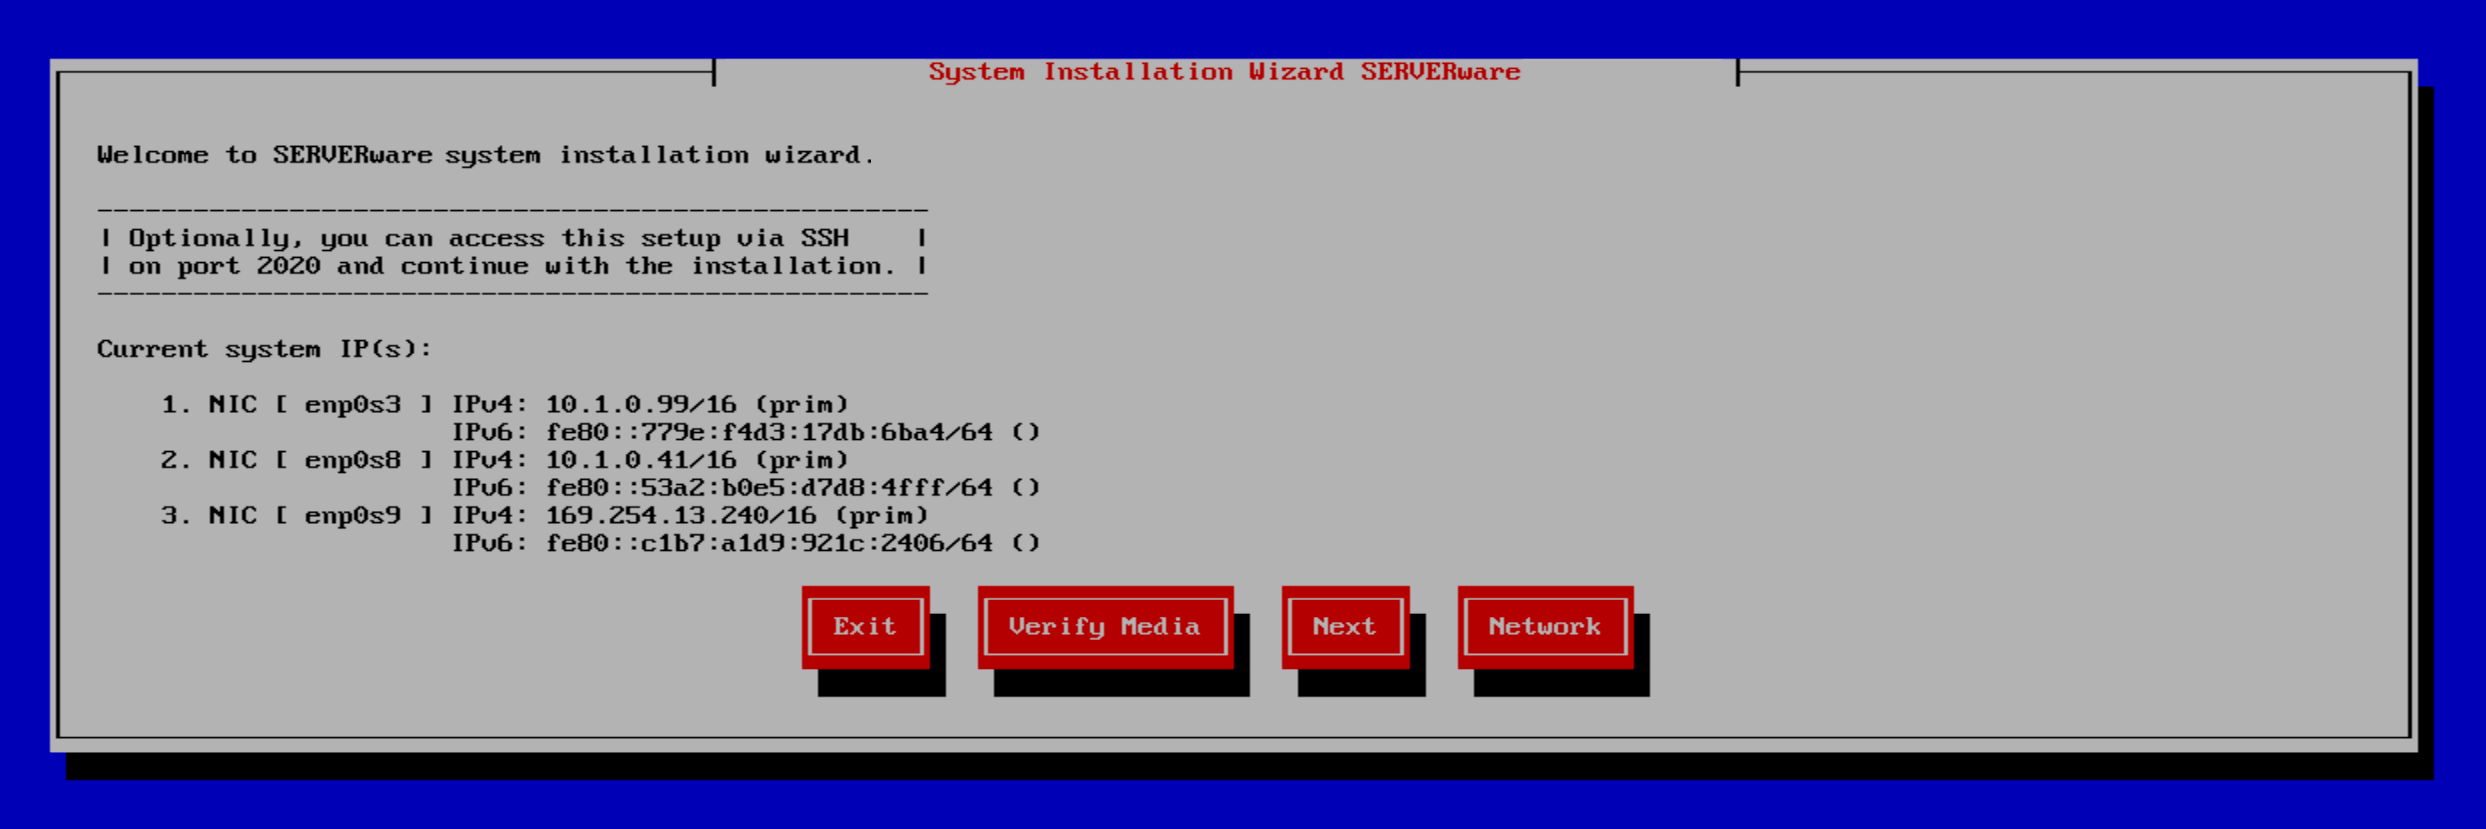
The welcome screen offers several options:
Exit - Select this option to exit the installation wizard and open the live system command line shell.
Verify Media - This option checks the installation media files, compares them against the stored checksum, and verifies their integrity to ensure there is no corruption.
Next - Proceed to the next step of the installation.
Network - Configure the IP address for remote access to the installation wizard.
If the live system successfully obtains an IP address from the DHCP server, it will be displayed on this screen. At this point, the system can be accessed remotely via SSH on port 2020.
Credentials for SSH access:
- username: root
- password: bicomsystems
After selecting 'Next,' users will proceed with the installation and be presented with a new window where they choose (in this case) to install a Backup Host.

After selecting the type of host and clicking "Next:, the installation wizard will check for available disks and identify disks available for the SERVERware operating system. The fraction of disk/disks will be allocated for the operating system, everything else is to be available for /BACKUP storage.
On the next window, users will select the storage configuration type for the system disk based on the number of detected disks.
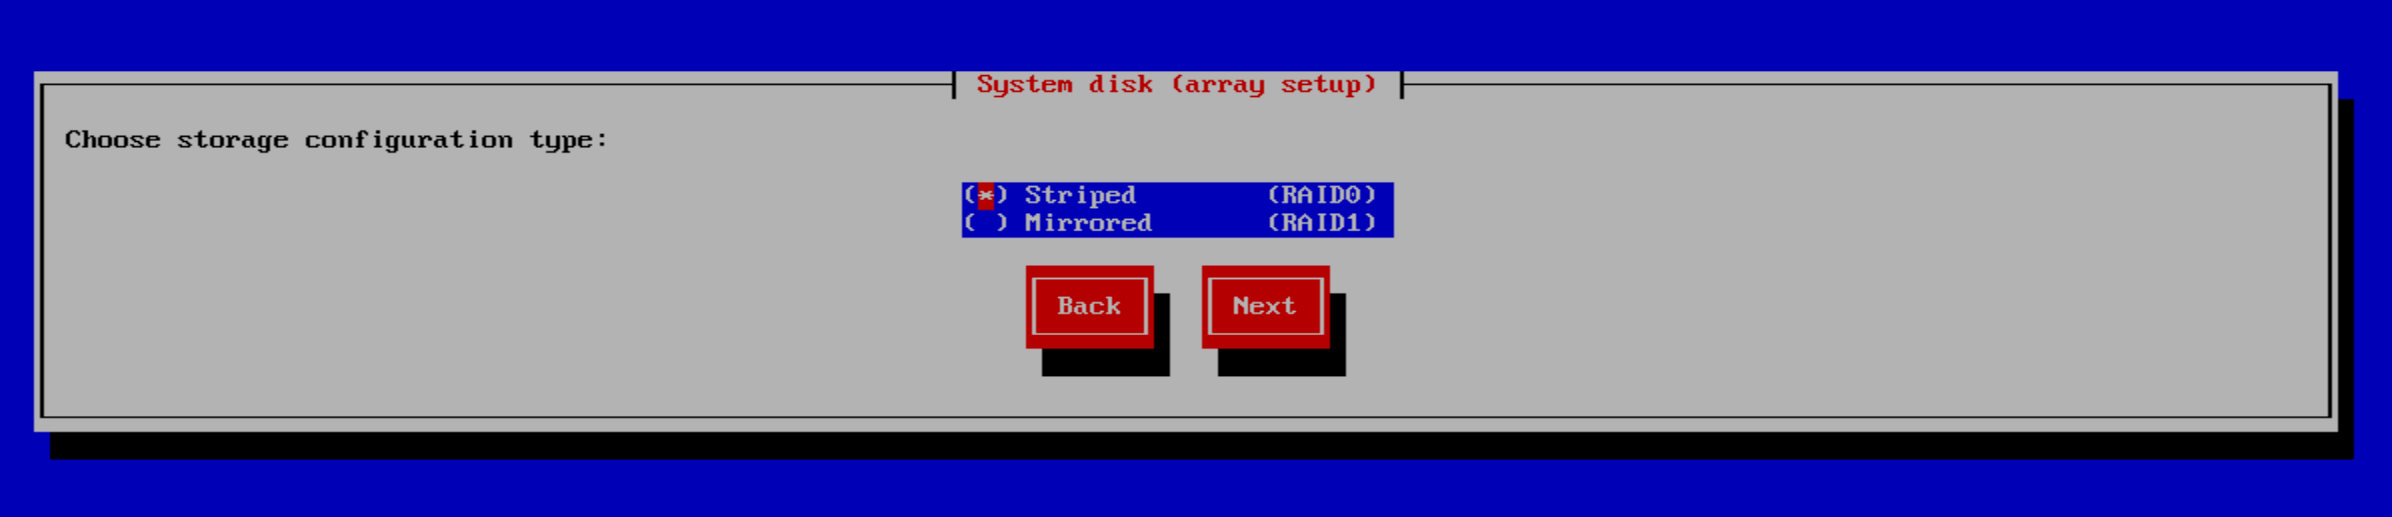
Users can choose from the following storage configuration options:
- Striped - Enhances performance by distributing data across multiple disks, improving read and write speeds.
- Mirrored - Creates a mirrored ZFS pool for increased data redundancy and fault tolerance.
Please be noted to configure a mirrored storage setup, a minimum of four disks is required.
After selecting the desired type and clicking "Next," users will see the number of detected disks along with available options for creating the system and backup pool. Note: The backup host will allocate all available disk space to the backup pool. Both the system and the backup pool will reside on the same hard drive — the system will not be installed on a separate disk.

Multiple disks can be chosen for system installation, depending on the number of disks available in the physical machine.
A confirmation dialog will appear, showing which disks are selected for the backup host. The user must click Next to proceed.

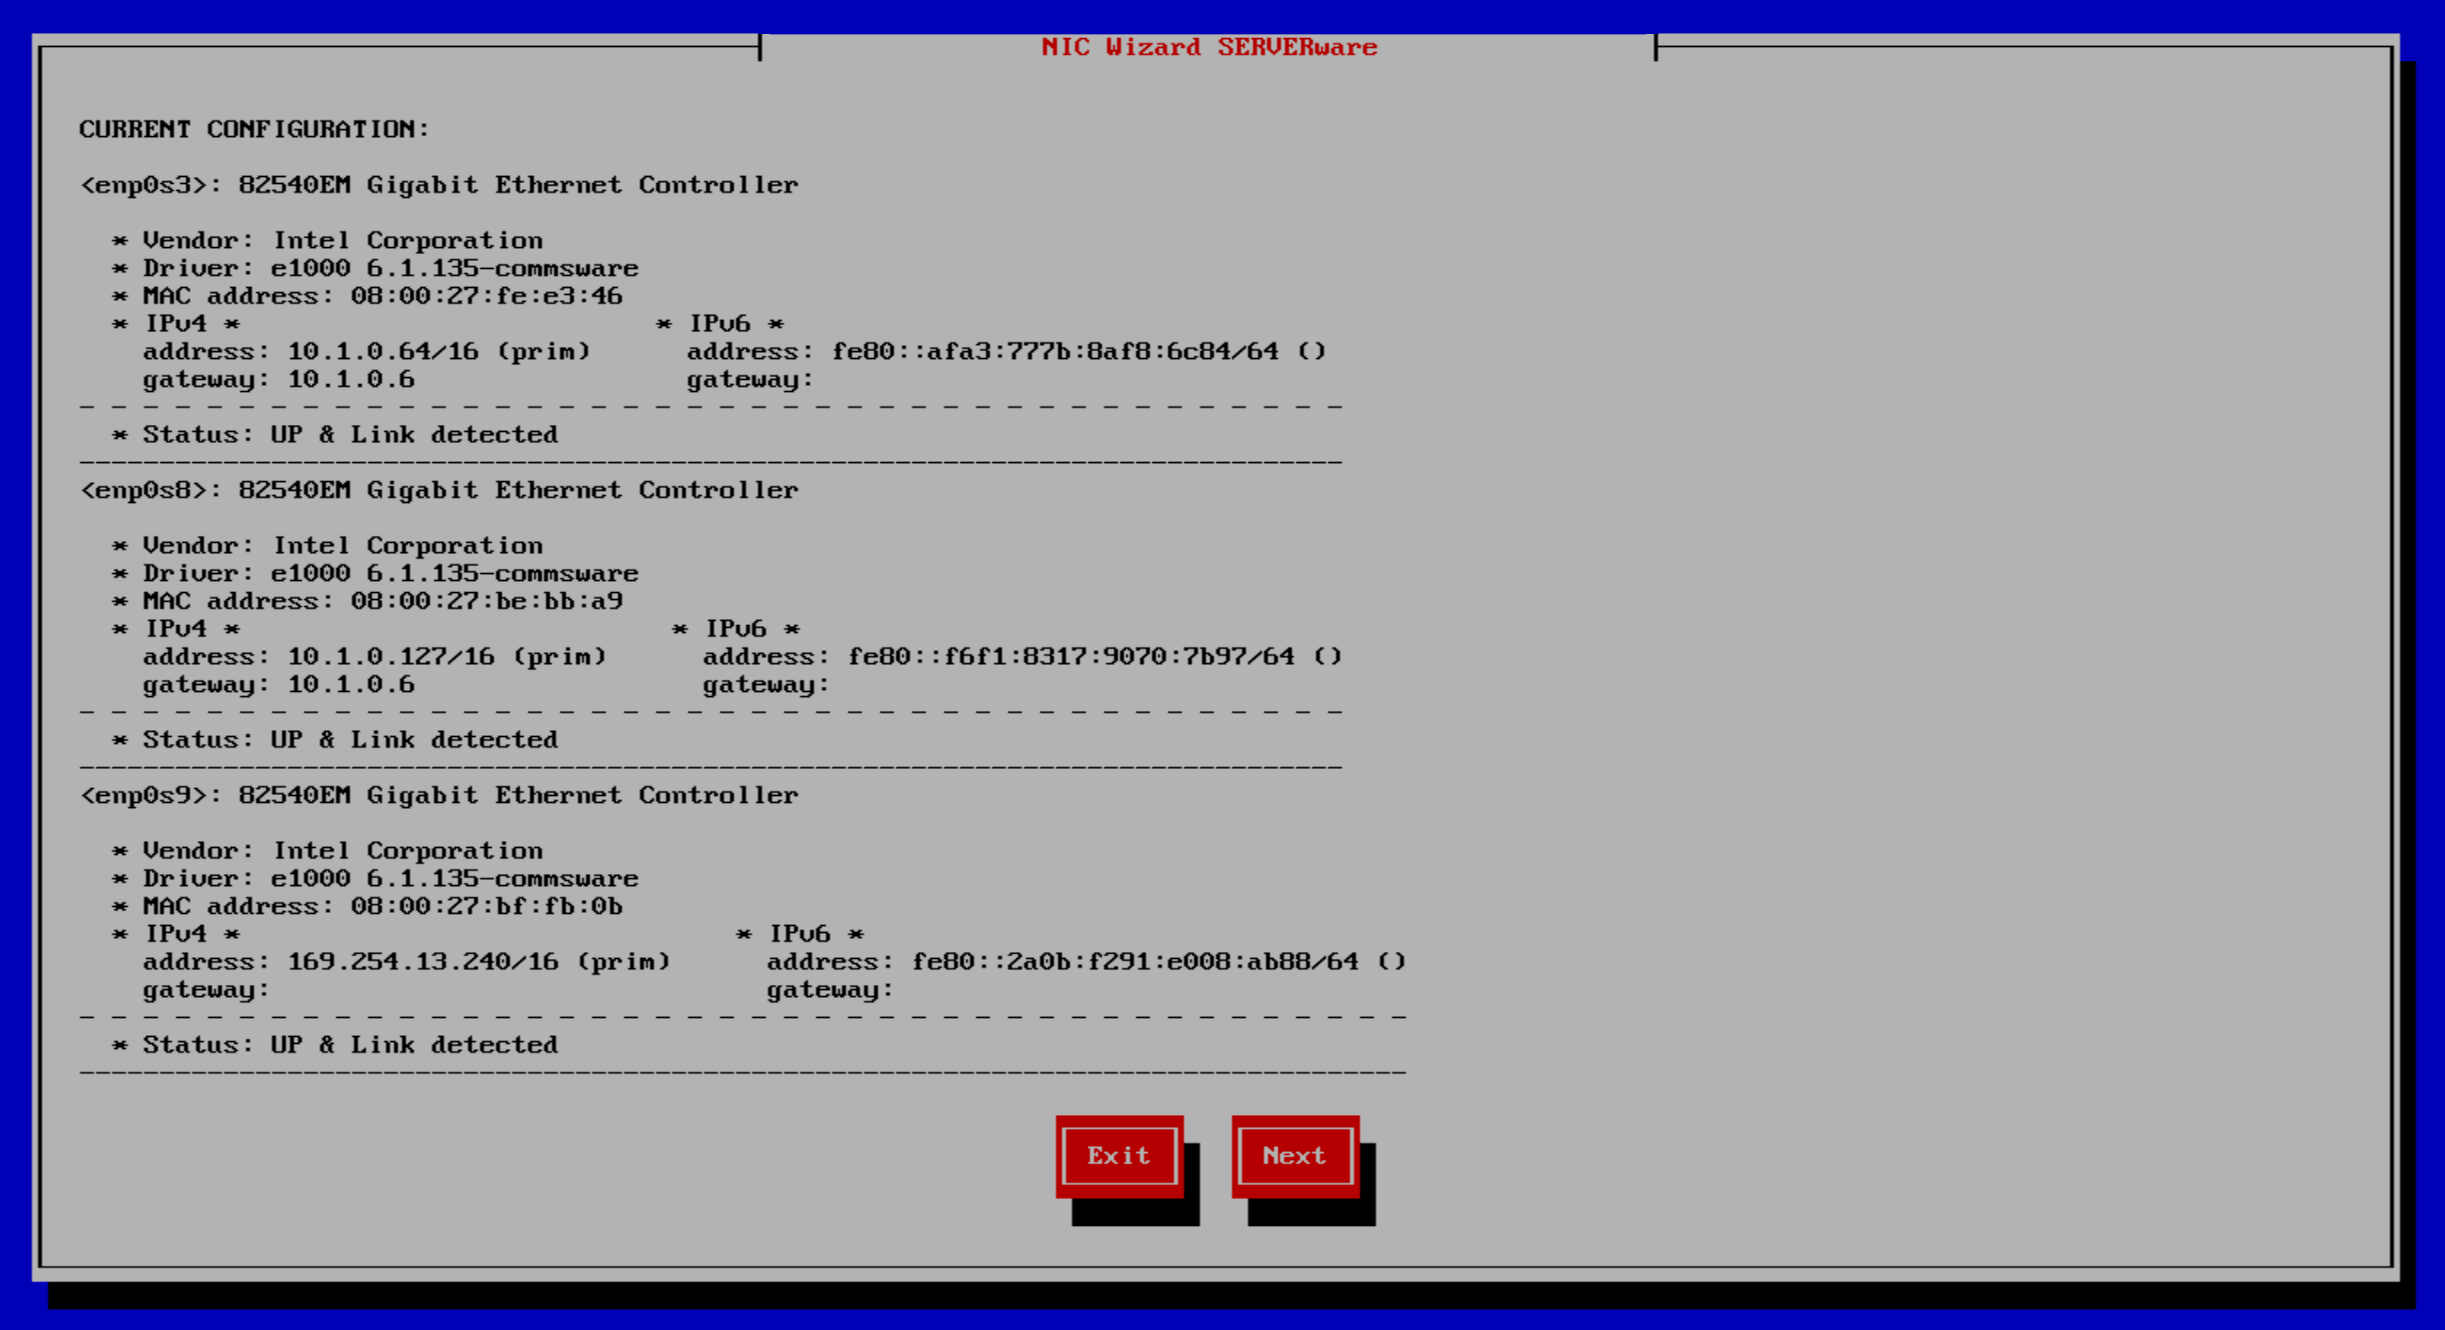
The following window displays the detected network interfaces available for configuration.
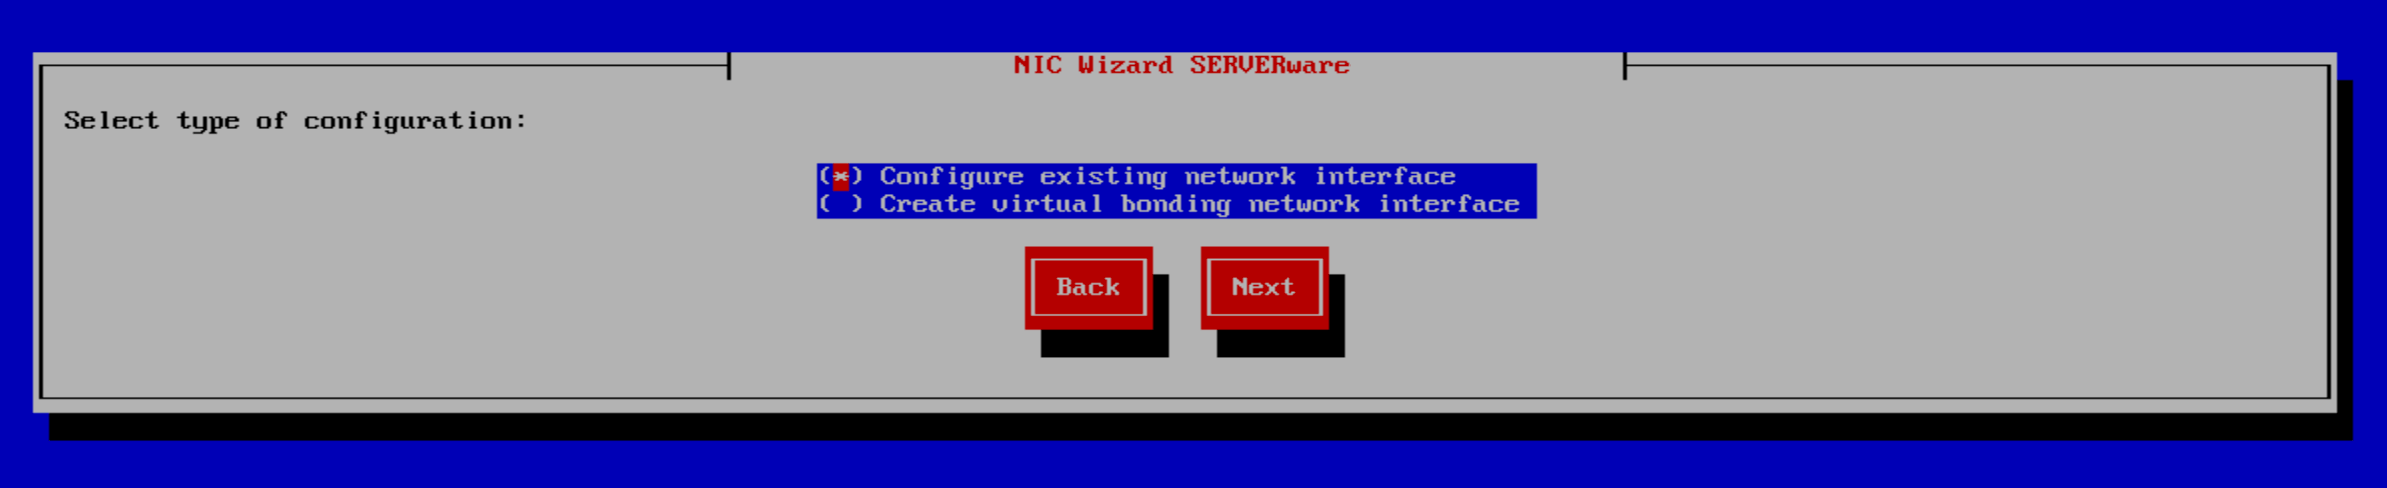
In the next window, the user can choose the configuration type: either configure an existing network interface or create a virtual bonded network interface. In this example, we will configure an existing network interface.
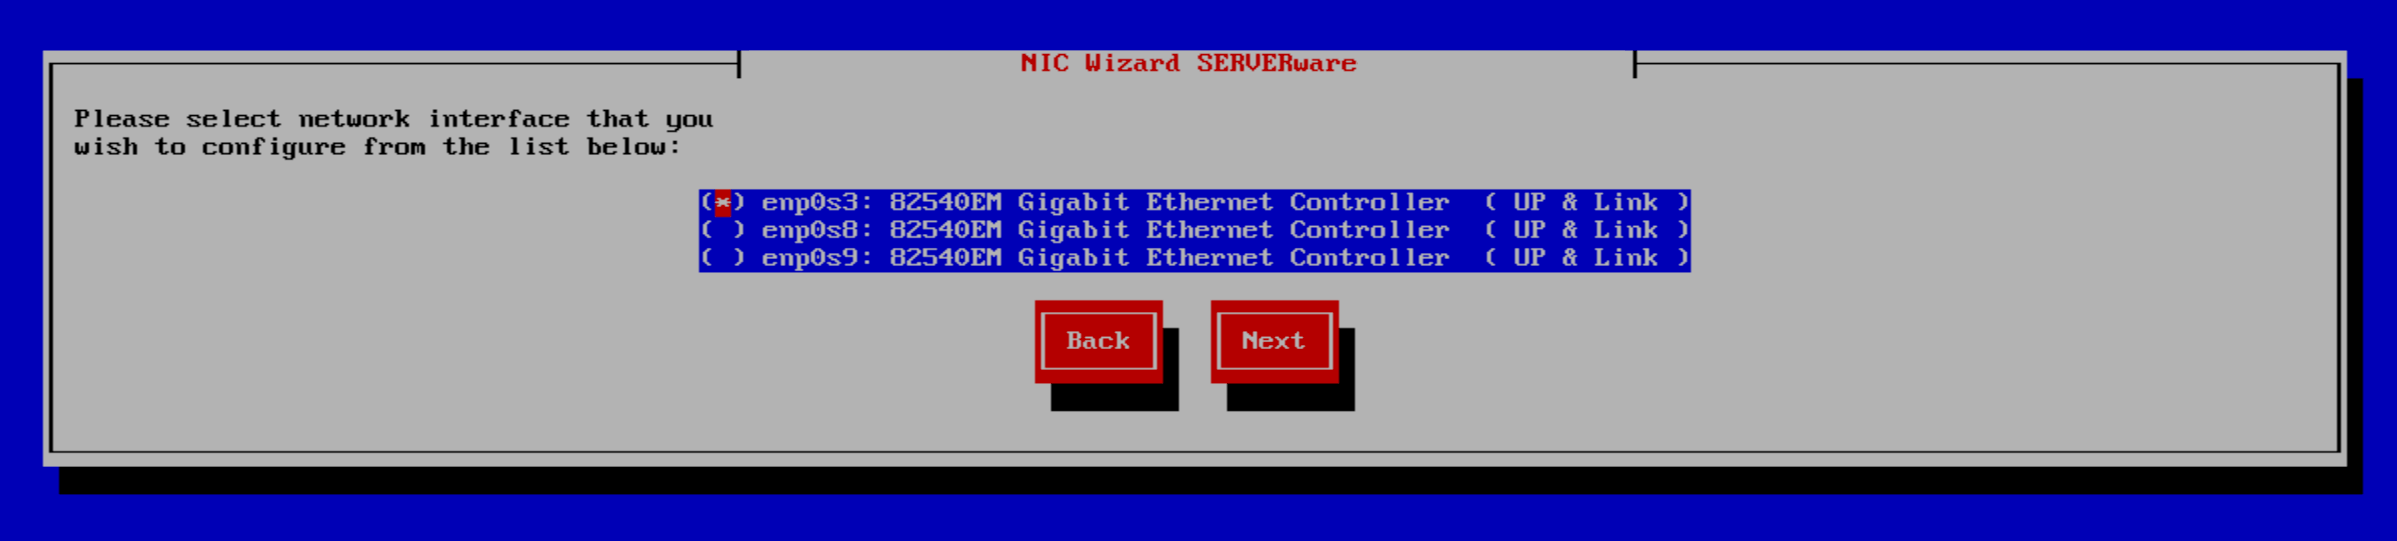
Next, the user selects the network interfaces to be configured. Once ready, click Next to continue.
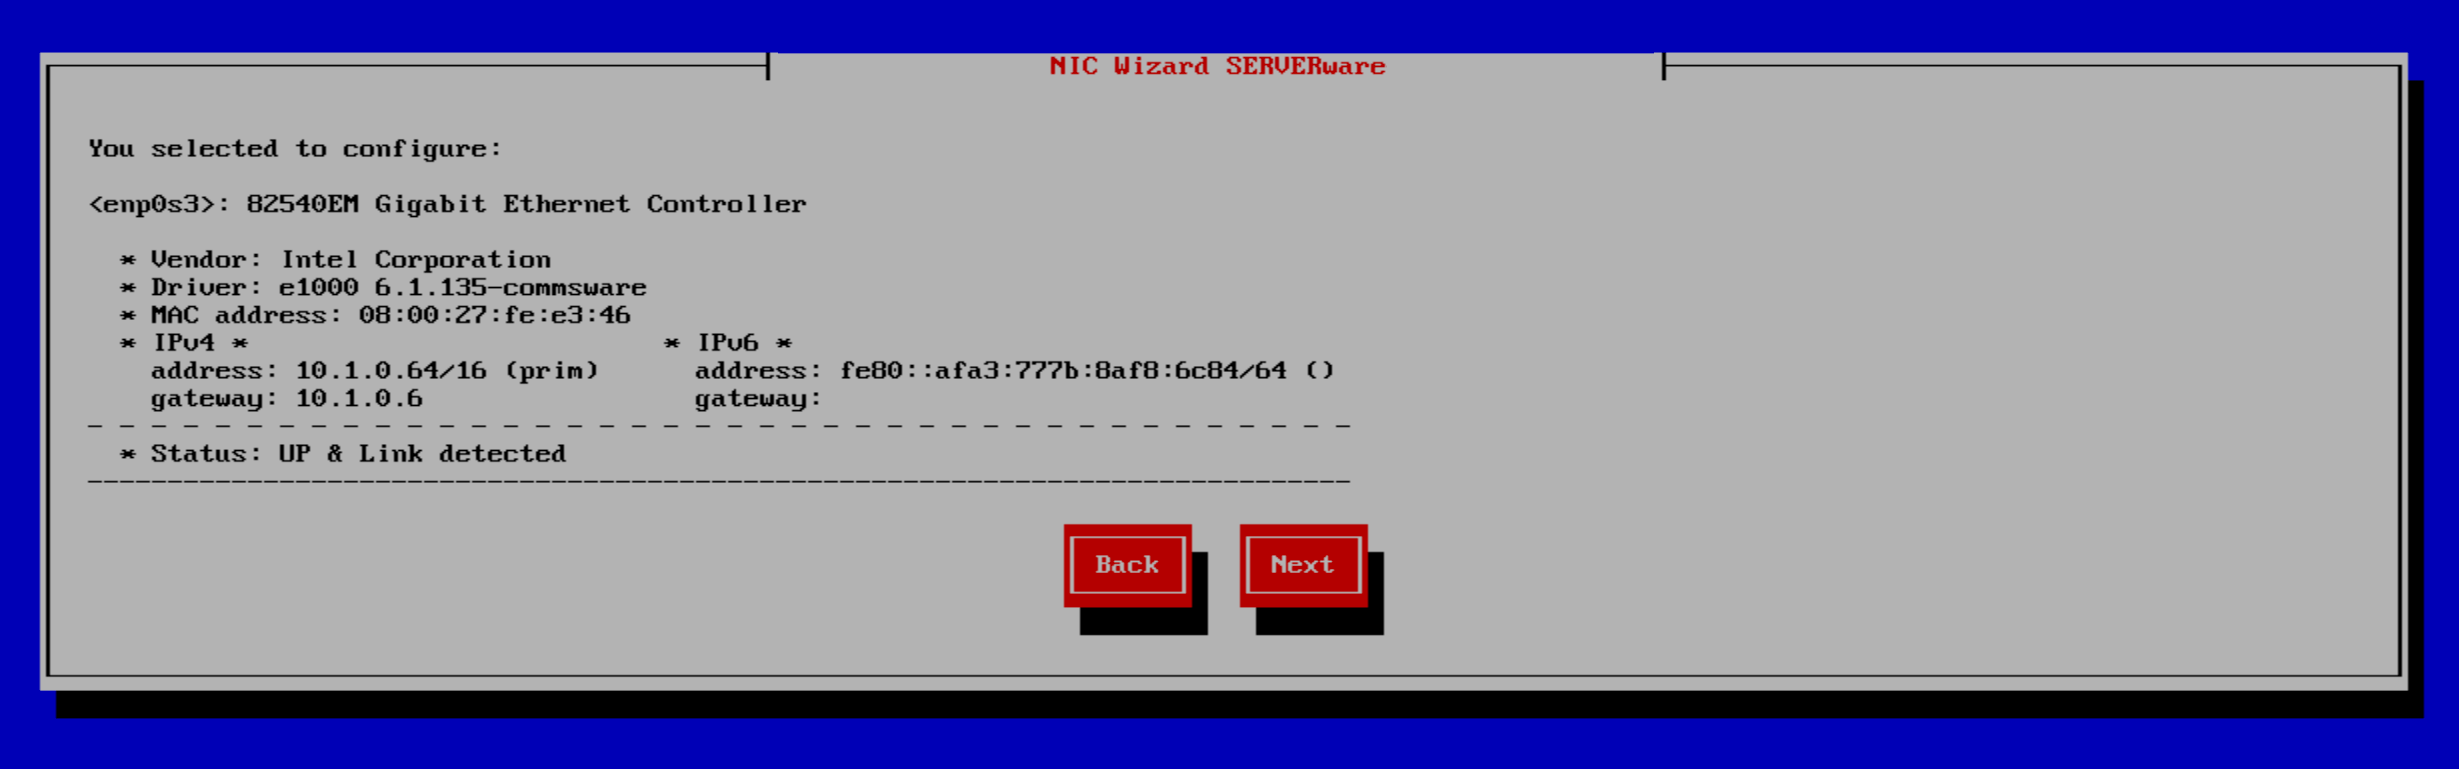
Confirm the selected interface, then click Next to continue.
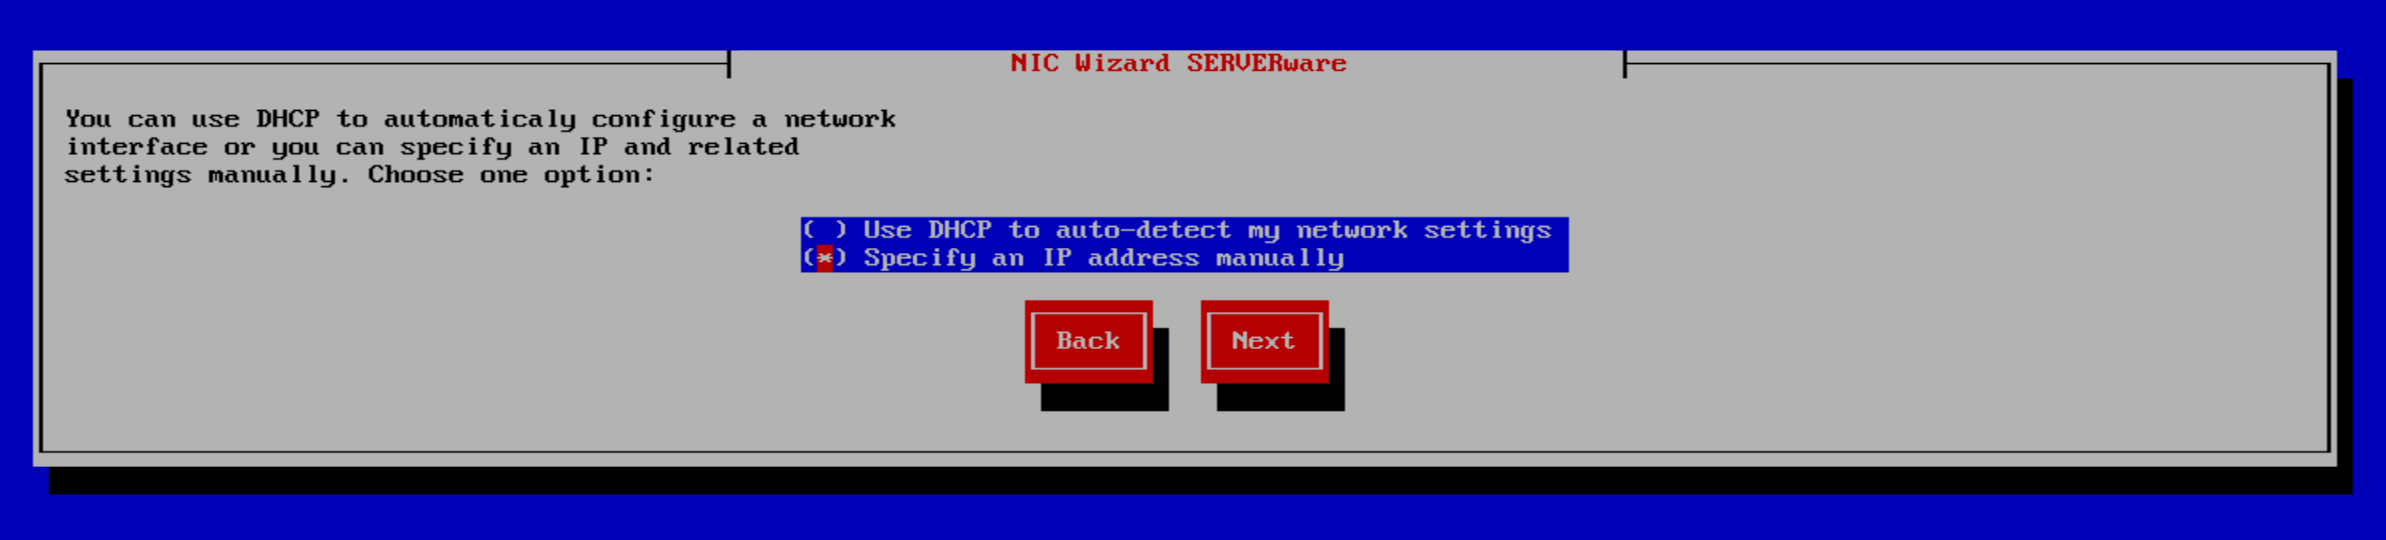
Continuing with the NIC Wizard, users must choose how to configure the selected interface—either by using DHCP to automatically detect network settings or by manually specifying an IP address. In this example, the IP address will be set manually. To continue, select 'Next.'
On the following window, users will have to specify IPV4 parameters.

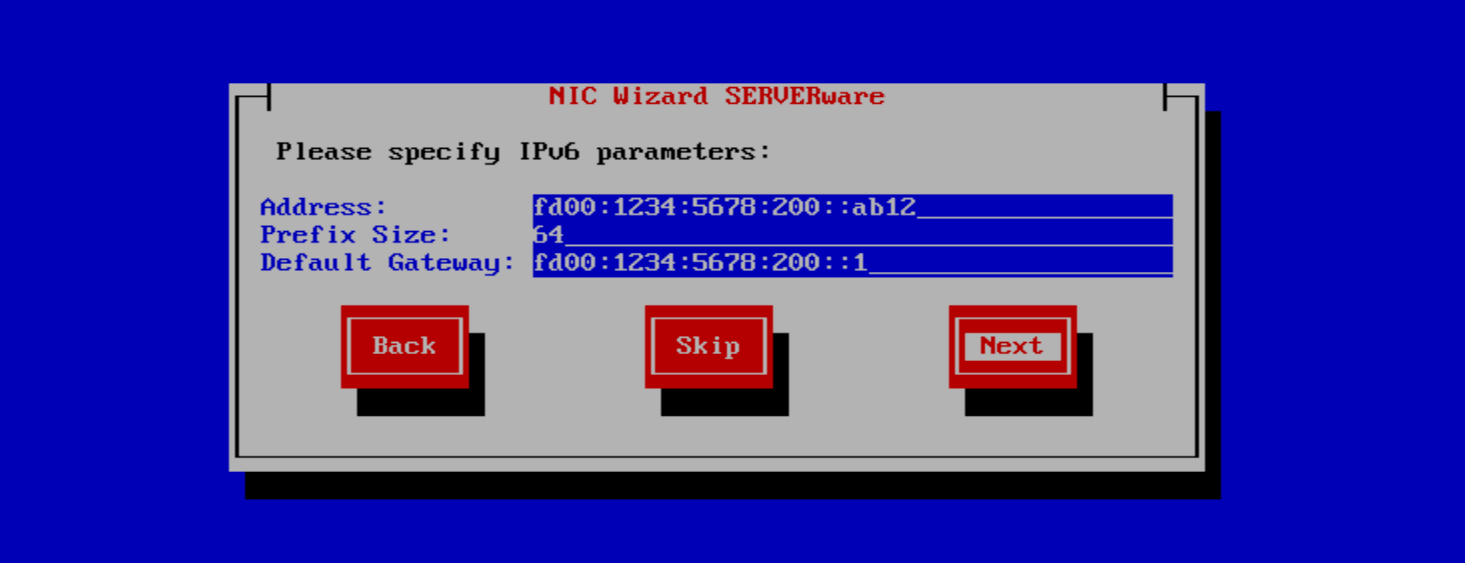
In the following window, the user can specify IPv6 parameters. This step may be skipped if IPv6 configuration is not required.
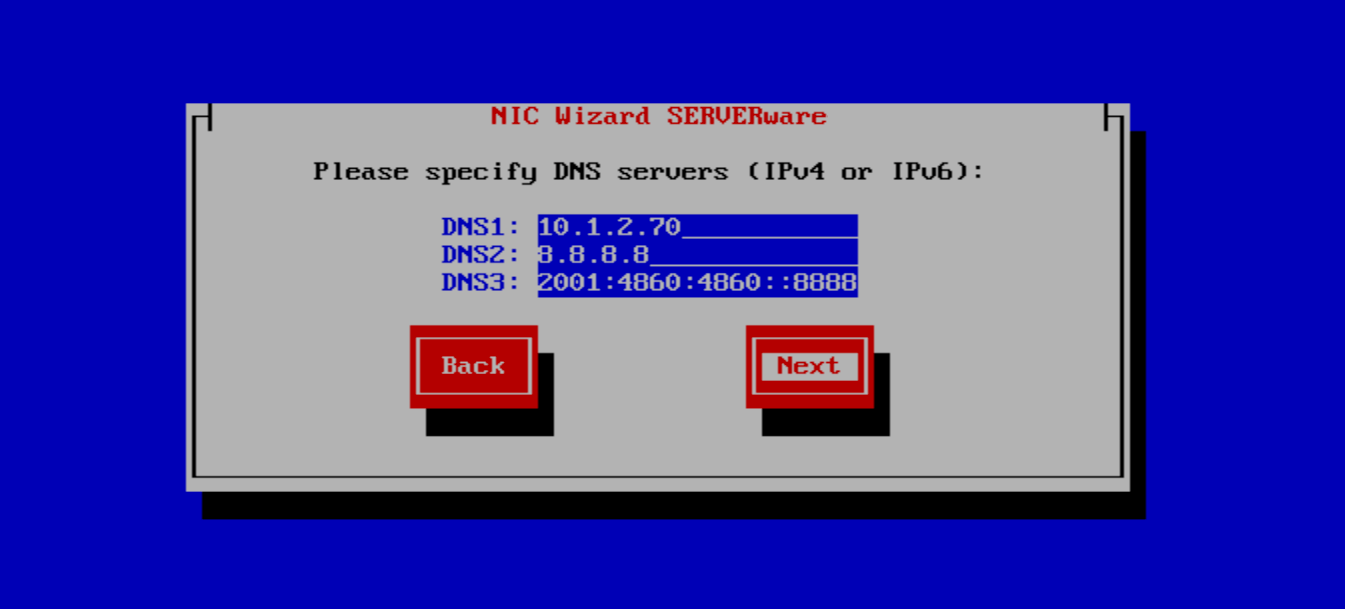
On the next step, users will need to set the parameters for DNS.
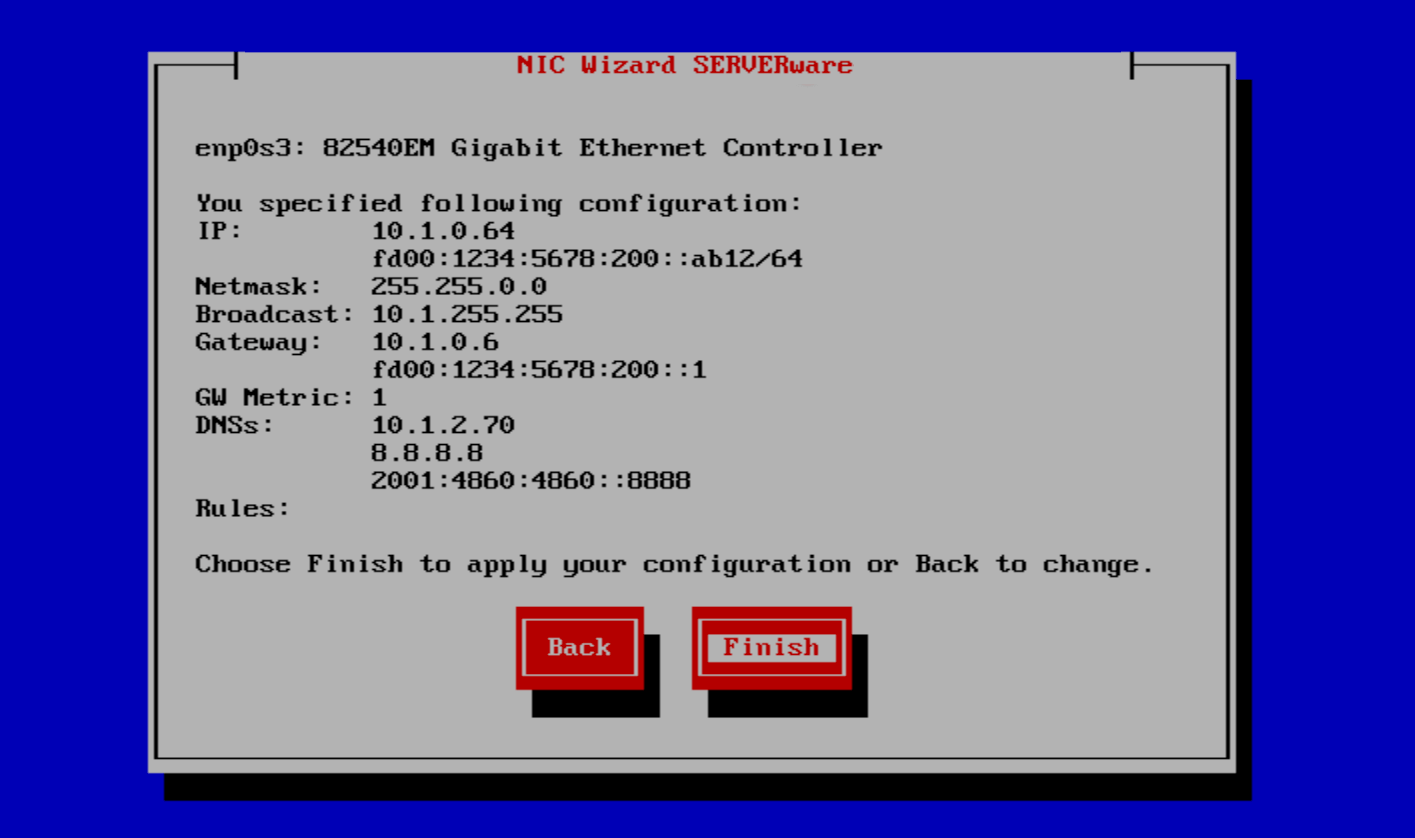
Complete the network configuration by clicking Finish.
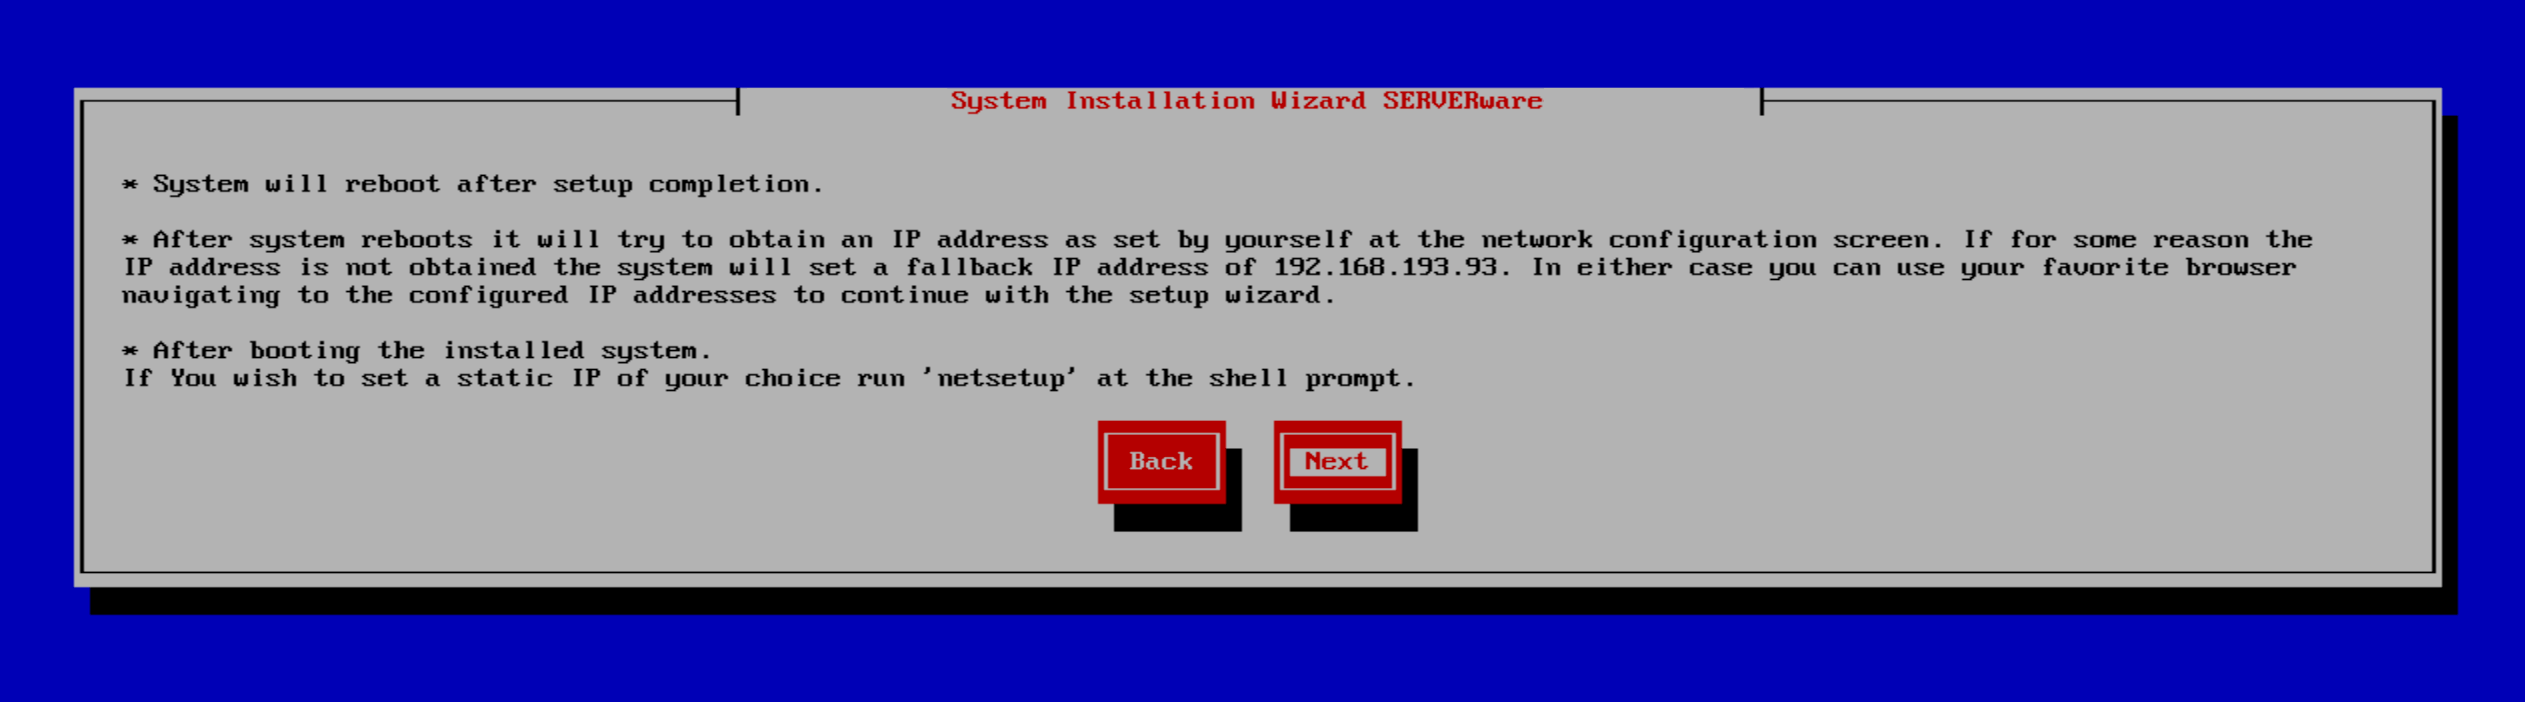
Once the network configuration is complete, click "Next" to begin the installation.
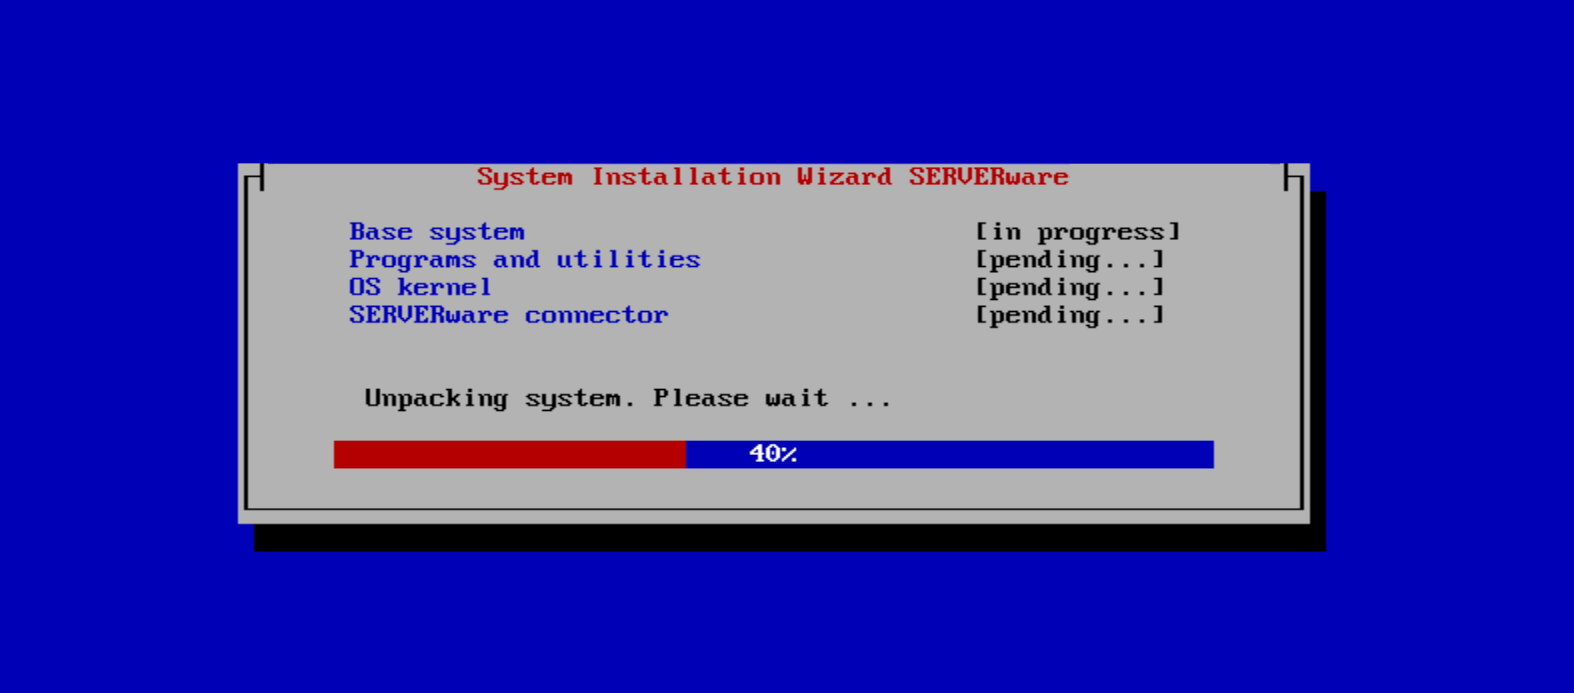
The wizard will then proceed with installing the SERVERware operating system and initiate a reboot after the installation is finished.
After completing the installation wizard, the system must reboot to finalize the installation.
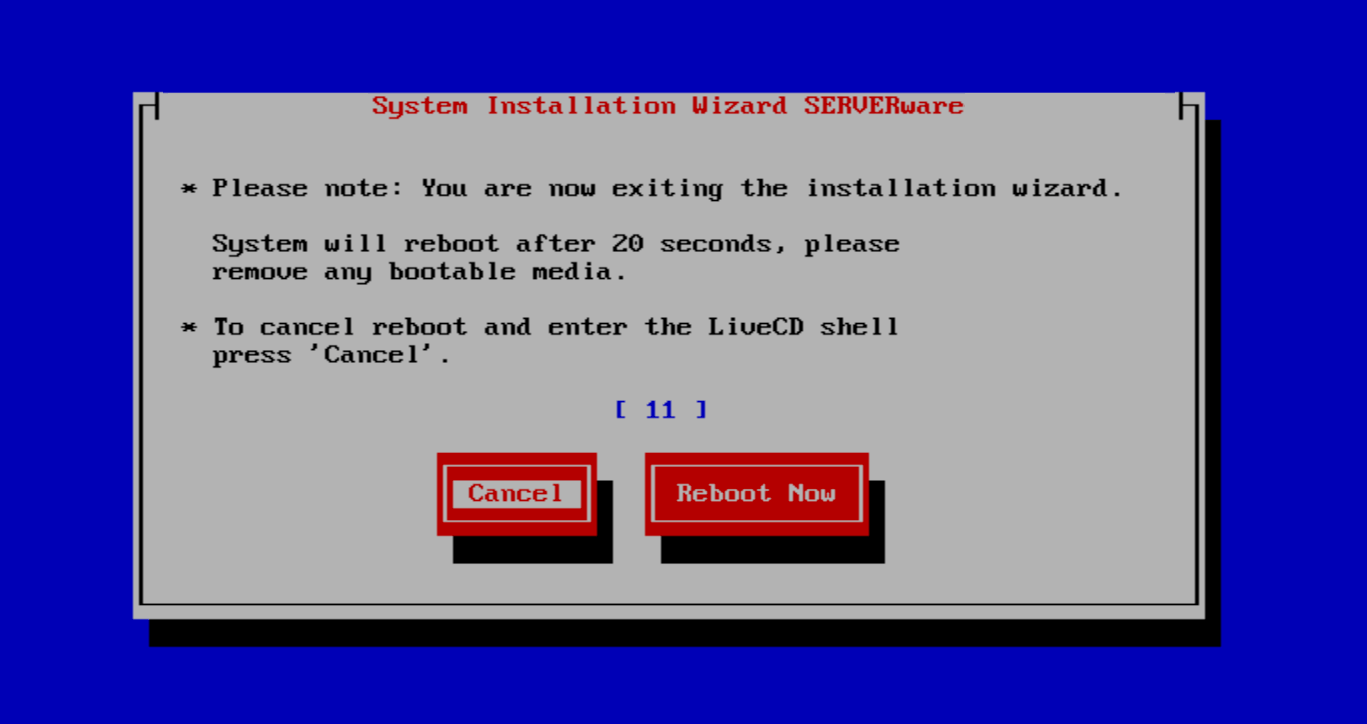
Before rebooting, remove any bootable media and allow the system to restart. If the installation was successful, the server's home page will be displayed.
Credentials for accessing the server:
username: swadmin
password: serverware