¶ Event Manager
The Event Manager is a feature that gives the ability to streamline workflows between the PBXware and third-party platforms/services on predefined system Events such as:
-
Incoming Call
-
Answered Call
-
Unanswered Call
-
Hangup
-
Ringing
The Event Manager allows for easy control, defining and managing of Actions that will be triggered upon those events ( For example: This feature may be useful to those that have a requirement to trigger a webhook for answered and unanswered calls, so that they may execute internal automation on call analytics, and similar situations ).
NOTE: On PBXware, the Event Manager feature must be enabled in license in order to access it.
¶ Events
The Events page consists of three tabs:
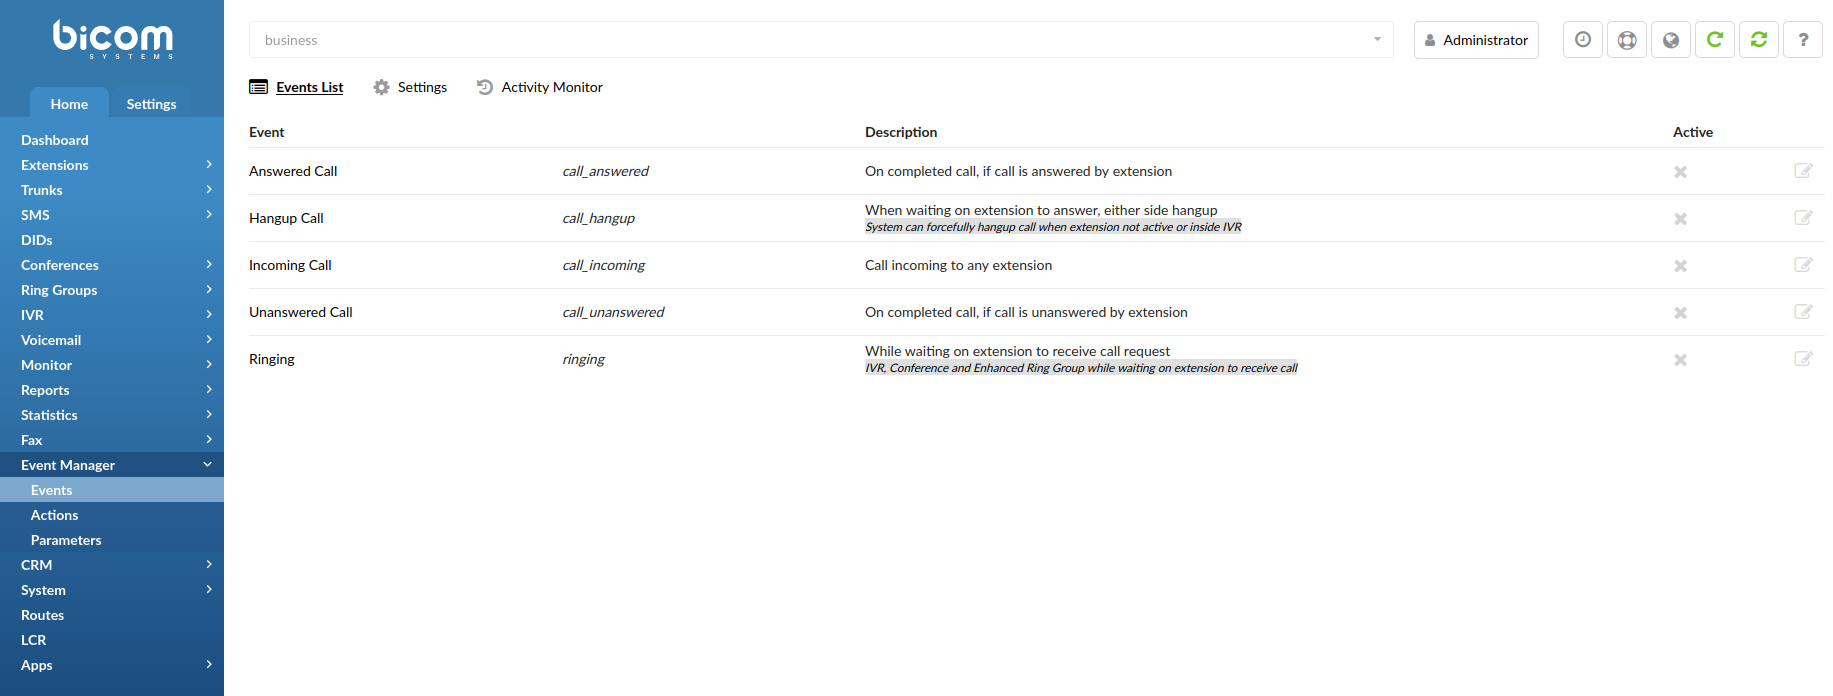
¶ Event List
The Event List tab displays the list of predefined system events, their description as well as active status.Available system Events are:
-
Incoming Call
-
Answered Call
-
Unanswered Call
-
Hangup
-
Ringing
Predefined events can not be deleted, but they can be edited. To edit any of the events, click on the event's name or the edit icon on the far right. This will open the Event edit page with two available options:
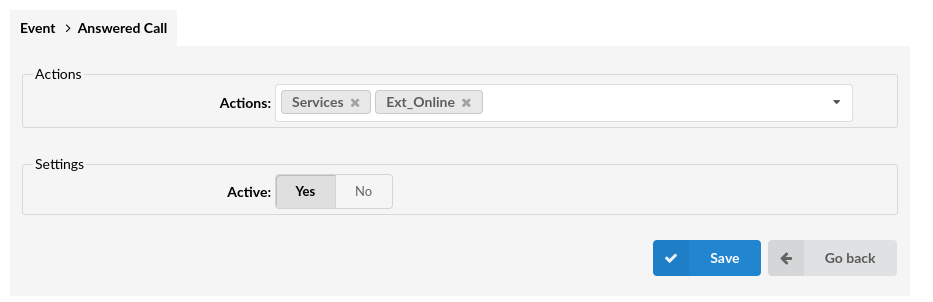
Actions
Select one or more actions (previously created) you want to trigger when the event occurs from the dropdown.
Active
This option allows you to enable or disable actions for this specific event.
¶ Settings
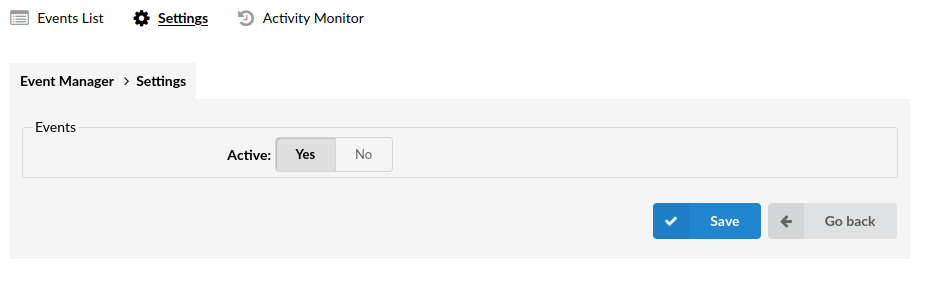
The Settings tab allows the administrator to Enable or Disable actions for all events.
By default, actions for all the Events are globally disabled, so all the events on the Event List page will have their active status grayed out in the Active column.
Changing the Active option to Yes will enable actions for all active events.
¶ Activity Monitor

List of all events triggered from the system or the tested ones. There will be status and message displayed about the action that was triggered.
¶ Actions
The Actions page allows PBXware administrators to define an HTTP request that can be attached to an Event and sent once the event is triggered. A single Action can be attached to multiple events.
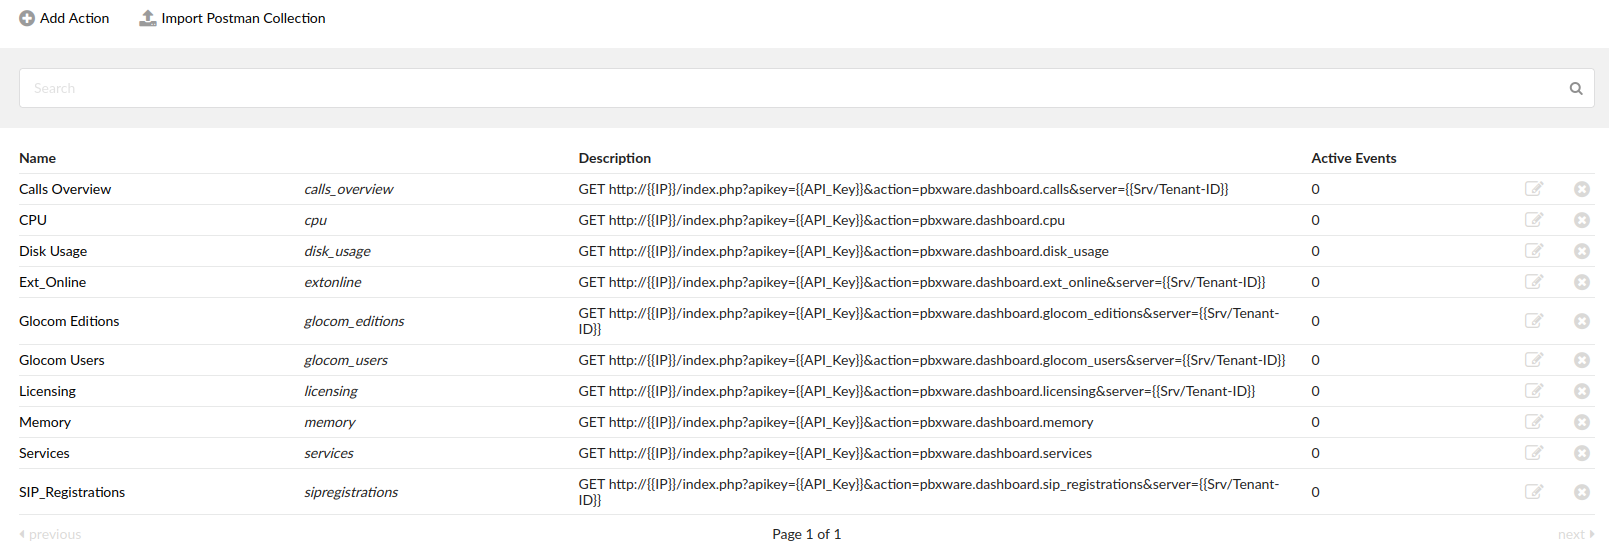
Add Action

Click this button to create a new action.
For more information on adding an action, please refer to the Action Request > Add/Edit Action section.
Import Postman Collection

Click this button to import requests from your Postman Collection to your actions page.
For more information on this, please refer to the Actions > Import Postman Collection section.
Search

Enter the search pattern to filter the action list.
Delete
Click this button to delete an action.
Edit
Click this button to edit an action.
¶ Action Request > Add/Edit Action
This option allows you to create (or edit) an action directly on PBXware. There are many options that allow PBXware administrators to customize this feature to accommodate their needs.
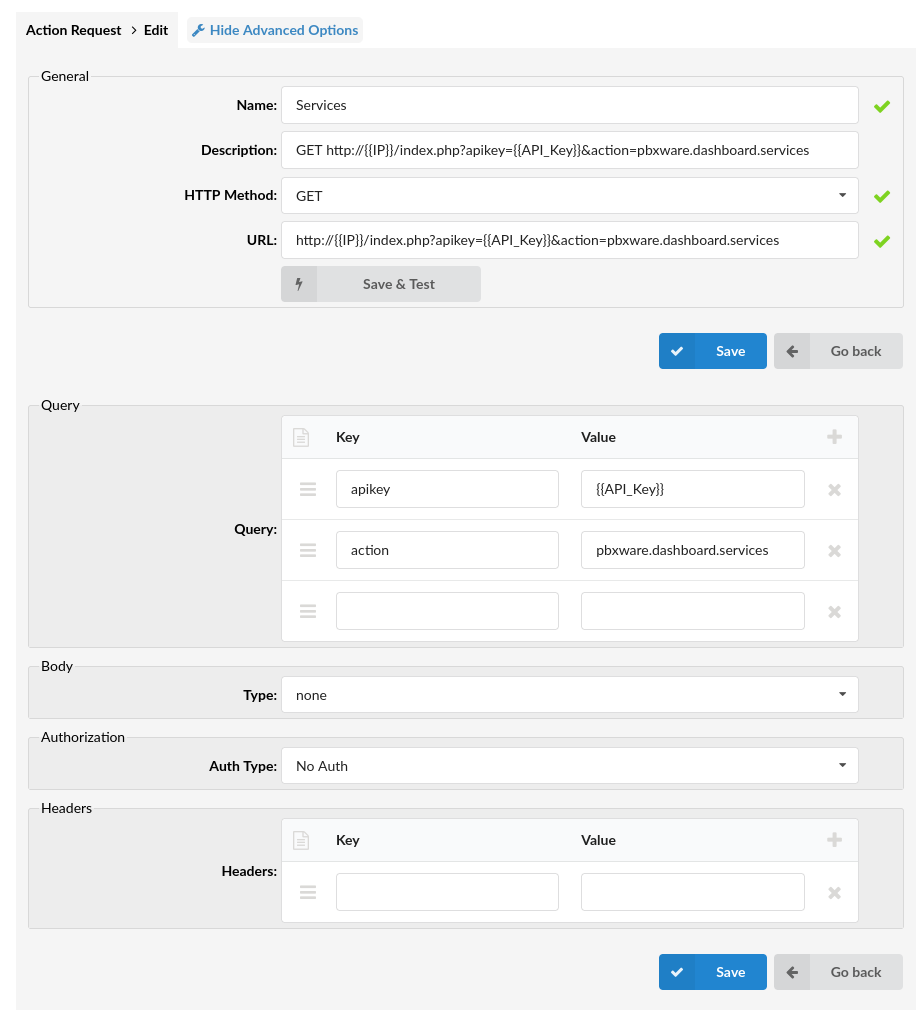
¶ General
Name
Unique name assigned to the individual actions.
Description
A short description of the action specifics.
HTTP Method
HTTP method refers to the type of HTTP request used to send data from the webhook source to the webhook consumer.
Available options:
-
GET requests the data to be delivered.
-
PUT request to update data on the consumer's server.
-
POST is the most common HTTP method used for webhooks. When an event occurs, the source will send an HTTP POST request containing relevant data to the designated endpoint (URL).
-
PATCH requests will make only partial updates to the data on the target server.
-
DELETE requests indicate that certain data should be removed.
-
URLThe address to which HTTP requests will be sent.
¶ Query
Key
The key is the name or identifier associated with a particular parameter. It serves as the reference point used by the webhook consumer to identify and extract the corresponding value from the query string. Keys are typically alphanumeric strings and may contain special characters but must adhere to URL encoding rules. For example, in the query string ?name=John&age=30, "name" and "age" are the keys.
Value
The value is the actual data or information associated with the key. It represents the content or value assigned to a specific parameter within the query string. Values can vary in format and content, depending on the webhook consumer's requirements and the parameter's purpose. Continuing with the previous example, "John" is the value associated with the "name" key, and "30" is the value associated with the "age" key.
¶ Body
Type
- None
None typically indicates that the webhook does not include a message body in the HTTP request.
This means that the webhook provider sends data to the consumer without including any payload in the request body. Instead, the relevant information is conveyed through other means, such as HTTP headers or query parameters.
- Form-data
When sending data using form data, the payload is typically formatted as a series of key-value pairs, similar to how data is submitted in an HTML form. Each key-value pair represents a field and its corresponding value. This format is commonly used when the webhook provider wants to mimic the behavior of submitting a form.
- x-www-form-urlencoded
When using x-www-form-urlencoded format in webhooks, the payload is structured similarly to form data, where each key-value pair is encoded in a specific way to conform to the application/x-www-form-urlencoded content type. This format is commonly used when a webhook provider sends data to a webhook consumer in a structured yet simple manner.
- raw
This means that the payload of the webhook request is sent exactly as provided by the webhook source without any additional processing or formatting by the webhook provider.
A "raw" body type allows for flexibility in the content of the webhook payload. It means that the webhook provider does not enforce any specific format for the payload, leaving it up to the webhook consumer to handle and parse the data according to its requirements.
¶ Authorization
No Auth
Select No Auth if the endpoint requires no authorization.
API Key
This option indicates that API Key will be sent along with the webhook request. The webhook consumer validates the API key to ensure the request comes from an authorized source.
Basic Auth
Basic authentication requires a username and password to be sent with the webhook request. The webhook consumer validates the credentials before processing the request.
Bearer Token
Some webhook providers may use custom tokens for authentication purposes. These tokens are unique to the provider and consumer and are used to validate the authenticity of the webhook request.
OAuth 2.0
OAuth 2.0 is used when the endpoint requires an access token from an authorization server. PBXware sends a request to the specified Token URI with the provided Client ID and Client Secret. If the request is successful, the returned access token is added to the webhook request using the Authorization: Bearer <access_token> header.
¶ Header
Headers
In the context of webhooks, headers consist of key-value pairs that provide additional information about the HTTP request being sent from the source to the webhook endpoint.
Key
The key refers to the name or identifier of a specific header in an HTTP request sent as part of a webhook. Headers are key-value pairs included in the HTTP request's header section, providing additional information about the request or specifying how the server should handle it.
Value
refers to the content associated with a specific header key in an HTTP request sent as part of a webhook.
¶ Undefined Parameters
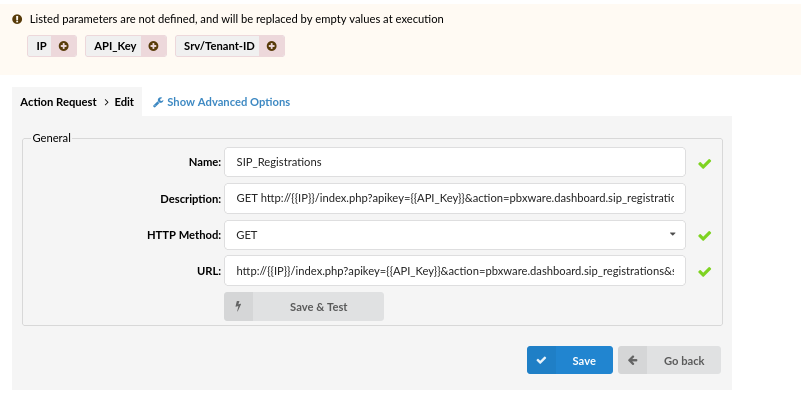
When editing an action that was previously created, if you have parameters that have not been defined in the parameters tab of the Event Manager but they are being used in that specific action, they will be listed at the top of the action page with the option to add them along with their assigned value.
Click on the parameter in order to add it to the parameters list where you will be prompted to assign a value to it as well.

¶ Actions > Import Postman Collection
This option allows you to import an existing collection from Postman.
This option enables PBXware administrators to import collections they already have stored in Postman. After a collection is imported, all of the available requests will appear on the list, from where they can be selected one by one or by using Select all Actions, followed by the Import button to complete the procedure.

¶ Parameters
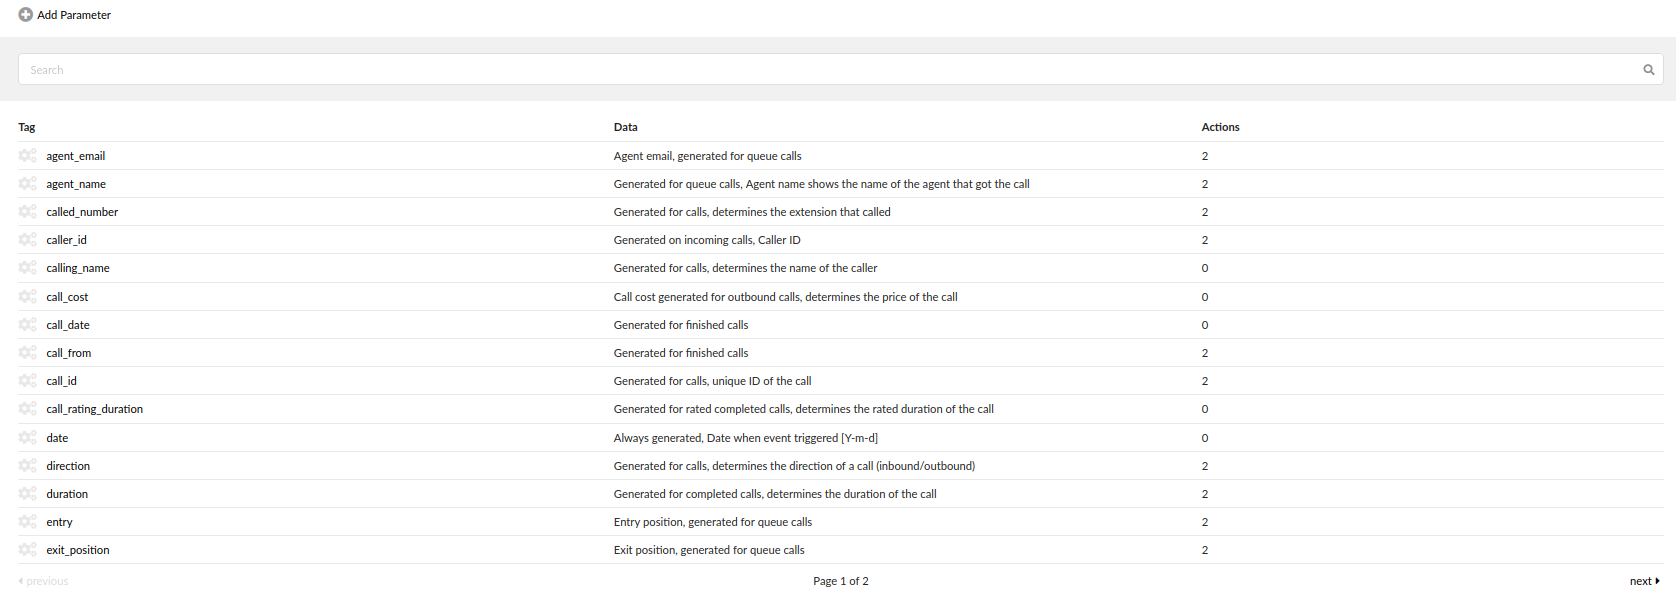
The Parameters section defines the system and custom parameters the admin can create and use inside Actions. Defined by 'tag' and 'value'. Parameters used in Actions are only replaced when a request is sent, so throughout PBXware, the parameter tag will be shown. To use a Parameter in Action, it needs to be defined with a tag enclosed by double curly brackets, like: {{parameter_tag}}.
The system default parameters can be found in the list on the Parameters page with the cog (cog) icon and are the following:
- agent_email - Agent email, generated for queue calls
- agent_name - Generated for queue calls, Agent name shows the name of the agent that got the call
- called_number - Generated for calls, determines the extension that called
- caller_id - Generated on incoming calls, Caller ID
- calling_name - Generated for calls, determines the name of the caller
- call_cost - Call cost generated for inbound and outbound calls, determines the price of the call
- call_date - Generated for finished calls
- call_from - Generated for finished calls
- call_id - Generated for calls, unique ID of the call
- call_rating_duration - Generated for rated completed calls, determines the rated duration of the call
- date - Always generated, Date when event triggered [Y-m-d]
- direction - Generated for calls, determines the direction of a call (inbound/outbound)
- duration - Generated for completed calls, determines the duration of the call
- entry - Entry position, generated for queue calls
- exit_position - Exit position, generated for queue calls
- extension - Generated for extension in context of triggered Action
- last_event - Last event, generated for queue calls
- queue_id - Queue ID, generated for queue calls
- queue_name - Generated for queue calls, Queue name shows the name of the queue involved with the call
- talk_time - Talk time, generated for queue calls
- tenant - Always generated, Tenant Code where event triggered (empty on CC)
- time - Always generated, Time when event triggered [H:i:s]
- unix_time - Always generated, Unix timestamp when event triggered
- wait_time - Wait time, generated for queue calls
These default parameters cannot be deleted or edited.
-
Add Parameters
-

Click this option to add a new parameter.
-
Edit
-

Click this option to edit the parameter.
-
Delete
-

Click this option to delete the parameter.
-
Search
-

Enter the search pattern to filter parameters by Tag or Data.
¶ Parameter > Add
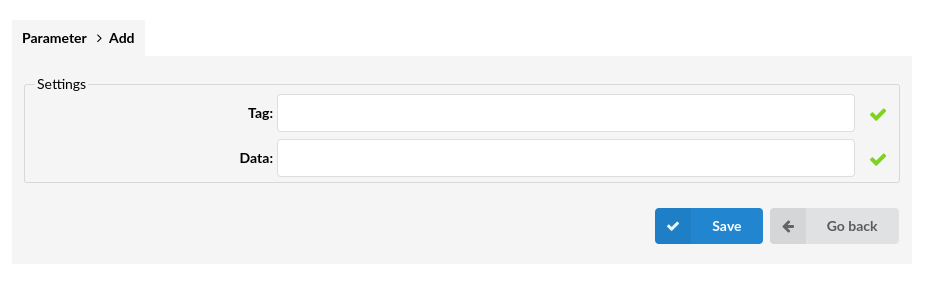
- Tag
Alias or name of the parameter that will be used in actions in URLs
- Data
Parameter value