¶ SMS/MMS
These features allow the user to send/receive SMS/MMS messages.
The MMS message is an enhancement to the standard SMS message. The main difference between SMS and MMS messages is that the user can send multimedia and other files in their messages. It includes media such as videos, pictures, audio clips, GIFs, and much more. The maximum size of uploaded files is 500 KB or up to ten (10) files per message. Additionally, MMS allows for up to 1000 characters of text in a message, which is a lot more than for a standard SMS.
The MMS feature can be enabled/disabled depending on the server settings.

The gloCOM applications allow users to synchronize their SMS conversations and messages across multiple devices, ensuring they can access their messages from any device they use.
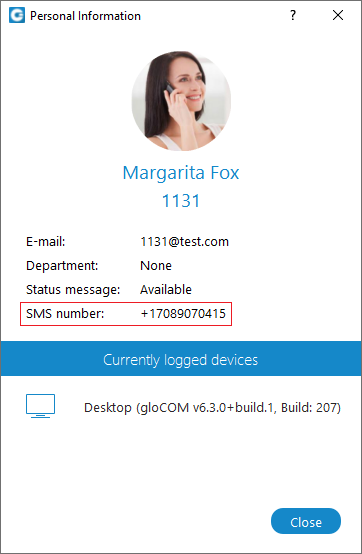
¶ SMS Number
If the user has associated an SMS number with their Extension, they need to open the Personal Information screen to see it.
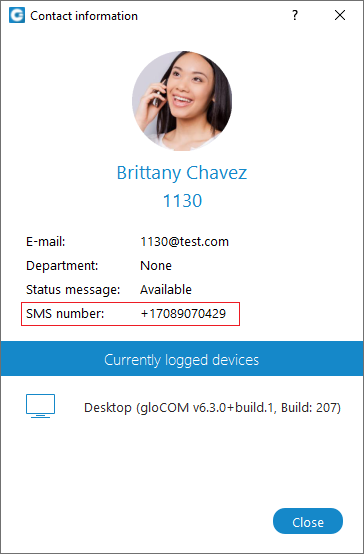
To see the SMS number of the contact, right-clicking on contact, and from the drop-down menu, select the Contact Information.
¶ Shared SMS Number
An SMS number can be shared between multiple extensions. In case when the user receives a message from the number used by multiple extensions, the SMS conversation will be displayed as in the picture.

All extensions using this number can see all sent/received messages.
Furthermore, click the Multiple users share this number label within the conversation to see who uses this SMS number.
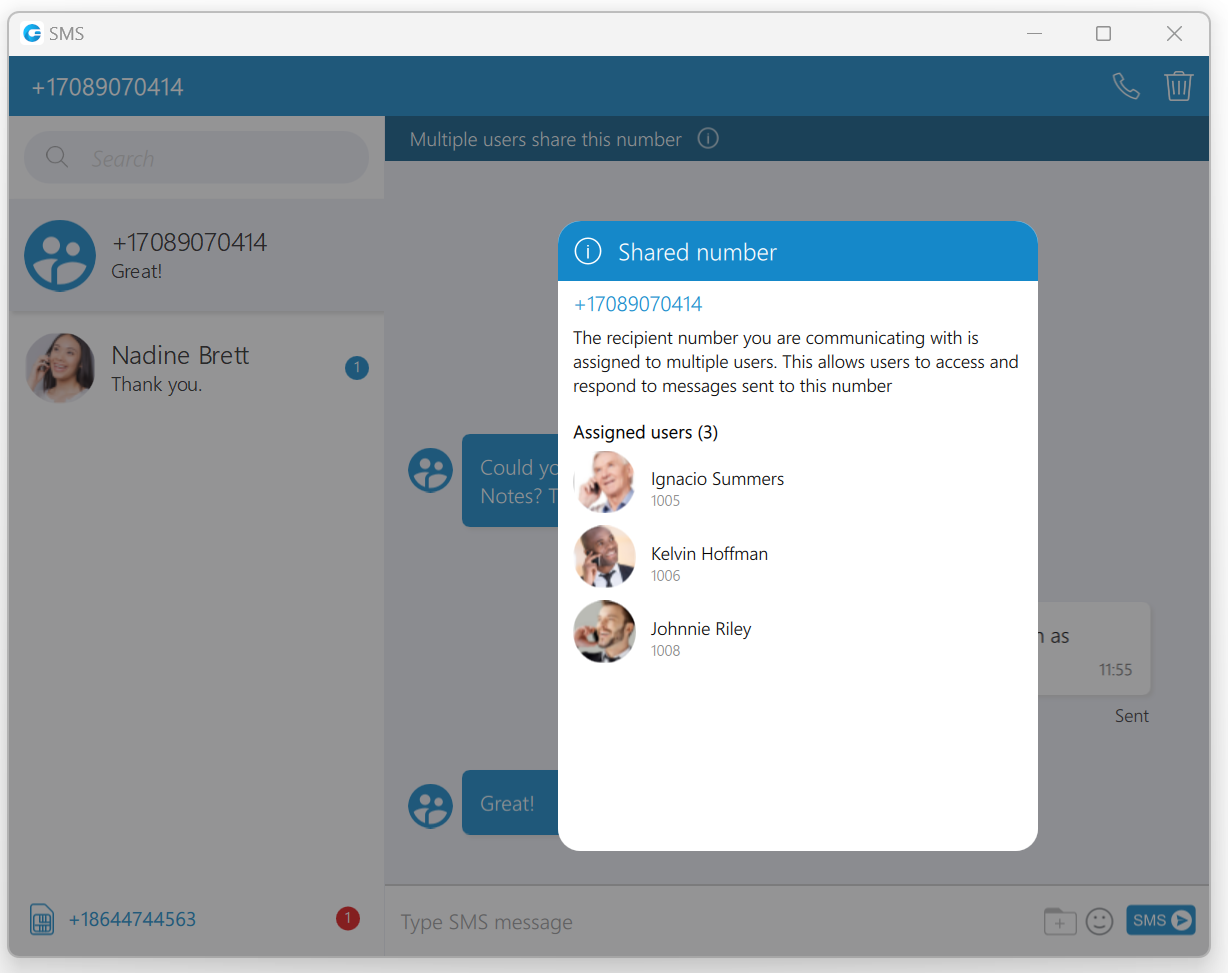
Messages of the other users you share the number with will have a header with their name and avatar, as in the picture. Your messages will not have this header.

¶ Start SMS conversation
There are two ways to start an SMS conversation:
The first way is to open the SMS window by clicking on the SMS icon in the toolbar within the main gloCOM window. The SMS window will appear. Next, enter the name or number of the contact inside the search field and click the result to start a conversation.
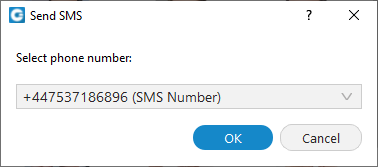
The second way is right-clicking on the contact, and from the drop-down menu select Send SMS.
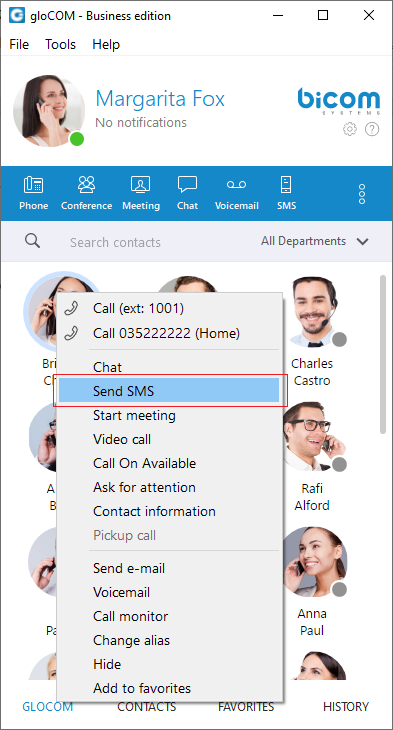
If the contact has multiple phone numbers, the pop-up window will appear with all their numbers, and the user will be able to select which number they desire to send an SMS/MMS message.
¶ SMS/MMS Notifications
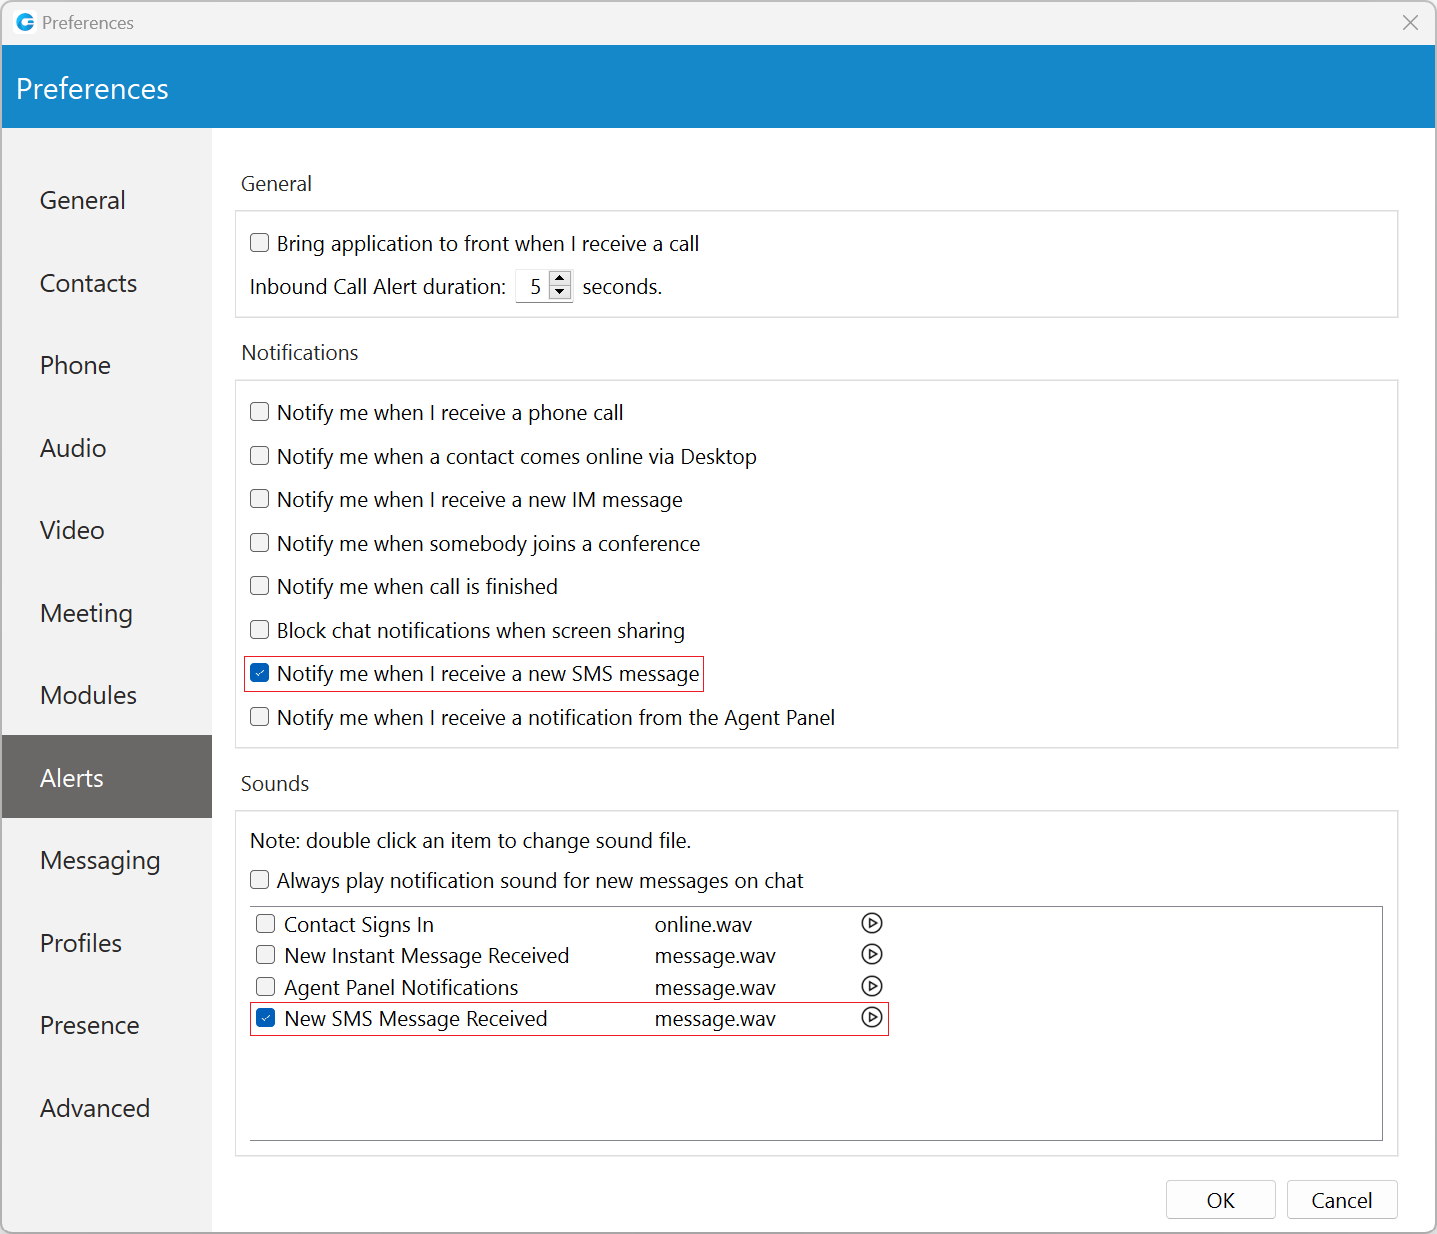
SMS/MMS notifications have the same behavior as chat notifications. When an SMS/MMS message is received, a notification pops up. Additionally, if the New SMS Message Received option is enabled within Preferences -> Alerts under the Sounds section, the pop-up notifications will be accompanied by sound.
SMS notifications are turned off by default.


The app will display the number of unread SMS messages within a gloCOM main window, taskbar, tray icon, and at the bottom of the SMS window.

To turn on/off SMS notifications, please navigate to Preferences -> Alerts and uncheck the Notify me when I receive a new SMS message option.
To turn on/off the SMS notification sound, please navigate to Preferences -> Alerts and uncheck the New SMS Message Received option.
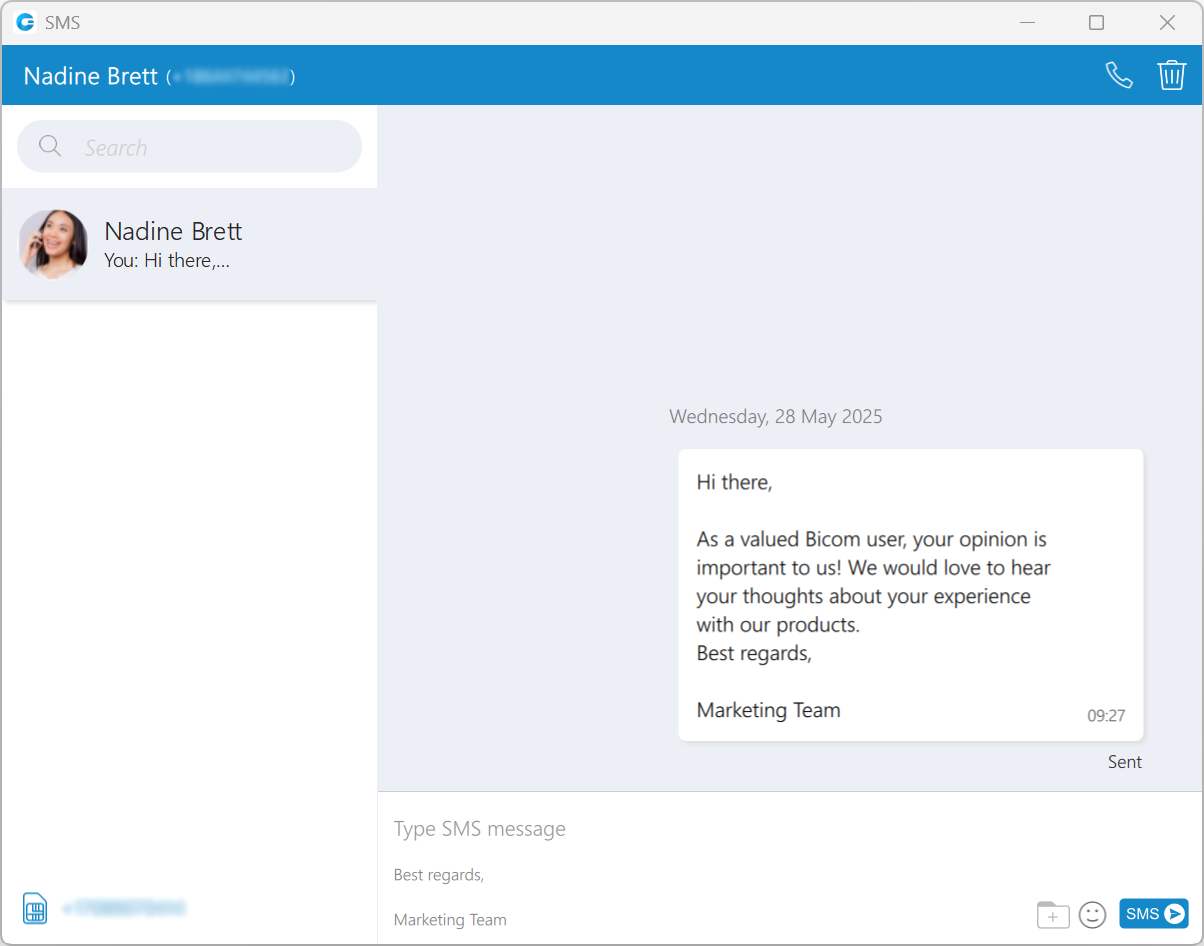
¶ SMS Window
At the top left side of the blue bar is displayed an SMS number of contact the user is currently talking to.
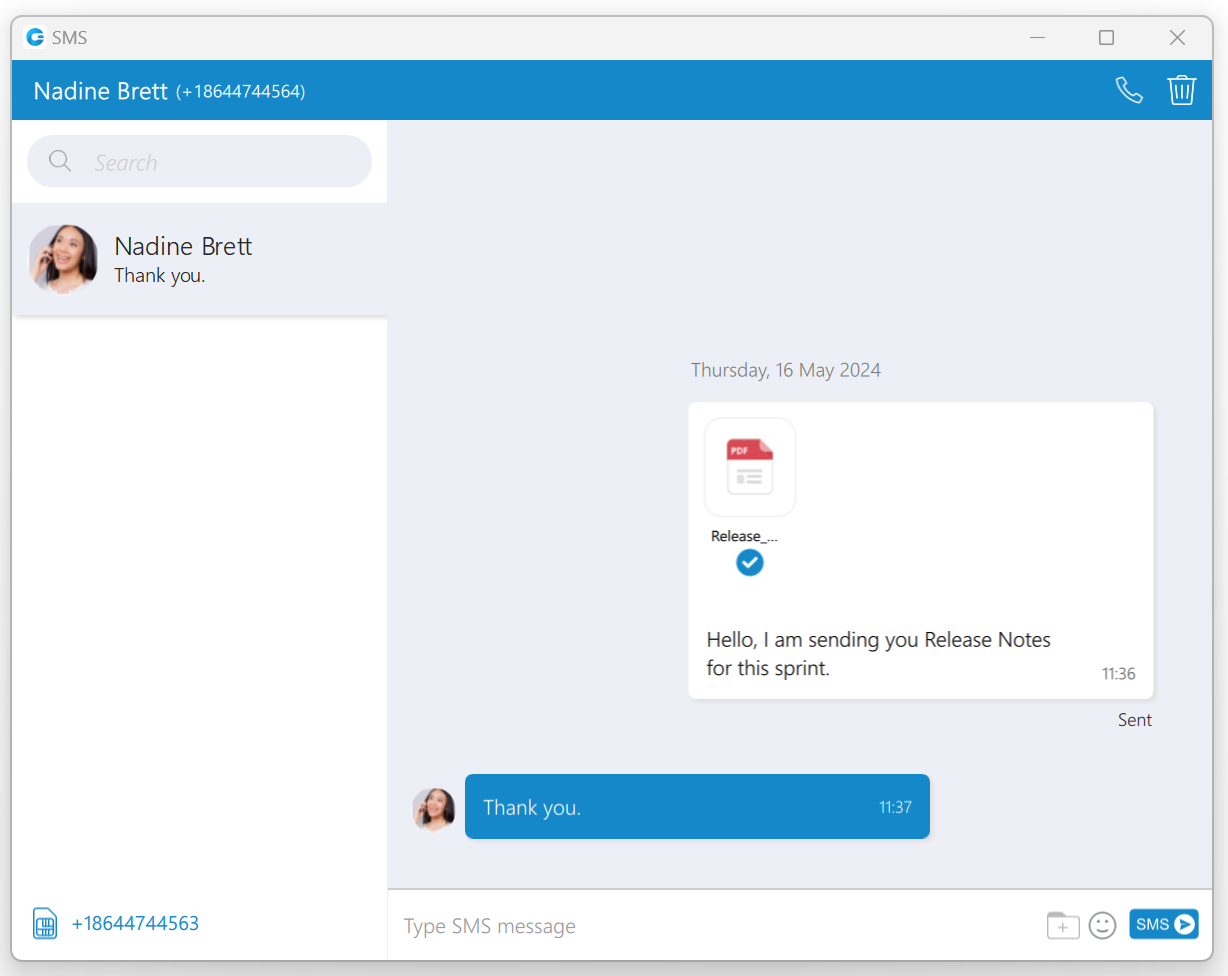
On the right side of the blue bar, there are two options:
-
 Call the currently selected user.
 -
 Delete the current conversation.
The search field is below the contact’s SMS number. The user can use it for filtering contacts, conversations, and searching messages.
Below the search field is a conversation list of all user’s conversations sorted by their most recent activity.
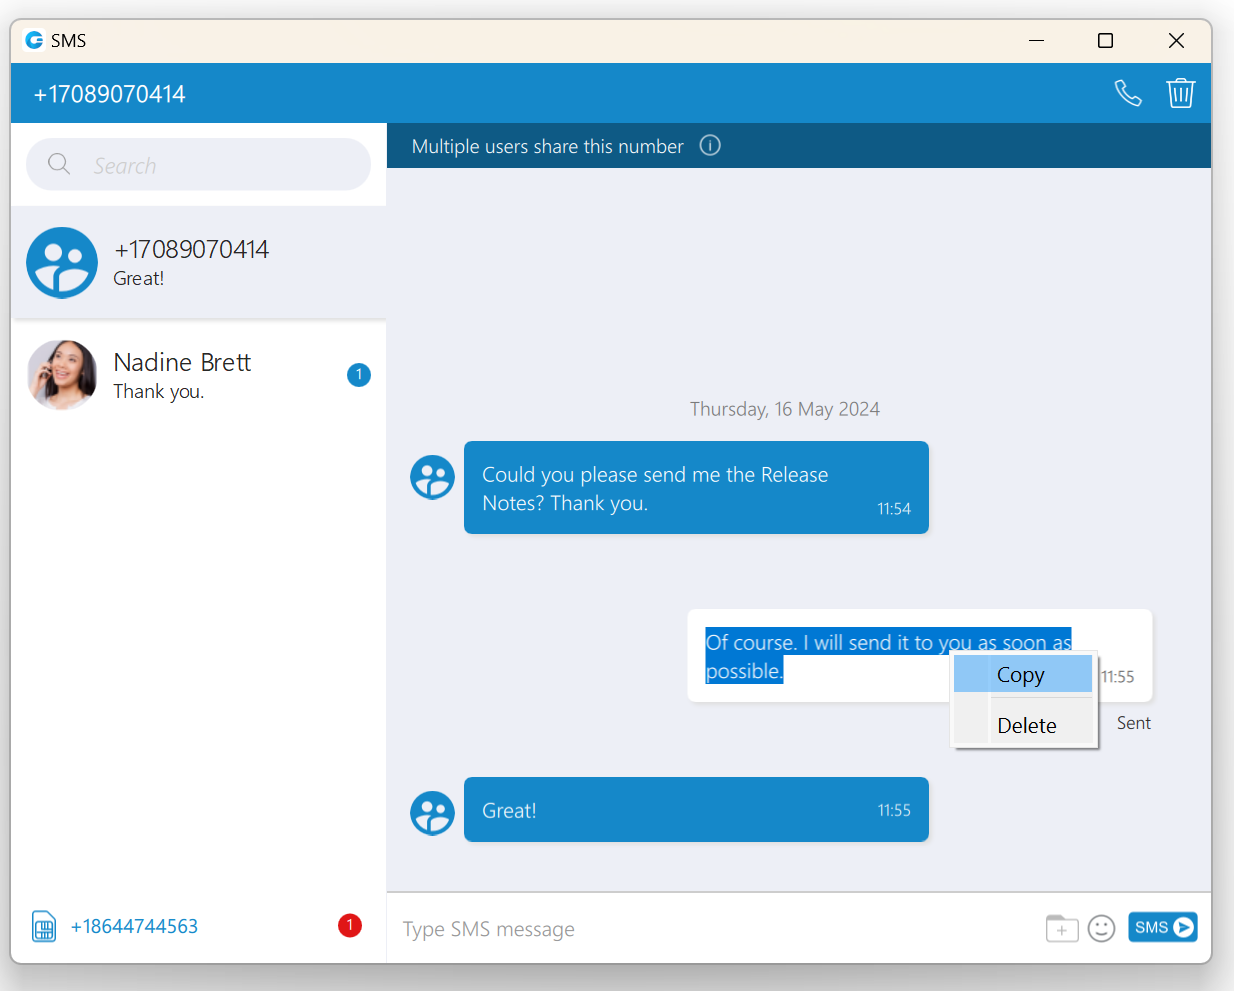
Next to it is the messages view. Deleting messages can be done by right-clicking on the desired message and selecting the Delete option from the drop-down menu.
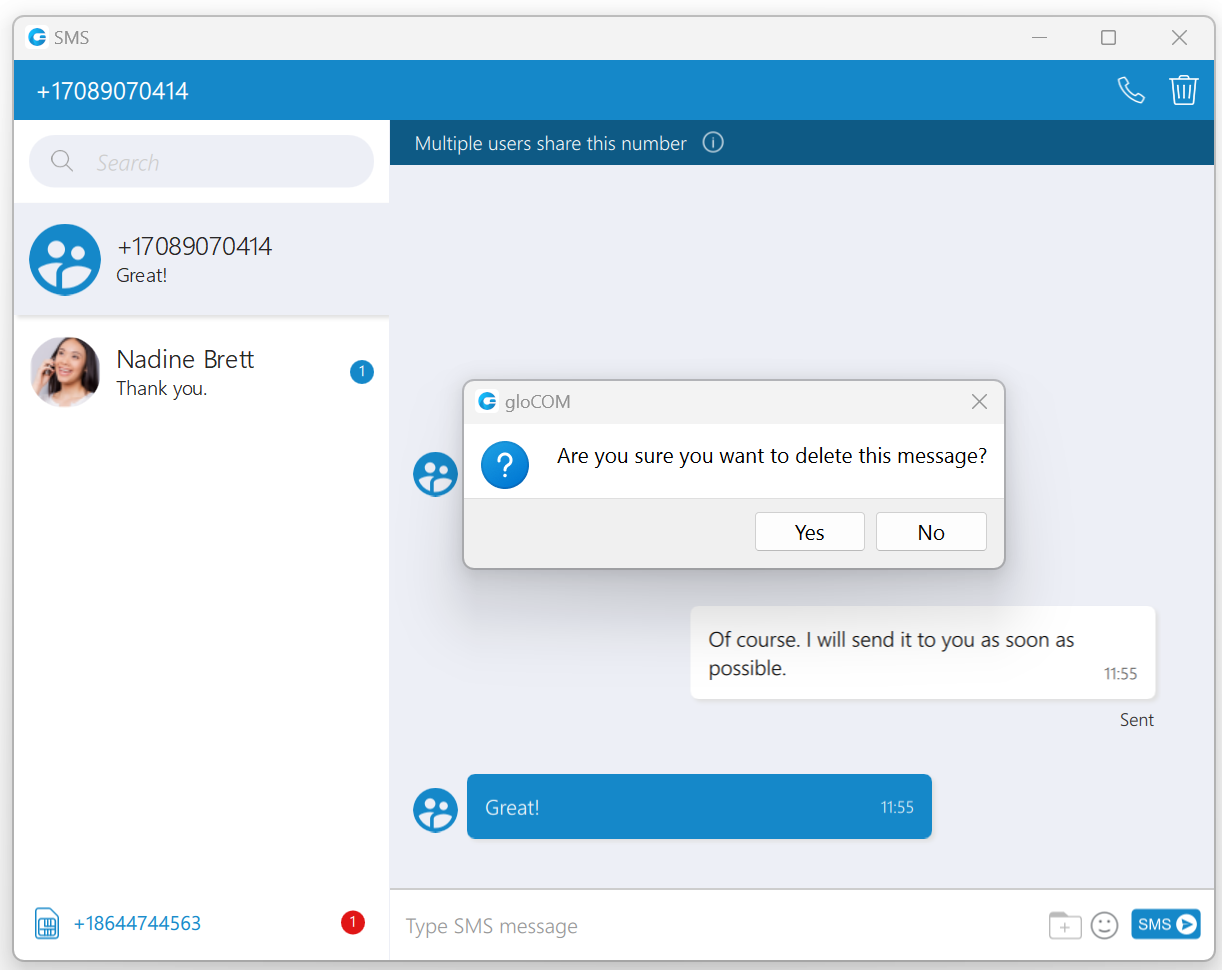
Besides the Delete option, users can copy highlighted text by selecting the Copy option from the drop-down menu.
The white rectangle represents outgoing messages, and the blue represents incoming messages.
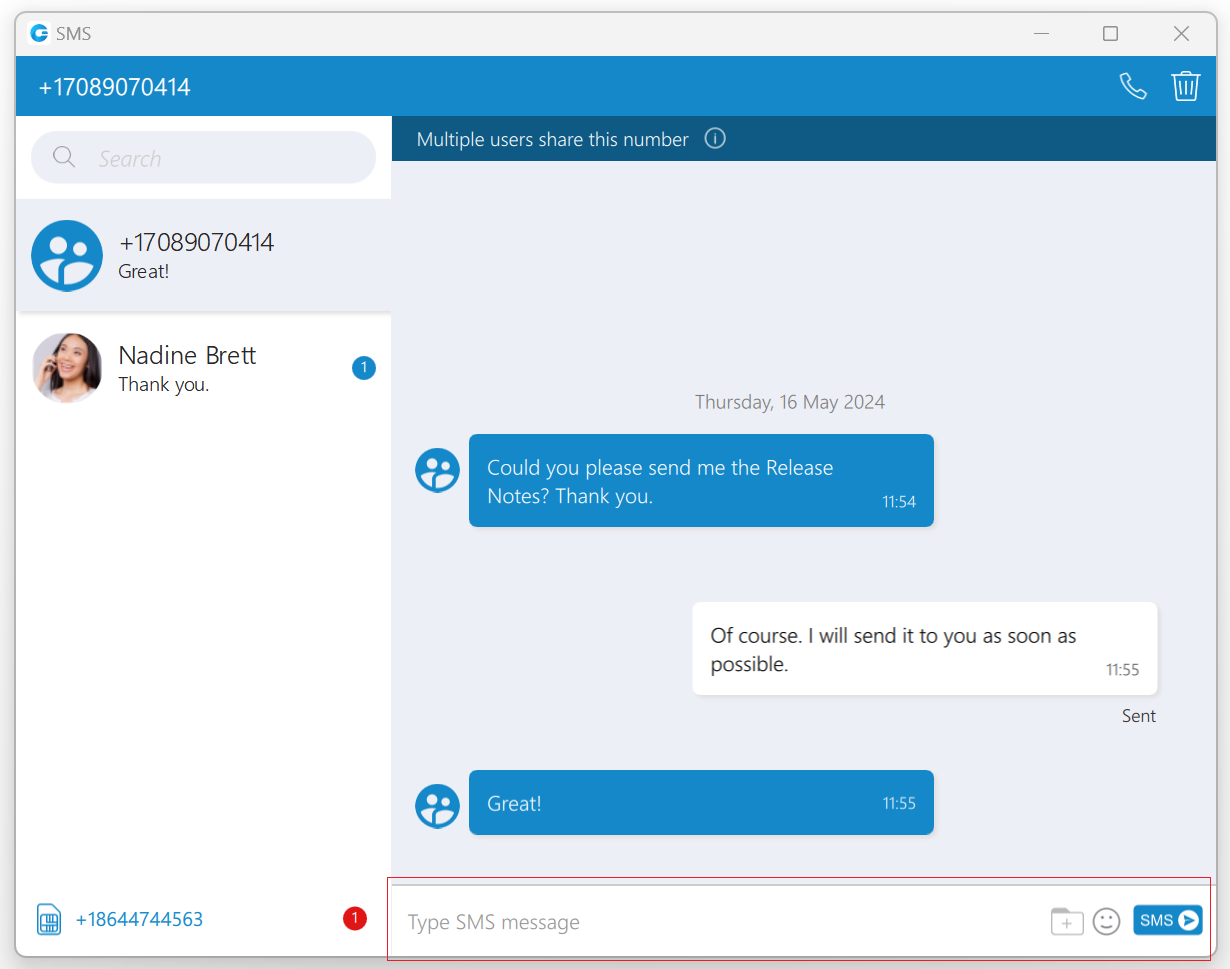
An input field is below the messages view. Click the send SMS icon on the right side of the input field to send an SMS message. The Enter key on the keyboard represents a new line.
It is not possible to send more than four (4) messages at a time. Also, the character counter appears above the send SMS icon as soon as you start typing the message.

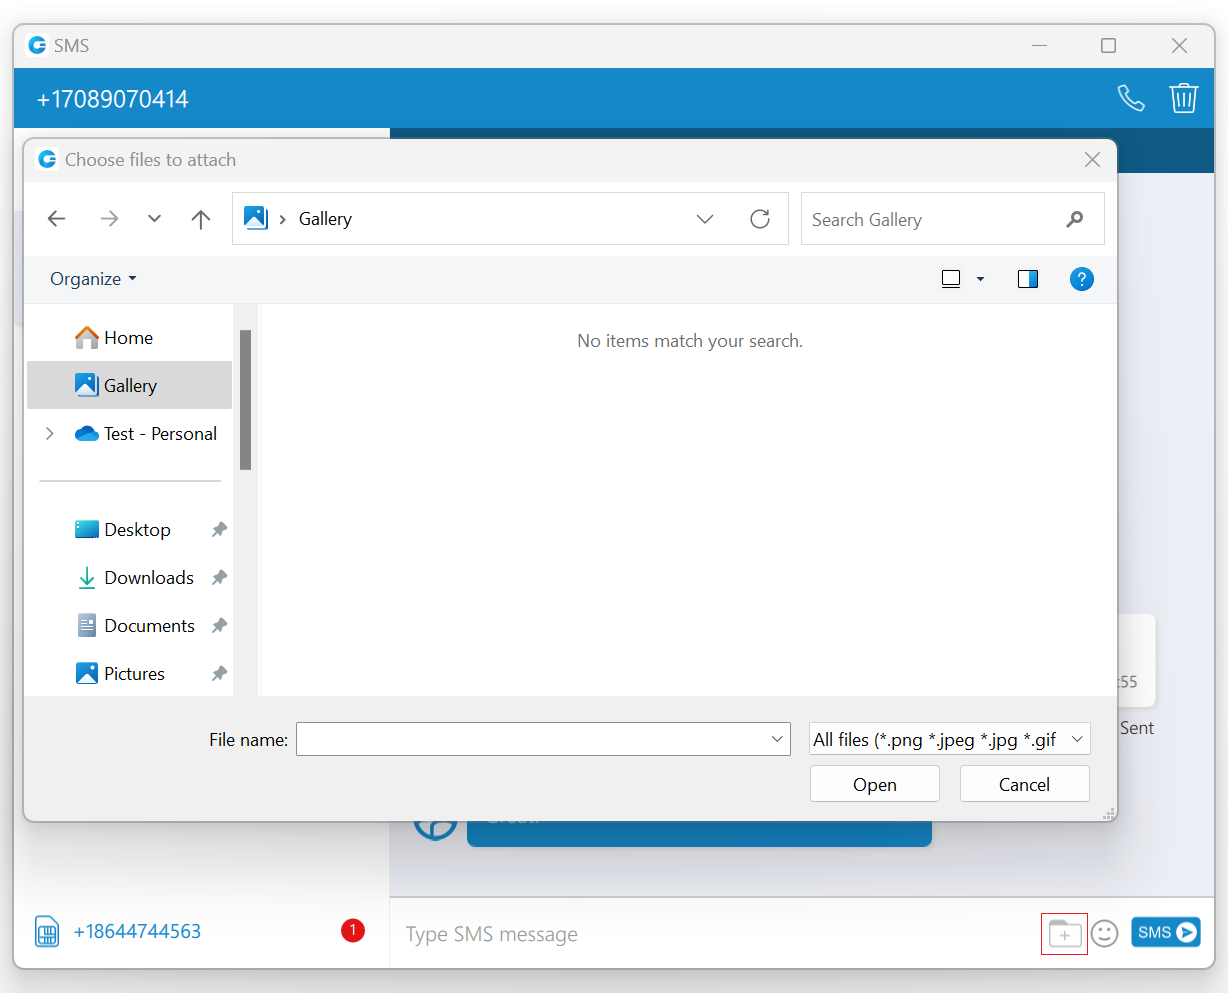
A folder  icon that is used for sending files can be found next to the Send SMS icon. Clicking the icon opens up a dialog where the user can select up to ten (10) files to be sent to the currently selected conversation.
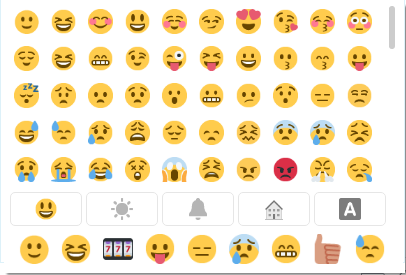
 An emoji icon allows the user to send emojis. Clicking on it shows an emojis window where the user can browse through emojis separated into categories. At the bottom of the emojis window is a list of the most recently used emojis.
The user can upload a max of 500 KB of multimedia data.
Additionally, the user can send files by dragging them from Windows Explorer (Finder on macOS) to the message area inside the SMS window. If the amount of the selected data is larger than 500 KB or if more than ten (10) files are selected, a pop-up message will appear displaying the following: Maximum size of attached files for MMS reached. All files that exceed the previously mentioned limits will be discarded.
Please note that supported MMS files are as follows:
- Image Files: jpeg, png, gif
- Audio Files: MP3, OGG, AMR
- Text Files: PDF, Vcard, txt
- Video Files: mp4
The application will compress images (jpeg and png) before sending, which gives the user the ability to send images larger than 500 KB. The application will preserve the quality as much as possible and adjust the resolution as needed.
If a file is selected, an SMS message becomes an MMS message, which can be seen above the Send SMS/MMS icon as the counter of the remaining kilobytes is displayed instead of the character counter.
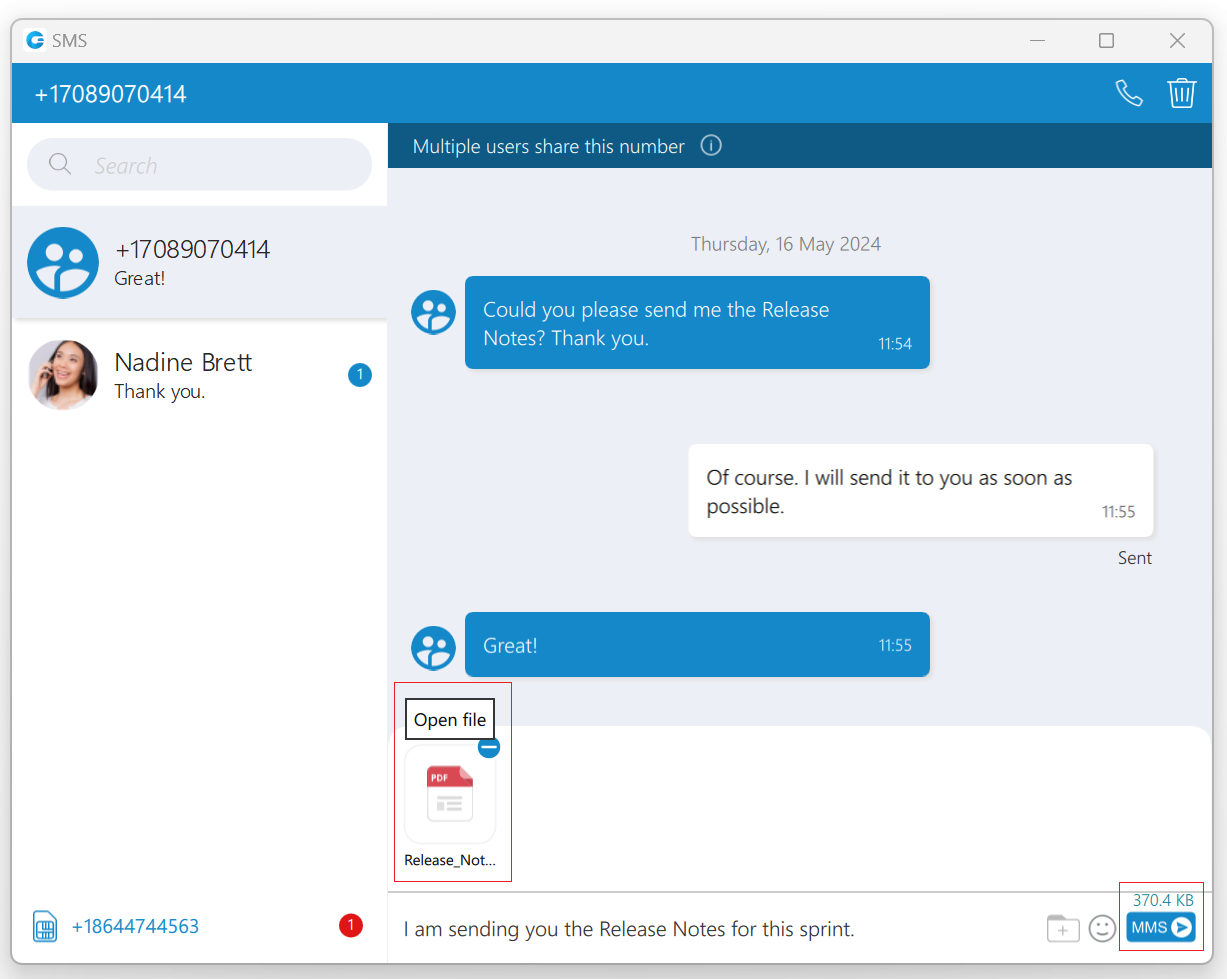
After selecting the files, a thumbnail with the file name for each selected file will be displayed above the text area within the input field. Also, it is possible to remove selected files from the MMS message by hovering over them and selecting the blue circle with a white dash at the top right corner of the thumbnail.
The gloCOM will automatically download all files smaller than 500 KB. If the file is not downloaded for any reason, the user can click on it to download it.
The associated SMS number (or the alert icon) is displayed at the bottom left side of the SMS window. What will be displayed depends on whether the SMS option is enabled or not.
If the user has associated an SMS number with their Extension, the SMS number will appear. It means that they can send/receive SMS/MMS messages. Click on it to copy it to the clipboard.
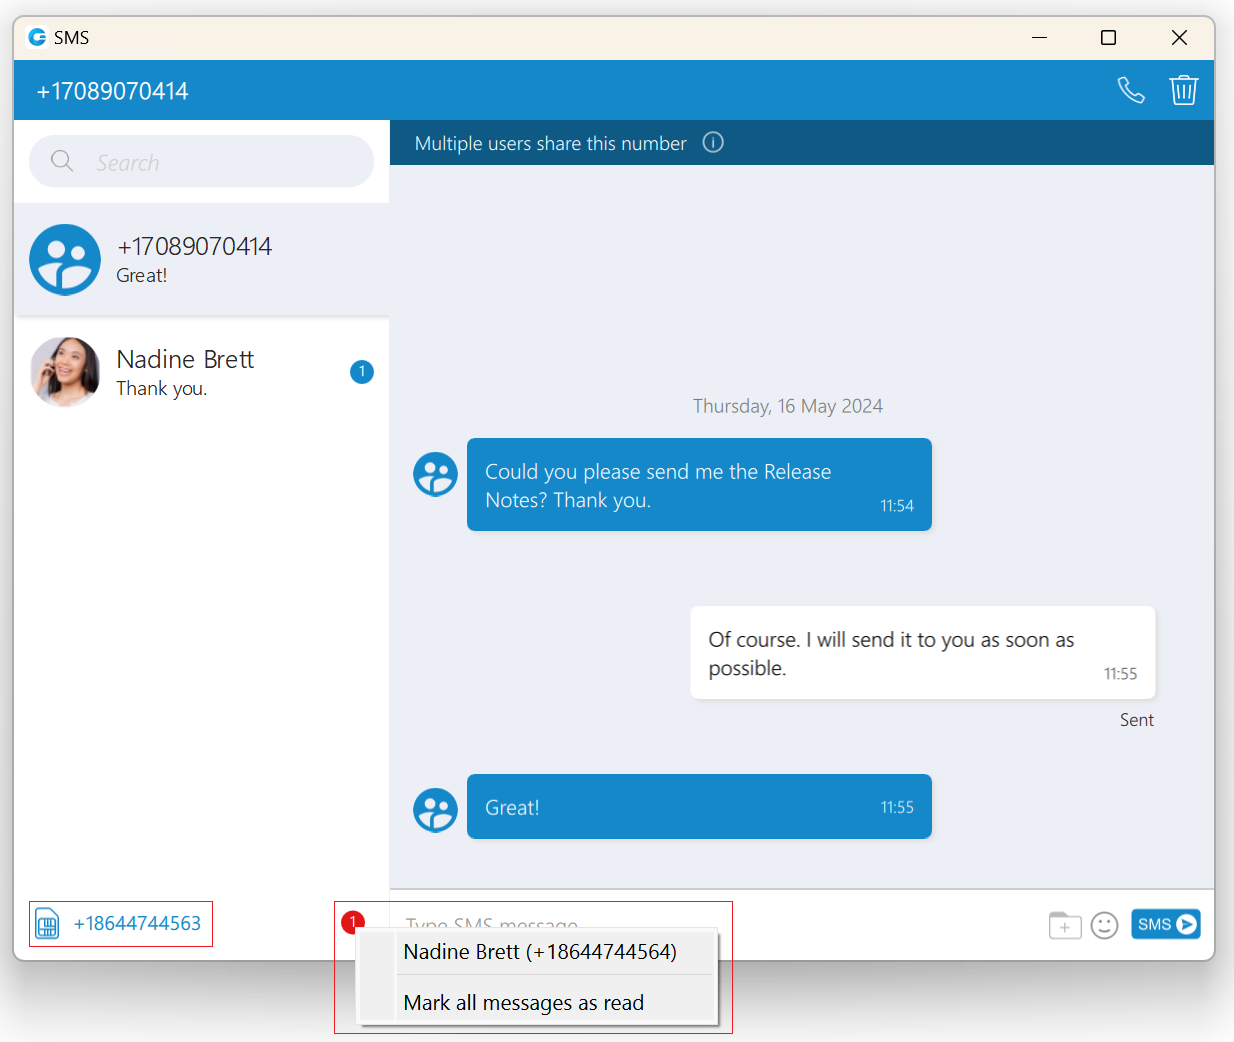
Next to it is an unread SMS messages indicator. It informs the user if there are currently unread SMS messages. It has the same behavior as the unread messages indicator within the chat window.
If there are unread messages, the red circle will appear with the number of missed SMS messages inside it to draw the user’s attention.
Click on it to open up a menu showing a list of all conversations with unread messages indicating the number of unread messages in the parenthesis. Also, there is an option to mark all messages as read.
Marking all messages as read will effectively treat all messages as read and remove the unread count indicator even though you have not read them yet. Clicking on any other option besides Mark all as read opens the selected conversation. It can be used as a quicker way to find conversations with unread messages instead of looking for them in the conversations list. If there are no unread messages, the red circle will not appear.
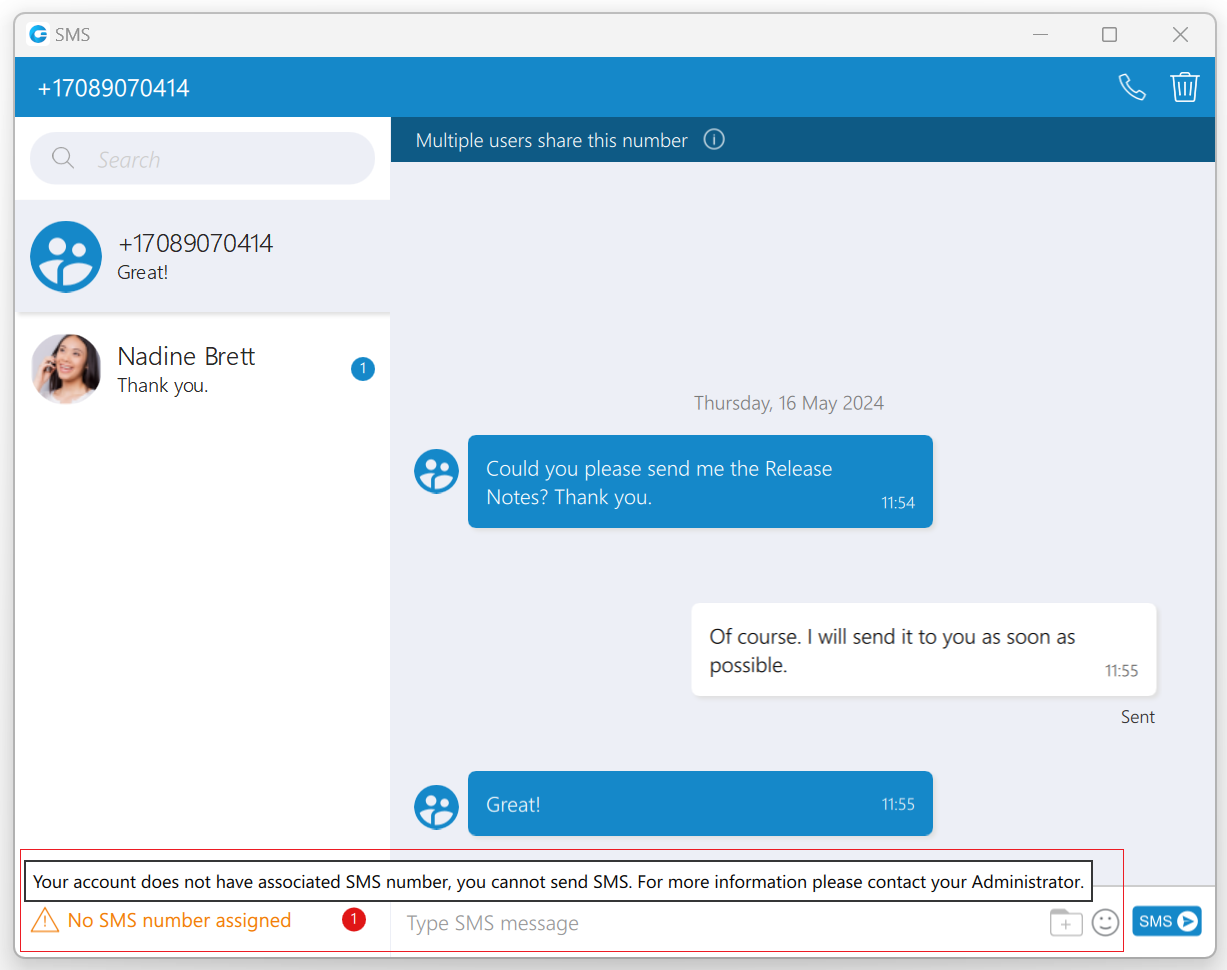
If the SMS number is not associated with the user Extension, the alert icon will appear instead of the SMS number with the message, No SMS number assigned. It means that the SMS/MMS messages cannot be sent or received.
¶ [7.6] SMS footer text
If the administrator turns on SMS footer messaging on the PBXware, an SMS footer text will be displayed at the bottom of the input field. This text will be added at the end of every SMS/MMS message, and its length is included in the length of the SMS/MMS messages.
The length of the footer text can be up to 160 characters.
¶ SMS Message States
The SMS/MMS message has only three states:
- Sending
- Sent (It does not mean that the message is delivered.)
- Failed (When the SMS/MMS message is in this state, click the Retry option to send it again.)

¶ Enable/Disable SMS messaging on Desktop
By default, SMS/MMS messaging is enabled within the gloCOM Desktop application. The user can disable it if they do not want to use the gloCOM Desktop application for SMS/MMS messaging.

To disable SMS/MMS messaging, please navigate to the Preferences --> Messaging and uncheck the Enable the SMS messaging on Desktop option. Unchecking this option will disable sending/receiving SMS/MMS messages through the gloCOM Desktop application, but users can still send/receive SMS/MMS messages through the gloCOM GO application.
Enabling/Disabling SMS messaging on Desktop can only be done when the PBXware version is older than the PBXware 7.
¶ Export old SMS History
To export an old SMS history, please navigate to Preferences -> Messaging and click the Export old SMS history button.
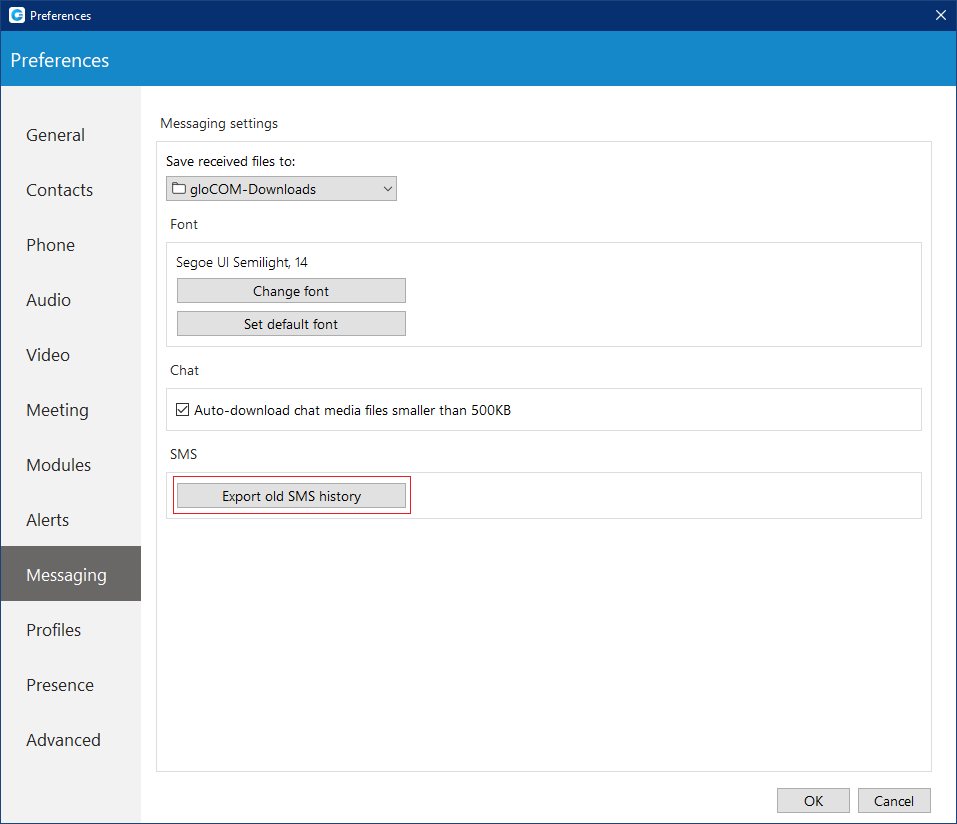
The Export old SMS history button will be displayed only when the old SMS history exists.
After clicking the button, a file picker will show up, allowing the selection of the desired location for exporting an old SMS history. All old SMS conversations will be exported as individual files within the new SMS folder created by the application. In the case of MMS messages, the application saves existing files within the SMS folder.
Previous: Chat
Next: Preferences